Introduction to this section:
What this section brings to everyone is ViewFlipper, which is a multi-page management control built into Android, and it can auto-play! Unlike ViewPager, ViewPager is page by page, while ViewFlipper is layer by layer. Like ViewPager, it is often used to implement the guide pages after entering an app, or for image carousels. In this section, we will use ViewFlipper to write a simple image carousel example~ Official API:ViewFlipper
1. Two ways to add Views to ViewFlipper
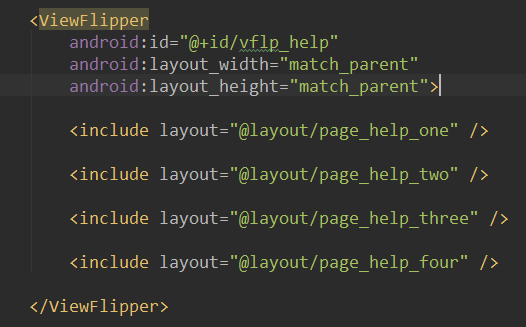
1) Static import
The so-called static import is to add each page to the middle of the ViewFlipper as shown in the figure!
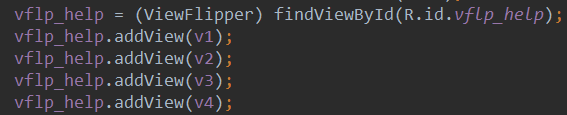
2) Dynamic import
Fill Views via the addView method
2. Some commonly used methods
- setInAnimation: Sets the animation used when the View enters the screen
- setOutAnimation: Sets the animation used when the View exits the screen
- showNext: Call this method to display the next View in the ViewFlipper
- showPrevious: Call this method to display the previous View in the ViewFlipper
- setFilpInterval: Sets the time interval for switching between Views
- setFlipping: Use the time interval set above to start switching all Views; the switching will loop
- stopFlipping: Stop View switching
3. Usage examples
1) Example 1: Using ViewFlipper to implement image carousel (static import)
Implementation effect screenshot:

Implementation code:
The layout of each page is a simple ImageView, so I won't paste it here. First, let me paste the two enter and exit animations:
right_in.xml:
<?xml version="1.0" encoding="utf-8"?>
<set xmlns:android="http://schemas.android.com/apk/res/android">

    <translate
        android:duration="2000"
        android:fromXDelta="100%p"
        android:toXDelta="0" />

</set>
right_out.xml:
<?xml version="1.0" encoding="utf-8"?>
<set xmlns:android="http://schemas.android.com/apk/res/android" >

    <translate
        android:duration="2000"
        android:fromXDelta="0"
        android:toXDelta="-100%p" />

</set>
Thenactivity_main.xmlLayout file:
<RelativeLayout xmlns:android="http://schemas.android.com/apk/res/android"
    xmlns:tools="http://schemas.android.com/tools"
    android:layout_width="match_parent"
    android:layout_height="match_parent"
    tools:context=".MainActivity">

    <ViewFlipper
        android:id="@+id/vflp_help"
        android:layout_width="match_parent"
        android:layout_height="match_parent"
        android:inAnimation="@anim/right_in"
        android:outAnimation="@anim/right_out"
        android:flipInterval="3000">

        <include layout="@layout/page_help_one" />

        <include layout="@layout/page_help_two" />

        <include layout="@layout/page_help_three" />

        <include layout="@layout/page_help_four" />

    </ViewFlipper>

</RelativeLayout>
Here we set flipInterval = 3000, i.e., switch one every 3000ms. Finally, we just need to call the ViewFlipper's startFlipping() method in MainActivity.java to start sliding!
MainActivity.java:
public class MainActivity extends AppCompatActivity {

    private ViewFlipper vflp_help;
    @Override
    protected void onCreate(Bundle savedInstanceState) {
        super.onCreate(savedInstanceState);
        setContentView(R.layout.activity_main);
        vflp_help = (ViewFlipper) findViewById(R.id.vflp_help);
        vflp_help.startFlipping();
    }
}
2) Example 2: ViewFlipper supporting gesture swiping (dynamic import)
Implementation effect screenshot:

Code implementation:
Because we have divided it into entering the previous page and entering the next page, in addition to the above two animations, we add two more animations:
left_in.xml:
<?xml version="1.0" encoding="utf-8"?>
<set xmlns:android="http://schemas.android.com/apk/res/android" >

    <translate
        android:duration="500"
        android:fromXDelta="-100%p"
        android:toXDelta="0" />

</set>
left_out.xml:
<?xml version="1.0" encoding="utf-8"?>
<set xmlns:android="http://schemas.android.com/apk/res/android">

    <translate
        android:duration="500"
        android:fromXDelta="0"
        android:toXDelta="100%p" />

</set>
MainActivity.java:
public class MainActivity extends AppCompatActivity  {

    private Context mContext;
    private ViewFlipper vflp_help;
    private int[] resId = {R.mipmap.ic_help_view_1,R.mipmap.ic_help_view_2,
            R.mipmap.ic_help_view_3,R.mipmap.ic_help_view_4};

    private final static int MIN_MOVE = 200;   //最小距离
    private MyGestureListener mgListener;
    private GestureDetector mDetector;

    @Override
    protected void onCreate(Bundle savedInstanceState) {
        super.onCreate(savedInstanceState);
        setContentView(R.layout.activity_main);
        mContext = MainActivity.this;
        //实例化SimpleOnGestureListener与GestureDetector对象
        mgListener = new MyGestureListener();
        mDetector = new GestureDetector(this, mgListener);
        vflp_help = (ViewFlipper) findViewById(R.id.vflp_help);
        //动态导入添加子View
        for(int i = 0;i < resId.length;i++){
            vflp_help.addView(getImageView(resId[i]));
        }

    }

    //重写onTouchEvent触发MyGestureListener里的方法
    @Override
    public boolean onTouchEvent(MotionEvent event) {
        return mDetector.onTouchEvent(event);
    }


    //自定义一个GestureListener,这个是View类下的,别写错哦!!!
    private class MyGestureListener extends GestureDetector.SimpleOnGestureListener {
        @Override
        public boolean onFling(MotionEvent e1, MotionEvent e2, float v, float v1) {
            if(e1.getX() - e2.getX() > MIN_MOVE){
                vflp_help.setInAnimation(mContext,R.anim.right_in);
                vflp_help.setOutAnimation(mContext, R.anim.right_out);
                vflp_help.showNext();
            }else if(e2.getX() - e1.getX() > MIN_MOVE){
                vflp_help.setInAnimation(mContext,R.anim.left_in);
                vflp_help.setOutAnimation(mContext, R.anim.left_out);
                vflp_help.showPrevious();
            }
            return true;
        }
    }

    private ImageView getImageView(int resId){
        ImageView img = new ImageView(this);
        img.setBackgroundResource(resId);
        return img;
    }
}
Explanation of key code points:
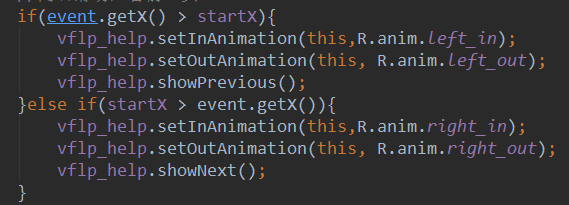
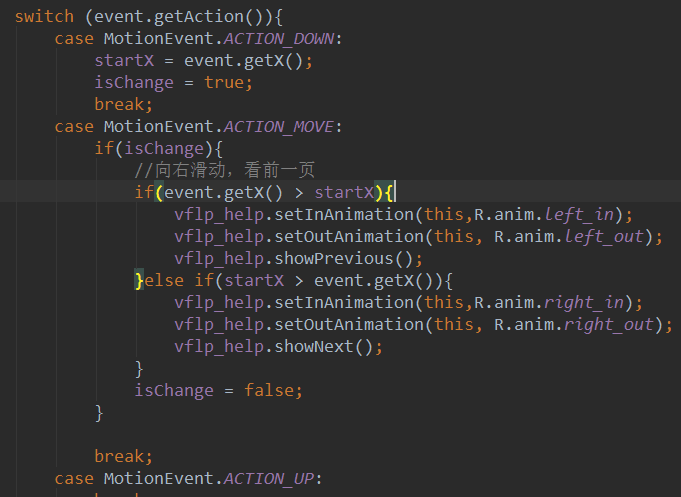
1. Here we add Views dynamically. The Views are just simple ImageViews, which can be extended according to your own needs! 2. I believe the careful among you have noticed that here we don't use direct judgment through onTouchEvent for gestures. Instead we override the onTouch event, judge the Action, and if it is MotionEvent.ACTION_MOVE, execute the following code:
Later I found that on the emulator, because of the mouse, it doesn't jitter frequently; but on a real device, because the finger is always trembling, ACTION_MOVE keeps getting triggered, causing the View to keep switching. Later I consideredBerial (B God)'s suggestion, and added a value for judgment, i.e., added a flag:
It works, but it still feels a bit jerky and strange. Later I thought it would be better to use the gesture class and just handle it directly in onFling, so the above code was created, and it runs really smoothly~ Of course, if you are not familiar with Gesture, you can refer to an article I wrote before:Android Basic Tutorial——3.8 Gesture
4. Code example download
ViewFlipperDemo.zip
ViewFlipperDemo2.zip
Summary of this section:
Alright, in this section we explained the basic usage of ViewFlipper (Flip View). In the future, when making image carousels and guide pages, you have one more choice~ Well, that's all, thank you~