Section Introduction:
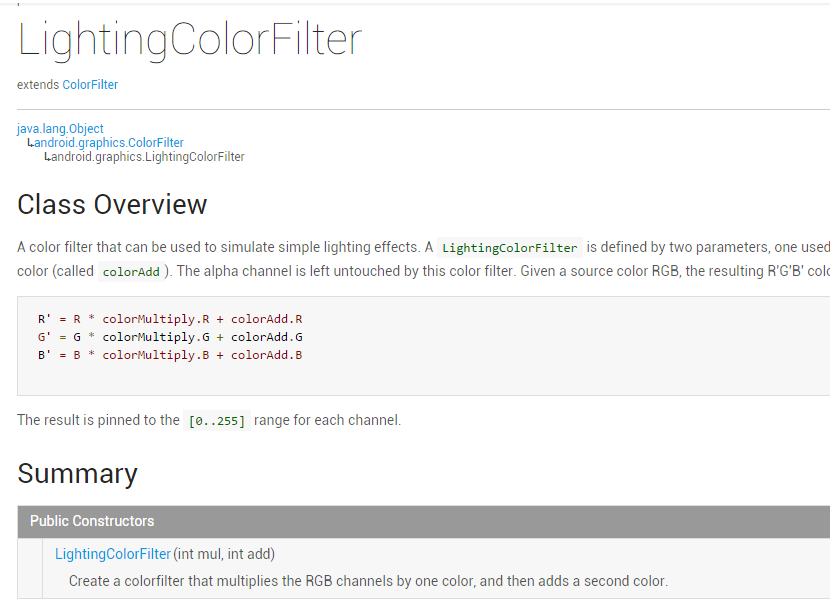
In the previous section, we explained Paint in AndroidAPIinColorFilterthe first subclass of (ColorFilter):ColorMatrixColorFilter(ColorMatrixColorFilter), I believe it has broadened everyone's horizons in Android image processing, and in this section we will study its second subclass:LightingColorFilter(LightingColorFilter), let's first bring up the official API documentation:LightingColorFilter, there is not much content in the documentation, and the key point is here:
The general idea is: a color filter that can be used to simulate simple lighting effects. The constructor has two parameters: one is used to multiply the RGB value of the original image, and the other is added to the previously obtained result! In fact, the calculation method is nothing more than:(RGB value * mul + Add) % 255, thus obtaining a new RGB value. Here % is the remainder operation. In addition, Alpha does not participate in the change throughout the process! Below we will write an example to verify!
1. Code Example:
Run Effect Screenshot:
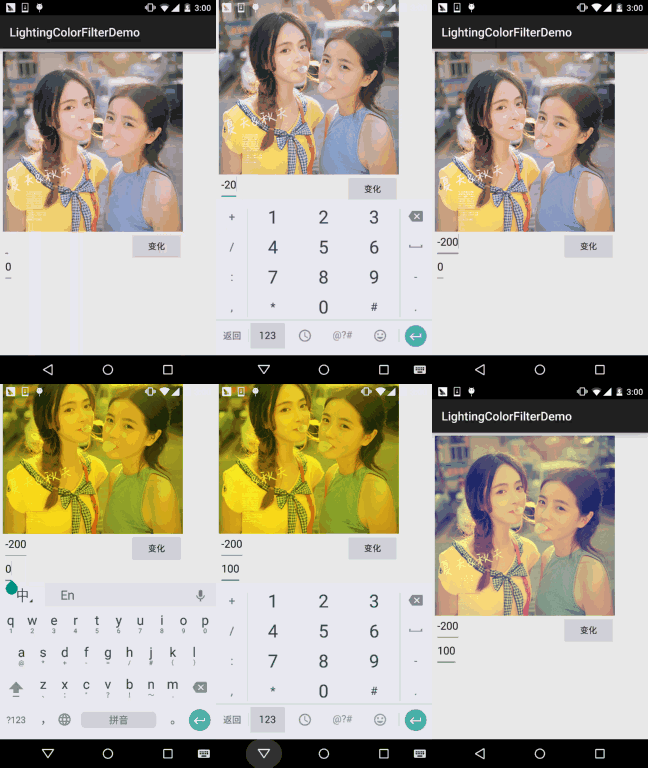
Implementation Code:
First, a simple layout:activity_main.xml:
<RelativeLayout xmlns:android="http://schemas.android.com/apk/res/android"
    xmlns:tools="http://schemas.android.com/tools"
    android:layout_width="match_parent"
    android:layout_height="match_parent"
    android:padding="5dp"
    tools:context=".MainActivity">

    <ImageView
        android:id="@+id/img_meizi"
        android:layout_width="300dp"
        android:layout_height="300dp"
        android:src="@mipmap/img_meizi.html" />

    <EditText
        android:id="@+id/edit_mul"
        android:layout_width="wrap_content"
        android:layout_height="wrap_content"
        android:layout_below="@id/img_meizi"
        android:text="0" />

    <EditText
        android:id="@+id/edit_add"
        android:layout_width="wrap_content"
        android:layout_height="wrap_content"
        android:layout_below="@id/edit_mul"
        android:text="0" />


    <Button
        android:id="@+id/btn_change"
        android:layout_width="wrap_content"
        android:layout_height="wrap_content"
        android:layout_alignRight="@id/img_meizi"
        android:layout_below="@id/img_meizi"
        android:text="变化" />

</RelativeLayout>
Next is ourMainActiivty.java, which is also very simple:
public class MainActivity extends AppCompatActivity implements View.OnClickListener{

    private ImageView img_meizi;
    private EditText edit_mul;
    private EditText edit_add;
    private Button btn_change;
    private Bitmap mBitmap;

    @Override
    protected void onCreate(Bundle savedInstanceState) {
        super.onCreate(savedInstanceState);
        setContentView(R.layout.activity_main);
        mBitmap = BitmapFactory.decodeResource(getResources(), R.mipmap.img_meizi);
        bindViews();
    }

    private void bindViews() {
        img_meizi = (ImageView) findViewById(R.id.img_meizi);
        edit_mul = (EditText) findViewById(R.id.edit_mul);
        edit_add = (EditText) findViewById(R.id.edit_add);
        btn_change = (Button) findViewById(R.id.btn_change);

        btn_change.setOnClickListener(this);

    }


    private Bitmap ProcessImage(Bitmap bp,int mul,int add){
        Bitmap bitmap = Bitmap.createBitmap(bp.getWidth(),bp.getHeight(), Bitmap.Config.ARGB_8888);
        Canvas canvas = new Canvas(bitmap);
        Paint paint = new Paint(Paint.ANTI_ALIAS_FLAG);
        paint.setColorFilter(new LightingColorFilter(mul,add));
        canvas.drawBitmap(bp,0,0,paint);
        return bitmap;
    }

    @Override
    public void onClick(View v) {
        switch (v.getId()){
            case R.id.btn_change:
                int mul = Integer.parseInt(edit_mul.getText().toString());
                int add = Integer.parseInt(edit_add.getText().toString());
                img_meizi.setImageBitmap(ProcessImage(mBitmap,mul,add));
                break;
        }
    }
}
Alright, the demonstration of using LightingColorFilter is complete~
3. Download This Section's Code
LightingColorFilterDemo.zip
Section Summary:
Well, this section demonstrated a basic usage of LightingColorFilter, used to simulate simple lighting effects and achieve simple image processing effects. Alright, that's all for this section, thanks~