Introduction to this section:
This is the second-to-last section of Chapter 1. This section introduces how to package our program into an APK file and sign our APK! As mentioned in the previous section, the IDE we will use in the subsequent tutorials is Android Studio, so this section also explains how to package and sign the project under AS (let's abbreviate it this way from now on)!
1. What is signing and what is it used for:
Android apps require us to digitally sign the application with a certificate; otherwise, they cannot be installed on Android phones. When we normally debug and run on a phone, AS automatically signs using the default key and certificate. However, when we actually compile for release, it does not sign automatically. At this point, we need to manually sign! Signing our APK has the following benefits:
- 1. Application upgrade:If you want users to seamlessly upgrade to a new version, you must sign with the same certificate. This is because the system will only allow the upgraded application to be installed if it is signed with the same certificate. If you use a different certificate, the system will require your application to use a different package name, which in this case is equivalent to installing a brand new application. If you want to upgrade an application, the signing certificate must be the same, and the package name must be the same!
- 2. Application modularization:The Android system allows multiple applications signed with the same certificate to run in one process. The system actually treats them as a single application. At this point, we can deploy our applications in a modular way, and users can independently upgrade one of the modules.
- 3. Code or data sharing:Android provides a signature-based permission mechanism, so an application can expose its functionality to another application signed with the same certificate. By signing multiple applications with the same certificate and using signature-based permission checks, you can securely share code and data between applications. If different applications want to share data or code, they need to run in the same process and be signed with the same certificate. —— The above content is excerpted from:Why Android needs signing
2. How to package and sign in Android Studio:
OK, since the students of this course are all beginners, the content of multi-channel packaging will be explained later! This section only covers the simplest packaging and signing. By the way, the APK generated by default during debugging mentioned in section 1 is in the app/build/outputs/apk directory! It is different from Eclipse; Eclipse generates it in the bin directory!

OK, open our Hello World project in AS, and click the menu:
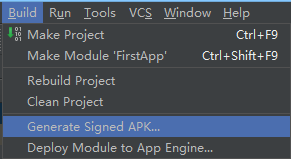
①Build -> Generate Signed APK...
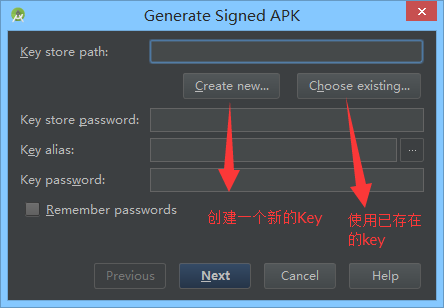
② A popup window appears. If there is no key, create one; if there is one, select the existing key
③ If there isn't one, we create a new one. You can fill in the relevant items according to your needs:
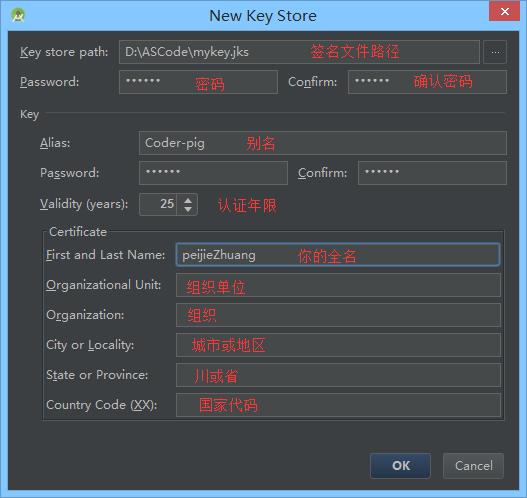
④ OK, after clicking OK, you can see our password information. We may need to enter the password, so fill it in:

⑤ Click Next:
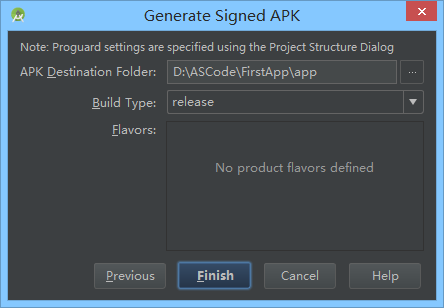
⑥ Click Finish. After waiting a moment, the following prompt will appear, indicating that the application has been successfully packaged and signed:

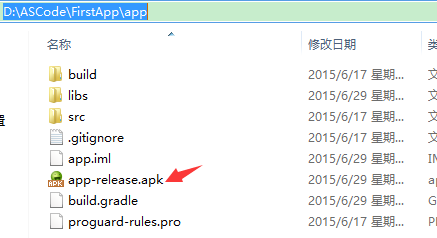
⑦ You can see that the packaged APK is now peacefully lying in our app directory:
⑧ By step 7, the packaging and signing is already complete. If you want to verify whether it is signed, just enter the following cmd command


Summary of this section
There are many other ways to package Android APKs, such as command line, or Gradle, ANT, MAVEN, etc. There are many methods. This section explains the simplest way to package and sign through the graphical interface! Alright, that's it for this section. Have you got the simplest packaging and signing method?