Introduction to this section:
In the previous section we learned about MaskFilter, using its two subclasses BlurMaskFilter to create a blur effect, and EmbossMaskFilter to create an emboss effect. In this section we will learn about another API——ColorFilter(color filter). Like MaskFilter, we don't use this class directly, but instead use its three subclasses:
Color matrix color filter:ColorMatrixColorFilter
Lighting color filter:LightingColorFilter
Blend color filterPorterDuffColorFilter
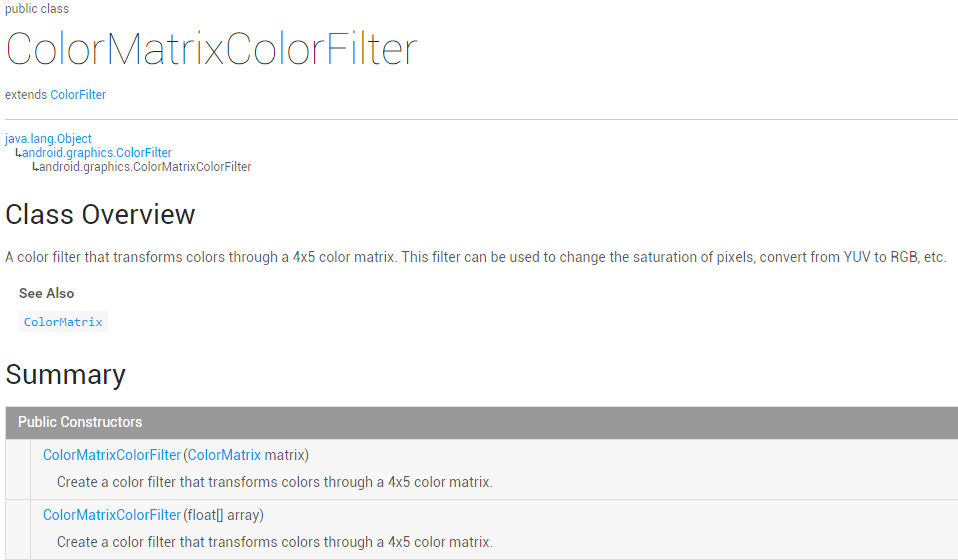
In this section we will learn about the usage of the first one, ColorMatrixColorFilter. Open the ColorMatrixColorFilter documentation,
It roughly says: use a 4 x 5 color matrix to transform colors, can modify pixel saturation, convert YUV to RGB, etc. And the ColorMatrix in the constructor is the color matrix, which is also the core of our study. Let me explain it one by one!
1. Popularization of related knowledge:
RGBA model:
I don't know if you've heard of RGBA. You must know red, green and blue, the three primary colors of light, and RGBA adds transparency to these.R (Red),G (Green),B (Blue),A (Alpha transparency); in addition, it should be distinguished from the three primary colors of pigments. The most obvious difference is that the three primary colors of pigments use yellow to replace green from the three primary colors of light. It's good to know this; if interested, you can Baidu it yourself.
Some terms:
- Tone/Hue— the color an object transmits

- Saturation— the purity of the color, described from 0 (gray) to 100% (saturated)

- Brightness/Lightness— the relative lightness or darkness of a color

2. Interpretation of ColorMatrix
As the title suggests, the color matrix (4 * 5) allows us to modify the values in the matrix to achieve effects such as black-and-white photos, yellowish old photos, high contrast, etc. The hand-drawn explanation diagram of the color matrix is as follows:
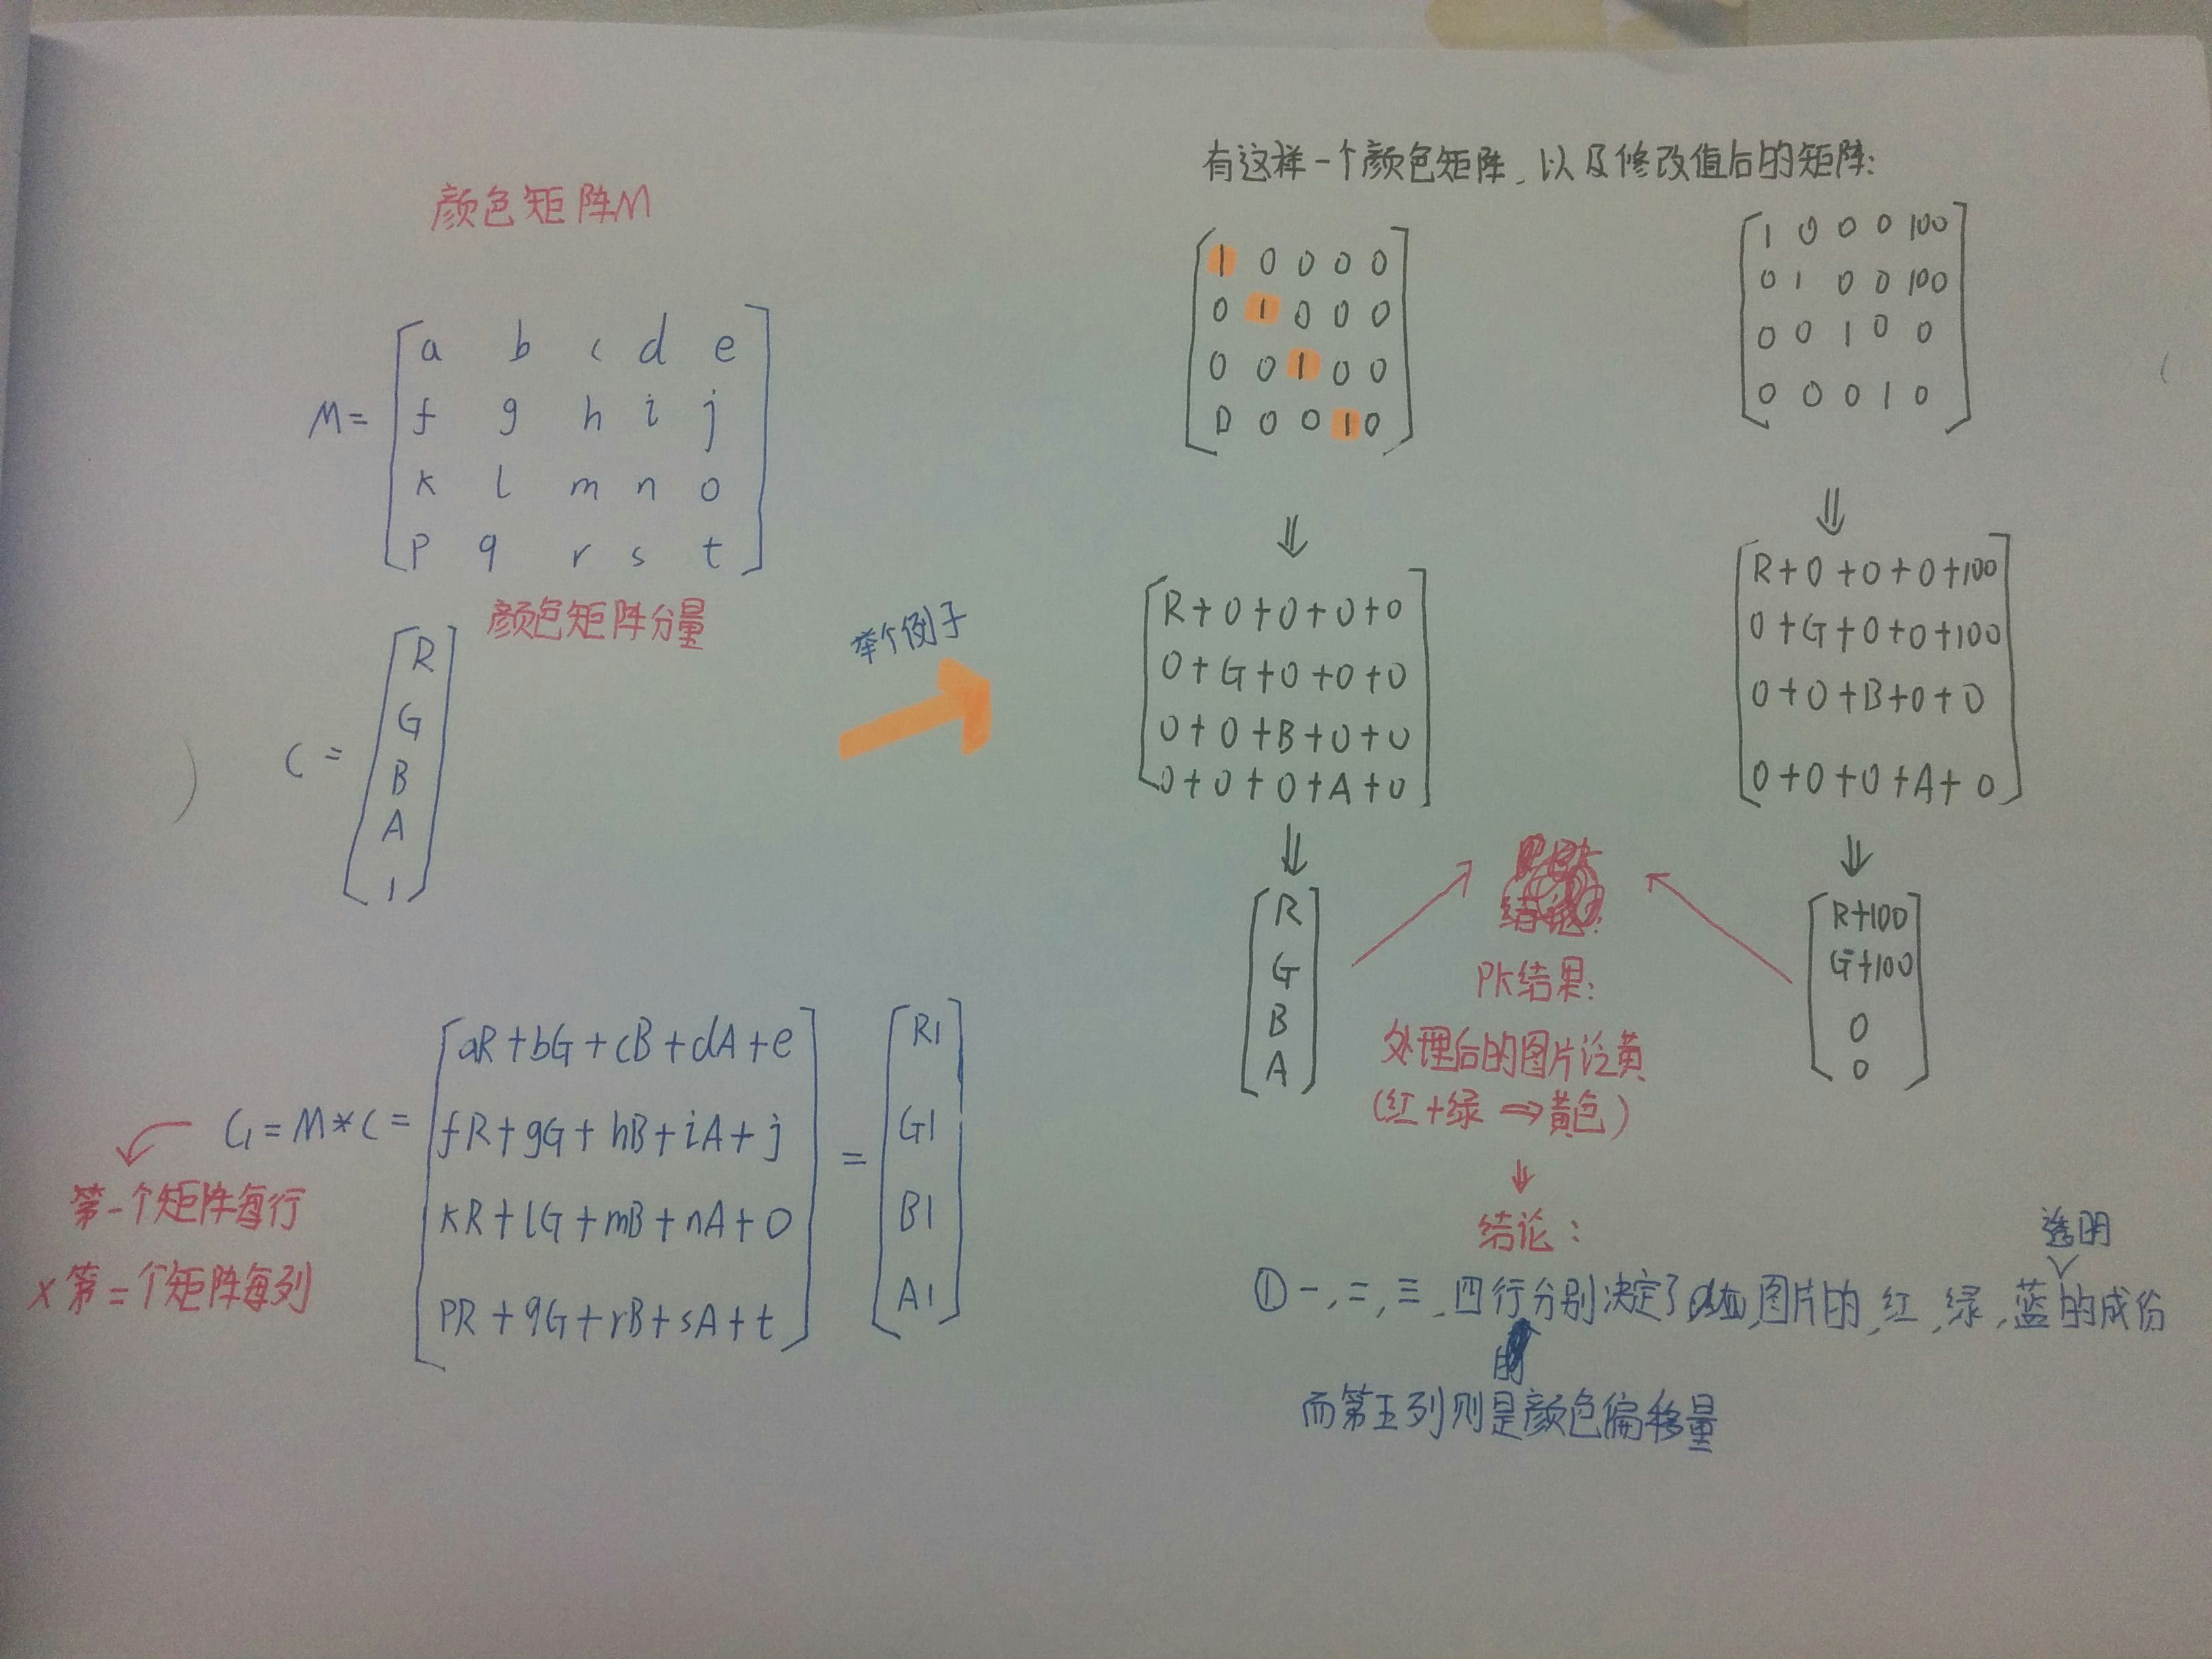
I don't know if you understand the above diagram. If you've studied advanced mathematics, you must be familiar with this; it's nothing more than matrix cross multiplication. If you haven't studied it, it doesn't matter. The calculation method is the one in the lower right corner,Take each row of the color matrix and multiply it by each column of the color matrix components.!
A very typical example is comparing the results before and after processing. We can also let a certaincolor value be multiplied by a constant, for example, multiply the third row (blue) by 2, and the effect becomes bluish. Of course, we definitely need to write code to verify the above results!
3. Write code to verify the role of ColorMatrix
Here we write a very common example: an ImageView, 4 * 5 EditTexts, a reset button and a generate button. Let's look at the effect diagram:
In order: original image, yellowish, greenish, reddish, high contrast, hue transform, and yellow retro.
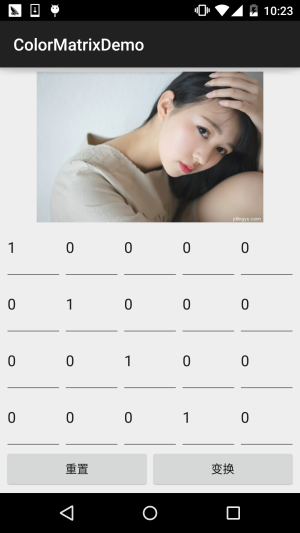
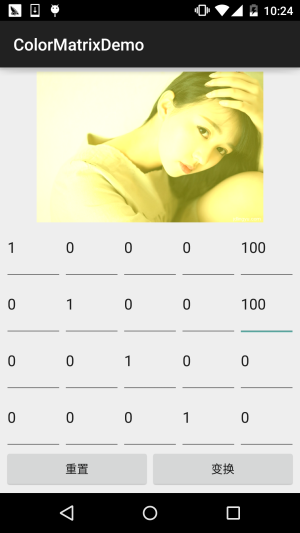
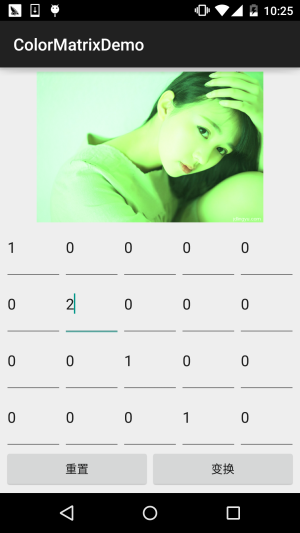
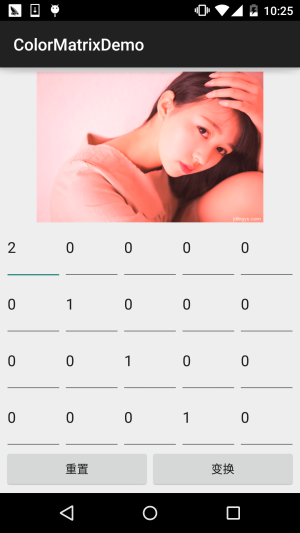
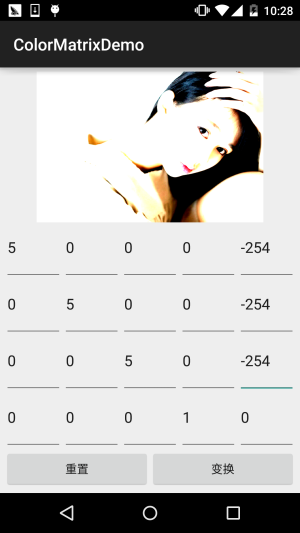
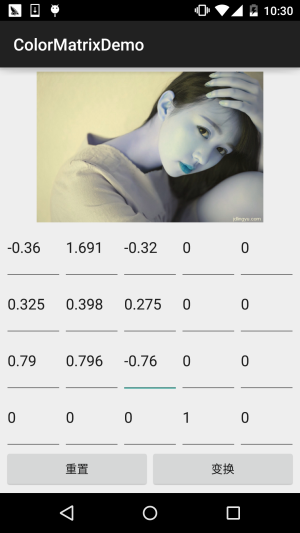
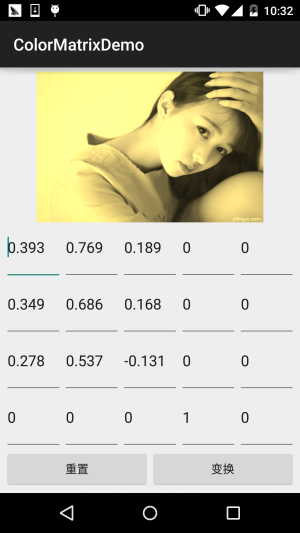
Next, let's write code to achieve the above effects:Code implementation:
First, the layout fileactivity_main.xml:
<?xml version="1.0" encoding="utf-8"?>
<LinearLayout xmlns:android="http://schemas.android.com/apk/res/android"
    android:layout_width="match_parent"
    android:layout_height="match_parent"
    android:orientation="vertical"
    android:padding="5dp">

    <ImageView
        android:id="@+id/img_show"
        android:layout_width="match_parent"
        android:layout_height="0dp"
        android:layout_weight="2" />

    <GridLayout
        android:id="@+id/gp_matrix"
        android:layout_width="match_parent"
        android:layout_height="0dp"
        android:layout_weight="3"
        android:columnCount="5"
        android:rowCount="4"></GridLayout>

    <LinearLayout
        android:layout_width="match_parent"
        android:layout_height="wrap_content"
        android:orientation="horizontal">
        <Button
            android:id="@+id/btn_reset"
            android:layout_width="0dp"
            android:layout_height="wrap_content"
            android:layout_weight="1"
            android:text="重置" />
        <Button
            android:id="@+id/btn_Change"
            android:layout_width="0dp"
            android:layout_height="wrap_content"
            android:layout_weight="1"
            android:text="变换" />
    </LinearLayout>
</LinearLayout>
Next isMainActivity.java:
public class MainActivity extends AppCompatActivity implements View.OnClickListener {

    private ImageView img_show;
    private GridLayout gp_matrix;
    private Button btn_reset;
    private Button btn_Change;
    private Bitmap mBitmap;
    private int mEtWidth, mEtHeight;
    private EditText[] mEts = new EditText[20];
    private float[] mColorMatrix = new float[20];
    private Context mContext;


    @Override
    protected void onCreate(Bundle savedInstanceState) {
        super.onCreate(savedInstanceState);
        setContentView(R.layout.activity_main);
        mContext = MainActivity.this;
        bindViews();


        gp_matrix.post(new Runnable() {
            @Override
            public void run() {
                mEtWidth = gp_matrix.getWidth() / 5;
                mEtHeight = gp_matrix.getHeight() / 4;
                //添加5 * 4个EditText
                for (int i = 0; i < 20; i++) {
                    EditText editText = new EditText(mContext);
                    mEts[i] = editText;
                    gp_matrix.addView(editText, mEtWidth, mEtHeight);
                }
                initMatrix();
            }
        });
    }

    private void bindViews() {
        img_show = (ImageView) findViewById(R.id.img_show);
        gp_matrix = (GridLayout) findViewById(R.id.gp_matrix);
        btn_reset = (Button) findViewById(R.id.btn_reset);
        btn_Change = (Button) findViewById(R.id.btn_Change);

        mBitmap = BitmapFactory.decodeResource(getResources(), R.mipmap.img_meizi);
        img_show.setImageBitmap(mBitmap);

        btn_reset.setOnClickListener(this);
        btn_Change.setOnClickListener(this);
    }


    //定义一个初始化颜色矩阵的方法
    private void initMatrix() {
        for (int i = 0; i < 20; i++) {
            if (i % 6 == 0) {
                mEts[i].setText(String.valueOf(1));
            } else {
                mEts[i].setText(String.valueOf(0));
            }
        }
    }

    //定义一个获取矩阵值得方法
    private void getMatrix() {
        for (int i = 0; i < 20; i++) {
            mColorMatrix[i] = Float.valueOf(mEts[i].getText().toString());
        }
    }

    //根据颜色矩阵的值来处理图片
    private void setImageMatrix() {
        Bitmap bmp = Bitmap.createBitmap(mBitmap.getWidth(), mBitmap.getHeight(),
                Bitmap.Config.ARGB_8888);
        android.graphics.ColorMatrix colorMatrix = new android.graphics.ColorMatrix();
        colorMatrix.set(mColorMatrix);

        Canvas canvas = new Canvas(bmp);
        Paint paint = new Paint(Paint.ANTI_ALIAS_FLAG);
        paint.setColorFilter(new ColorMatrixColorFilter(colorMatrix));
        canvas.drawBitmap(mBitmap, 0, 0, paint);
        img_show.setImageBitmap(bmp);
    }

    @Override
    public void onClick(View v) {
        switch (v.getId()) {
            case R.id.btn_Change:
                getMatrix();
                setImageMatrix();
                break;
            case R.id.btn_reset:
                initMatrix();
                getMatrix();
                setImageMatrix();
                break;
        }
    }
}
The code is very simple: load the layout, then stuff 5 * 4 EditTexts into the GridLayout. The post() method is used here to ensure that the GridLayout is fully loaded before getting its width and height; otherwise you won't get the values when getting the GridLayout width and height. Next, three methods are defined: initializing the matrix, getting the matrix values, and processing the image based on the matrix values. Isn't it simple?
But at this point you might have a littlequestion:
"Can we only modify the color matrix in this way to process images? Doing it every time is certainly troublesome; who would remember the values that should be filled in the matrix? Is there a simpler way to process images?"
Answer: Of course there is. We can look back at the documentation and find several very commonly used methods:setRotate(int axis, float degrees): set hue
setSaturation(float sat): set saturation
setScale(float rScale, float gScale, float bScale, float aScale): set brightness
Below we'll write an example to try out these three methods!
4. Using three methods of ColorMatrix to process images
Running effect diagram:
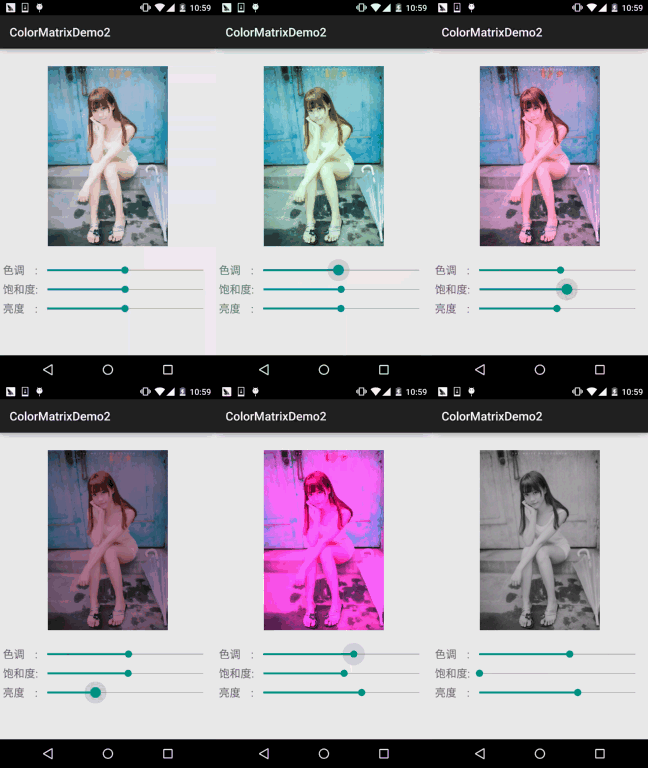
Code implementation:
First, let's write an image processing utility class. We pass in a Bitmap, hue, saturation, and brightness; after processing, it returns the processed image:ImageHelper.java:
/**
 * Created by Jay on 2015/10/28 0028.
 */
public class ImageHelper {
    /**
     * 该方法用来处理图像,根据色调,饱和度,亮度来调节
     *
     * @param bm:要处理的图像
     * @param hue:色调
     * @param saturation:饱和度
     * @param lum:亮度
     *
     */
    public static Bitmap handleImageEffect(Bitmap bm, float hue, float saturation, float lum) {
        Bitmap bmp = Bitmap.createBitmap(bm.getWidth(), bm.getHeight(), Bitmap.Config.ARGB_8888);
        Canvas canvas = new Canvas(bmp);
        Paint paint = new Paint(Paint.ANTI_ALIAS_FLAG);

        ColorMatrix hueMatrix = new ColorMatrix();
        hueMatrix.setRotate(0, hue);    //0代表R,红色
        hueMatrix.setRotate(1, hue);    //1代表G,绿色
        hueMatrix.setRotate(2, hue);    //2代表B,蓝色

        ColorMatrix saturationMatrix = new ColorMatrix();
        saturationMatrix.setSaturation(saturation);

        ColorMatrix lumMatrix = new ColorMatrix();
        lumMatrix.setScale(lum, lum, lum, 1);


        ColorMatrix imageMatrix = new ColorMatrix();
        imageMatrix.postConcat(hueMatrix);
        imageMatrix.postConcat(saturationMatrix);
        imageMatrix.postConcat(lumMatrix);

        paint.setColorFilter(new ColorMatrixColorFilter(imageMatrix));
        canvas.drawBitmap(bm, 0, 0, paint);

        return bmp;
    }
}
Next, let's also create the layout,activity_main.xml:
<?xml version="1.0" encoding="utf-8"?>
<RelativeLayout xmlns:android="http://schemas.android.com/apk/res/android"
    android:layout_width="match_parent"
    android:layout_height="match_parent"
    android:orientation="vertical"
    android:padding="5dp">

    <ImageView
        android:id="@+id/img_meizi"
        android:layout_width="300dp"
        android:layout_height="300dp"
        android:layout_centerHorizontal="true"
        android:layout_marginBottom="24dp"
        android:layout_marginTop="24dp" />


    <TextView
        android:id="@+id/txt_hue"
        android:layout_width="wrap_content"
        android:layout_height="32dp"
        android:layout_below="@id/img_meizi"
        android:gravity="center"
        android:text="色调    :"
        android:textSize="18sp" />

    <SeekBar
        android:id="@+id/sb_hue"
        android:layout_width="match_parent"
        android:layout_height="32dp"
        android:layout_below="@id/img_meizi"
        android:layout_toRightOf="@id/txt_hue" />


    <TextView
        android:id="@+id/txt_saturation"
        android:layout_width="wrap_content"
        android:layout_height="32dp"
        android:layout_below="@id/txt_hue"
        android:gravity="center"
        android:text="饱和度:"
        android:textSize="18sp" />

    <SeekBar
        android:id="@+id/sb_saturation"
        android:layout_width="match_parent"
        android:layout_height="32dp"
        android:layout_below="@id/sb_hue"
        android:layout_toRightOf="@id/txt_saturation" />


    <TextView
        android:id="@+id/txt_lun"
        android:layout_width="wrap_content"
        android:layout_height="32dp"
        android:layout_below="@id/txt_saturation"
        android:gravity="center"
        android:text="亮度    :"
        android:textSize="18sp" />

    <SeekBar
        android:id="@+id/sb_lum"
        android:layout_width="match_parent"
        android:layout_height="32dp"
        android:layout_below="@id/sb_saturation"
        android:layout_toRightOf="@id/txt_lun" />

</RelativeLayout>
Finally, ourMainActivity.java:
public class MainActivity extends AppCompatActivity implements SeekBar.OnSeekBarChangeListener{

    private ImageView img_meizi;
    private SeekBar sb_hue;
    private SeekBar sb_saturation;
    private SeekBar sb_lum;
    private final static int MAX_VALUE = 255;
    private final static int MID_VALUE = 127;
    private float mHue = 0.0f;
    private float mStauration = 1.0f;
    private float mLum = 1.0f;
    private Bitmap mBitmap;


    @Override
    protected void onCreate(Bundle savedInstanceState) {
        super.onCreate(savedInstanceState);
        setContentView(R.layout.activity_main);
        mBitmap = BitmapFactory.decodeResource(getResources(), R.mipmap.img_meizi);
        bindViews();
    }

    private void bindViews() {
        img_meizi = (ImageView) findViewById(R.id.img_meizi);
        sb_hue = (SeekBar) findViewById(R.id.sb_hue);
        sb_saturation = (SeekBar) findViewById(R.id.sb_saturation);
        sb_lum = (SeekBar) findViewById(R.id.sb_lum);

        img_meizi.setImageBitmap(mBitmap);
        sb_hue.setMax(MAX_VALUE);
        sb_hue.setProgress(MID_VALUE);
        sb_saturation.setMax(MAX_VALUE);
        sb_saturation.setProgress(MID_VALUE);
        sb_lum.setMax(MAX_VALUE);
        sb_lum.setProgress(MID_VALUE);

        sb_hue.setOnSeekBarChangeListener(this);
        sb_saturation.setOnSeekBarChangeListener(this);
        sb_lum.setOnSeekBarChangeListener(this);

    }

    @Override
    public void onProgressChanged(SeekBar seekBar, int progress, boolean fromUser) {
        switch (seekBar.getId()) {
            case R.id.sb_hue:
                mHue = (progress - MID_VALUE) * 1.0F / MID_VALUE * 180;
                break;
            case R.id.sb_saturation:
                mStauration = progress * 1.0F / MID_VALUE;
                break;
            case R.id.sb_lum:
                mLum = progress * 1.0F / MID_VALUE;
                break;
        }
        img_meizi.setImageBitmap(ImageHelper.handleImageEffect(mBitmap, mHue, mStauration, mLum));
    }

    @Override
    public void onStartTrackingTouch(SeekBar seekBar) {}

    @Override
    public void onStopTrackingTouch(SeekBar seekBar) {}
}
The code is also very simple, so we won't explain it here.
5. Download code examples for this section:
ColorMatrixDemo.zip
ColorMatrixDemo2.zip
Summary of this section:
Well, in this section we introducedColorFilterthe first one inColorMatrixColorFilter, the color matrix filter. Actually the core is still ColorMatrix. With this class, we can process images by setting the values of the 4*5 matrix ourselves, or directly call the methods provided by ColorMatrix to set hue, saturation, and brightness. Image processing is basically like this; there is another form that modifies pixel points, which will be covered later. This section's content is referenced from Doctor (Xu Yisheng)'s Muke.com video:Android Image Processing - Starting from It to Build Meitu Xiuxiu, if you don't want to read the text, you can watch the video; it's quite good.