Introduction to this section:
This section brings the third type of animation in Android - Property Animation. Remember in the previous section8.4.2 Android Animation Collection: Tween AnimationWhen setting transition animations for Fragment, we mentioned that the animation types corresponding to the setCustomAnimations() call for Fragments under the App package and the V4 package are different. The v4 package usesAnimation, while the app package usesAnimator;
Animation (general animation)which is what we learned earlierframe animation and tween animation!Animatorwhile this section coversproperty animation!
Regarding property animation, the expert Uncle Guo has already written three excellent summary articles. They are very well written, so there is no need to reinvent the wheel. However, I will still go through it here. Most of the content references the following three articles:
They are very well written, or you can skip this article directly and read the three articles above~
Of course, if you are willing to listen to me ramble, you are also welcome. Alright, let's start the content of this section~
1. Rambling about the Concept of Property Animation
No more chit-chat, straight to the diagram, just like that~

2. Simple Usage of ValueAnimator
Usage flow:
- 1. Call ValueAnimator'sofInt(),ofFloat() orofObject() static method to create a ValueAnimator instance
- 2. Call the instance's setXxx methods to set animation duration, interpolation method, repeat count, etc.
- 3. Call the instance'saddUpdateListeneraddAnimatorUpdateListenerlistener. In this listener, you can obtain the value calculated by ValueAnimator, and you can apply the value to the specified object~
- 4. Call the instance'sstart()method to start the animation! Also, we can see that both ofInt and ofFloat have a parameter like this: float/int... values, meaning multiple values are allowed!
Usage example:

Code implementation:
Layout file:activity_main.xml, very simple, four buttons and one ImageView
<LinearLayout xmlns:android="http://schemas.android.com/apk/res/android"
    android:id="@+id/ly_root"
    android:layout_width="match_parent"
    android:layout_height="match_parent"
    android:orientation="vertical">

    <Button
        android:id="@+id/btn_one"
        android:layout_width="wrap_content"
        android:layout_height="wrap_content"
        android:text="动画1" />

    <Button
        android:id="@+id/btn_two"
        android:layout_width="wrap_content"
        android:layout_height="wrap_content"
        android:text="动画2" />

    <Button
        android:id="@+id/btn_three"
        android:layout_width="wrap_content"
        android:layout_height="wrap_content"
        android:text="动画3" />

    <Button
        android:id="@+id/btn_four"
        android:layout_width="wrap_content"
        android:layout_height="wrap_content"
        android:text="动画4" />

    <ImageView
        android:id="@+id/img_babi"
        android:layout_width="wrap_content"
        android:layout_height="wrap_content"
        android:layout_gravity="center"
        android:background="@mipmap/img_babi" />

</LinearLayout>
Then go toMainActivity.java, first we need a method to modify the View position. Here we callmoveView() to set the starting coordinates of the left and top, as well as the width and height!
Then four animations are defined: linear movement, scaling, rotation with transparency, and circular rotation!
Then trigger the corresponding animation through the buttons~
public class MainActivity extends AppCompatActivity implements View.OnClickListener {

    private Button btn_one;
    private Button btn_two;
    private Button btn_three;
    private Button btn_four;
    private LinearLayout ly_root;
    private ImageView img_babi;
    private int width;
    private int height;

    @Override
    public void onCreate(Bundle savedInstanceState) {
        super.onCreate(savedInstanceState);
        setContentView(R.layout.activity_main);
        bindViews();
    }

    private void bindViews() {
        ly_root = (LinearLayout) findViewById(R.id.ly_root);
        btn_one = (Button) findViewById(R.id.btn_one);
        btn_two = (Button) findViewById(R.id.btn_two);
        btn_three = (Button) findViewById(R.id.btn_three);
        btn_four = (Button) findViewById(R.id.btn_four);
        img_babi = (ImageView) findViewById(R.id.img_babi);

        btn_one.setOnClickListener(this);
        btn_two.setOnClickListener(this);
        btn_three.setOnClickListener(this);
        btn_four.setOnClickListener(this);
        img_babi.setOnClickListener(this);
    }

    @Override
    public void onClick(View v) {
        switch (v.getId()) {
            case R.id.btn_one:
                lineAnimator();
                break;
            case R.id.btn_two:
                scaleAnimator();
                break;
            case R.id.btn_three:
                raAnimator();
                break;
            case R.id.btn_four:
                circleAnimator();
                break;
            case R.id.img_babi:
                Toast.makeText(MainActivity.this, "不愧是coder-pig~", Toast.LENGTH_SHORT).show();
                break;
        }
    }


    //定义一个修改ImageView位置的方法
    private void moveView(View view, int rawX, int rawY) {
        int left = rawX - img_babi.getWidth() / 2;
        int top = rawY - img_babi.getHeight();
        int width = left + view.getWidth();
        int height = top + view.getHeight();
        view.layout(left, top, width, height);
    }


    //定义属性动画的方法:

    //按轨迹方程来运动
    private void lineAnimator() {
        width = ly_root.getWidth();
        height = ly_root.getHeight();
        ValueAnimator xValue = ValueAnimator.ofInt(height,0,height / 4,height / 2,height / 4 * 3 ,height);
        xValue.setDuration(3000L);
        xValue.addUpdateListener(new ValueAnimator.AnimatorUpdateListener() {
            @Override
            public void onAnimationUpdate(ValueAnimator animation) {
                // 轨迹方程 x = width / 2
                int y = (Integer) animation.getAnimatedValue();
                int x = width / 2;
                moveView(img_babi, x, y);
            }
        });
        xValue.setInterpolator(new LinearInterpolator());
        xValue.start();
    }

    //缩放效果
    private void scaleAnimator(){

        //这里故意用两个是想让大家体会下组合动画怎么用而已~
        final float scale = 0.5f;
        AnimatorSet scaleSet = new AnimatorSet();
        ValueAnimator valueAnimatorSmall = ValueAnimator.ofFloat(1.0f, scale);
        valueAnimatorSmall.setDuration(500);

        ValueAnimator valueAnimatorLarge = ValueAnimator.ofFloat(scale, 1.0f);
        valueAnimatorLarge.setDuration(500);

        valueAnimatorSmall.addUpdateListener(new ValueAnimator.AnimatorUpdateListener() {
            @Override
            public void onAnimationUpdate(ValueAnimator animation) {
                float scale = (Float) animation.getAnimatedValue();
                img_babi.setScaleX(scale);
                img_babi.setScaleY(scale);
            }
        });
        valueAnimatorLarge.addUpdateListener(new ValueAnimator.AnimatorUpdateListener() {
            @Override
            public void onAnimationUpdate(ValueAnimator animation) {
                float scale = (Float) animation.getAnimatedValue();
                img_babi.setScaleX(scale);
                img_babi.setScaleY(scale);
            }
        });

        scaleSet.play(valueAnimatorLarge).after(valueAnimatorSmall);
        scaleSet.start();

        //其实可以一个就搞定的
//        ValueAnimator vValue = ValueAnimator.ofFloat(1.0f, 0.6f, 1.2f, 1.0f, 0.6f, 1.2f, 1.0f);
//        vValue.setDuration(1000L);
//        vValue.addUpdateListener(new ValueAnimator.AnimatorUpdateListener() {
//            @Override
//            public void onAnimationUpdate(ValueAnimator animation) {
//                float scale = (Float) animation.getAnimatedValue();
//                img_babi.setScaleX(scale);
//                img_babi.setScaleY(scale);
//            }
//        });
//        vValue.setInterpolator(new LinearInterpolator());
//        vValue.start();
    }


    //旋转的同时透明度变化
    private void raAnimator(){
        ValueAnimator rValue = ValueAnimator.ofInt(0, 360);
        rValue.setDuration(1000L);
        rValue.addUpdateListener(new ValueAnimator.AnimatorUpdateListener() {
            @Override
            public void onAnimationUpdate(ValueAnimator animation) {
                int rotateValue = (Integer) animation.getAnimatedValue();
                img_babi.setRotation(rotateValue);
                float fractionValue = animation.getAnimatedFraction();
                img_babi.setAlpha(fractionValue);
            }
        });
        rValue.setInterpolator(new DecelerateInterpolator());
        rValue.start();
    }

    //圆形旋转
    protected void circleAnimator() {
        width = ly_root.getWidth();
        height = ly_root.getHeight();
        final int R = width / 4;
        ValueAnimator tValue = ValueAnimator.ofFloat(0,
                (float) (2.0f * Math.PI));
        tValue.setDuration(1000);
        tValue.addUpdateListener(new ValueAnimator.AnimatorUpdateListener() {
            @Override
            public void onAnimationUpdate(ValueAnimator animation) {
                // 圆的参数方程 x = R * sin(t) y = R * cos(t)
                float t = (Float) animation.getAnimatedValue();
                int x = (int) (R * Math.sin(t) + width / 2);
                int y = (int) (R * Math.cos(t) + height / 2);
                moveView(img_babi, x, y);
            }
        });
        tValue.setInterpolator(new DecelerateInterpolator());
        tValue.start();
    }
}
Okay, the usage flow is very simple. First create a ValueAnimator object by calling ValueAnimator.ofInt/ofFloat, then set the animation duration,addUpdateListeneraddAnimatorUpdateListenerevent listener, then use the parameteranimationofgetAnimatedValue() to get the current value, then we can use this value to modify some properties of the View, thereby forming the so-called animation effect. Next, set the setInterpolator animation rendering mode, and finally call start() to begin the animation playback~
Damn, linear equations, parametric equations of a circle, I'm already starting to panic. Isn't this from advanced mathematics? This science slacker even forgot trigonometric functions...
The example is referenced from GitHub:MoveViewValueAnimator
3. Simple Usage of ObjectAnimator
Compared to ValueAnimator, ObjectAnimator appears to be easier to use. With this class, we candirectly
perform animation operations on any property of any object! That's right, any object, not just View objects. Continuously assign values to a certain property of the object, and then decide how to display it based on the changes in the object's property value! For example, setting the following animation for TextView:ObjectAnimator.ofFloat(textview, "alpha", 1f, 0f);
Here it continuously changes the alpha value from 1f to 0f, and then the object refreshes the interface display based on the changes in the property value, thereby showing a fade-in and fade-out effect. However, there is no alpha property in the TextView class. The internal mechanism of ObjectAnimator is:It looks for the get and set methods corresponding to the passed property name, rather than looking for this property value!If you don't believe it, you can look into the TextView source code to see if there is an alpha property! Okay, let's use ObjectAnimator to implement the effects of four tween animations~
Running effect diagram:

Code implementation:
The layout directly uses the layout from above, added a button, and replaced the ImageView with a TextView. I won't paste the code here, let's go straight to theMainActivity.javapart of the code, it's actually all much the same~
public class MainActivity extends AppCompatActivity implements View.OnClickListener {
    private Button btn_one;
    private Button btn_two;
    private Button btn_three;
    private Button btn_four;
    private Button btn_five;
    private LinearLayout ly_root;
    private TextView tv_pig;
    private int height;
    private ObjectAnimator animator1;
    private ObjectAnimator animator2;
    private ObjectAnimator animator3;
    private ObjectAnimator animator4;
    private AnimatorSet animSet;

    @Override
    protected void onCreate(Bundle savedInstanceState) {
        super.onCreate(savedInstanceState);
        setContentView(R.layout.activity_main);
        bindViews();
        initAnimator();
    }

    private void bindViews() {
        ly_root = (LinearLayout) findViewById(R.id.ly_root);
        btn_one = (Button) findViewById(R.id.btn_one);
        btn_two = (Button) findViewById(R.id.btn_two);
        btn_three = (Button) findViewById(R.id.btn_three);
        btn_four = (Button) findViewById(R.id.btn_four);
        btn_five = (Button) findViewById(R.id.btn_five);
        tv_pig = (TextView) findViewById(R.id.tv_pig);

        height = ly_root.getHeight();
        btn_one.setOnClickListener(this);
        btn_two.setOnClickListener(this);
        btn_three.setOnClickListener(this);
        btn_four.setOnClickListener(this);
        btn_five.setOnClickListener(this);
        tv_pig.setOnClickListener(this);
    }

    //初始化动画
    private void initAnimator() {
        animator1 = ObjectAnimator.ofFloat(tv_pig, "alpha", 1f, 0f, 1f, 0f, 1f);
        animator2 = ObjectAnimator.ofFloat(tv_pig, "rotation", 0f, 360f, 0f);
        animator3 = ObjectAnimator.ofFloat(tv_pig, "scaleX", 2f, 4f, 1f, 0.5f, 1f);
        animator4 = ObjectAnimator.ofFloat(tv_pig, "translationY", height / 8, -100, height / 2);
    }

    @Override
    public void onClick(View v) {
        switch (v.getId()) {
            case R.id.btn_one:
                animator1.setDuration(3000l);
                animator1.start();
                break;
            case R.id.btn_two:
                animator2.setDuration(3000l);
                animator2.start();
                break;
            case R.id.btn_three:
                animator3.setDuration(3000l);
                animator3.start();
                break;
            case R.id.btn_four:
                animator4.setDuration(3000l);
                animator4.start();
                break;
            case R.id.btn_five:
                //将前面的动画集合到一起~
                animSet = new AnimatorSet();
                animSet.play(animator4).with(animator3).with(animator2).after(animator1);
                animSet.setDuration(5000l);
                animSet.start();
                break;
            case R.id.tv_pig:
                Toast.makeText(MainActivity.this, "不愧是coder-pig~", Toast.LENGTH_SHORT).show();
                break;
        }
    }
}
The usage is also very simple. The combined animations mentioned above will be covered below~
4. Combined Animations and AnimatorListener
From both examples above, we experienced combined animations, usingAnimatorSetthis class!
We call the play() method and pass in the first animation to start executing. At this point, it returns a Builder class to us:
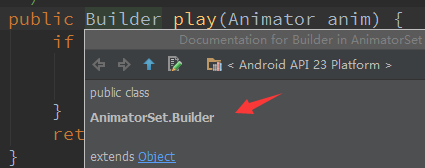
Next, we can call the four methods provided by Builder to combine other animations:
- after(Animator anim) Insert the existing animation to execute after the passed-in animation
- after(long delay) Execute the existing animation after delaying for the specified milliseconds
- before(Animator anim) Insert the existing animation to execute before the passed-in animation
- with(Animator anim) Execute the existing animation and the passed-in animation simultaneously
Hmm, very simple. Next, let's talk about animation event listening. Above, our ValueAnimator's listener isAnimatorUpdateListener, and when the value state changes, it will call backonAnimationUpdatemethod!
In addition to this kind of event, there is also: listening to the animation's running state~AnimatorListener, we can call theaddListenermethod to add a listener, and then override the following four callback methods:
- onAnimationStart(): Animation starts
- onAnimationRepeat(): Animation repeats
- onAnimationEnd(): Animation ends
- onAnimationCancel(): Animation is cancelled
That's right, if you really use AnimatorListener, you have to override all four methods. Of course, just like the gesture section earlier, Android has already provided us with an adapter class:AnimatorListenerAdapter, this class already implements every interface method, so we can just write one callback method here!
5. Using XML to Write Animations
Using XML to write animations may take a bit longer than Java code, but reusing them is much easier! The corresponding XML tags are: <animator><objectAnimator><set> The related attributes are explained as follows:
- android:ordering: Specifies the playback order of animations: sequentially (execute in order), together (execute simultaneously)
- android:duration: The duration of the animation
- android:propertyName="x": The x here, remember "alpha" above? The object loading the animation needs to define getx and setx methods. objectAnimator uses this to modify the values in the object!
- android:valueFrom="1" : The initial value at the start of the animation
- android:valueTo="0" : The final value at the end of the animation
- android:valueType="floatType": The data type of the changing value
Usage examples are as follows:
①An animation that smoothly transitions from 0 to 100:
<animator xmlns:android="http://schemas.android.com/apk/res/android"
    android:valueFrom="0"
    android:valueTo="100"
    android:valueType="intType"/>
②Change a view's alpha property from 1 to 0:
<objectAnimator xmlns:android="http://schemas.android.com/apk/res/android"
    android:valueFrom="1"
    android:valueTo="0"
    android:valueType="floatType"
    android:propertyName="alpha"/>
③set animation usage demonstration:
<set android:ordering="sequentially" >
    <set>
        <objectAnimator
            android:duration="500"
            android:propertyName="x"
            android:valueTo="400"
            android:valueType="intType" />
        <objectAnimator
            android:duration="500"
            android:propertyName="y"
            android:valueTo="300"
            android:valueType="intType" />
    </set>
    <objectAnimator
        android:duration="500"
        android:propertyName="alpha"
        android:valueTo="1f" />
</set>
Load our animation file:
AnimatorSet set = (AnimatorSet)AnimatorInflater.loadAnimator(mContext,
             R.animator.property_animator);
animator.setTarget(view);
animator.start();
6. Download the Sample Code for this Section:
AnimatorDemo1.zip
AnimatorDemo2.zip
Summary of this section:
Alright, this section gave everyone a rundown of the basic usage of property animation in Android. Not sure if you got it or not. The content is still relatively simple, and the examples are quite interesting. I believe everyone will like them. Well, that's all I have to say, thanks~
Thanks toGuo the Godfor the articles~
