Introduction to this section:
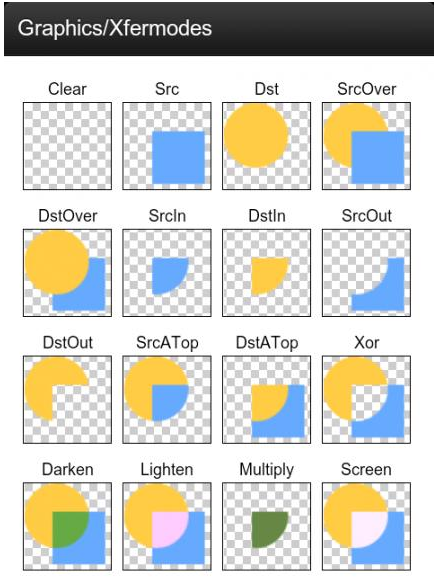
I wonder if you are familiar with these two things in the title. If you have implemented rounded corners or circular images yourself, I believe these two terms are not unfamiliar to you. Can't remember for a moment? Never mind, have you ever seen the image below?
PS: People online all say this image can be found under: \samples\android-XX\legacy\ApiDemos\src\com\example\android\apis\graphics, but it isn't actually there. I don't know if it's because my sample is android-22; I only found aXfermodes.javaJava file here! Here I'll directly paste the one I found online~
Well, back on track. I believe most friends have seen this image. If not, it doesn't matter; in this section we will take everyone to learn this thing step by step~, looking back at our previousAndroid Basic Tutorial - 8.3.1 Detailed Explanation of Three Drawing Tool Classes
setXfermode(Xfermode xfermode): Set the processing method when shapes overlap, such as merging, taking the intersection or union, often used to create an eraser effect!
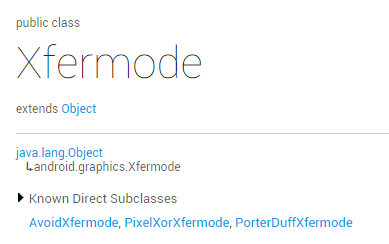
Let's go to the official documentation:Xfermode, we find that he has three sons:
In this section, let's learn about his first two sons~
Eldest son: AvoidXfermode
Well, like the two subclasses of MaskFilter we learned earlier, it does not support hardware acceleration. So if it is API 14 or above, you need to disable hardware acceleration for it to take effect! How to disable it? Check the previous section yourself~
Let's look at the constructor it provides! Official API documentation:AvoidXfermode
There are three parameters, in order:
opColor: A hexadecimal color value with alpha, such as 0x00C4C4;
tolerance: Tolerance value. If you have studied Photoshop, you may have used the Magic Wand tool; it sets the range for selecting color values. For example, with a tolerance of 0, you select a small dot of pure black; when the tolerance is adjusted to 40, the range expands to a large block of black! If you still don't quite understand, later when we write code you'll know!
mode: AvoidXfermode mode, there are two types:TARGETandAVOID

Mode 1: AvoidXfermode.Mode.TARGET
This mode will determine whether there are colors on the canvas that are different from the color value we set. If there are, it will dye these areas with a layer of the color defined by Paint; other areas remain undyed! Below we write code to demonstrate, and also let everyone feel the tolerance value!
Code usage example:
Screenshot of the result:
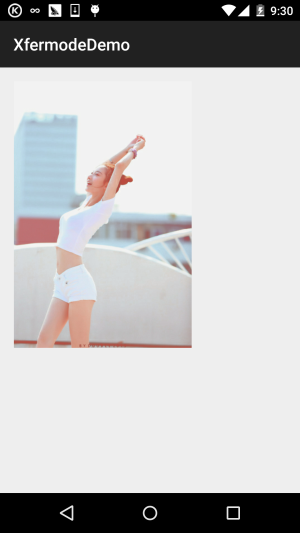
Well, first here is the original image. Material fromgank.io:

Next, let's use a color picker to pick a color from some place on the wall, then write a simple View!
PS: You need to add the hardware acceleration disable setting in the application node of AndroidManifest.xml:android:hardwareAccelerated="false"
/**
 * Created by Jay on 2015/10/22 0022.
 */
public class AvoidXfermodeView1 extends View {

    private Paint mPaint;
    private Bitmap mBitmap;
    private AvoidXfermode avoidXfermode;

    public AvoidXfermodeView1(Context context) {
        super(context);
        init();
    }

    public AvoidXfermodeView1(Context context, AttributeSet attrs) {
        super(context, attrs);
        init();
    }

    public AvoidXfermodeView1(Context context, AttributeSet attrs, int defStyleAttr) {
        super(context, attrs, defStyleAttr);
        init();
    }

    private void init() {
        mPaint = new Paint(Paint.ANTI_ALIAS_FLAG);  //抗锯齿
        avoidXfermode = new AvoidXfermode(0XFFCCD1D4, 0, AvoidXfermode.Mode.TARGET);
        mBitmap = BitmapFactory.decodeResource(getResources(), R.mipmap.iv_meizi);

    }

    @Override
    protected void onDraw(Canvas canvas) {
        canvas.drawBitmap(mBitmap, 50, 50, mPaint);
        mPaint.setARGB(255, 222, 83, 71);
        mPaint.setXfermode(avoidXfermode);
        canvas.drawRect(50, 50, 690, 1010, mPaint);
    }
}
Effect after running:
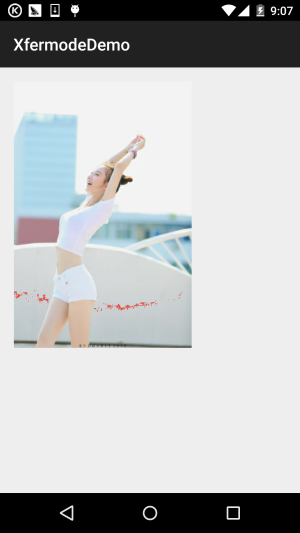
See that pile of period red on the wall? The effect is amazing. Here our tolerance value did not play a role; let's change it and turn the girl's white clothes into period red!
Let's change the above AvoidXfermode constructor content to:
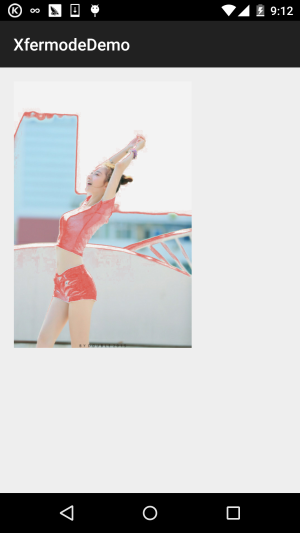
avoidXfermode = new AvoidXfermode(0XFFD9E5F3, 25, AvoidXfermode.Mode.TARGET);
Then, the white clothes on the girl turn into period red... , full of guilt...
Mode 2: AvoidXfermode.Mode.AVOID
It is the opposite of the TARGET mode above. Above, the color is changed only when it is the same; here, it is changed when it is different. The tolerance value brings the opposite result as well. When the tolerance is 0, the image will only be dyed when the pixel color value is completely different from the set color value. When the tolerance reaches the maximum of 255, any slight difference in color will cause it to be dyed! We just need to simply modify the above example. That is, modify the content of the AvoidXfermode constructor! We change it to the following sentence:
avoidXfermode = new AvoidXfermode(0XFFD9E5F3,230, AvoidXfermode.Mode.AVOID);
Screenshot of the result:
Second son: PixelXorXfermode
This is another image blending mode. Compared to the eldest son, it is simpler. Its constructor is as follows:
Official API documentation:PixelXorXfermode
Parameter analysis:
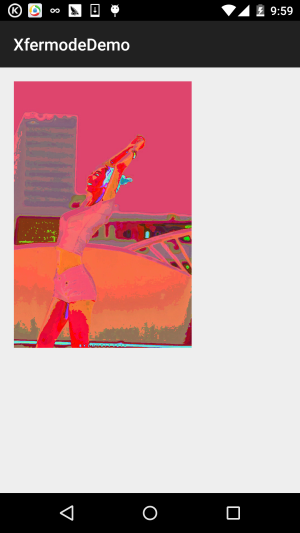
It is just a hexadecimal color value with alpha. As for the function of this value, there is an algorithm: PixelXorXfermode internally calculates according to the XOR algorithm "opColor ^ src ^ dst", obtaining an opaque (alpha = 255) color value and setting it into the image! Well, this is what I found online; I don't specifically know it either. Let's write an example and see the effect~
Code example:
Screenshot of the result:
Implementation code:
/**
 * Created by Jay on 2015/10/22 0022.
 */
public class PixelXorXfermodeView1 extends View{

    private Paint mPaint;
    private Bitmap mBitmap;
    private PixelXorXfermode pixelxorXfermode;

    public PixelXorXfermodeView1(Context context) {
        super(context);
        init();

    }

    public PixelXorXfermodeView1(Context context, AttributeSet attrs) {
        super(context, attrs);
        init();
    }

    public PixelXorXfermodeView1(Context context, AttributeSet attrs, int defStyleAttr) {
        super(context, attrs, defStyleAttr);
        init();
    }

    private void init() {
        mPaint = new Paint(Paint.ANTI_ALIAS_FLAG);  //抗锯齿
        pixelxorXfermode = new PixelXorXfermode(0XFFD9E5F3);
        mBitmap = BitmapFactory.decodeResource(getResources(), R.mipmap.iv_meizi);
    }

    @Override
    protected void onDraw(Canvas canvas) {
        canvas.drawBitmap(mBitmap, 50, 50, mPaint);
        mPaint.setARGB(255, 222, 83, 71);
        mPaint.setXfermode(pixelxorXfermode);
        canvas.drawRect(50, 50, 690, 1010, mPaint);
    }

}
Download sample code for this section:
XfermodeDemo.zip
Summary of this section:
Well, full of guilt. A beautiful girl ended up like this because of my demo. Don't blame me,
Oh, right, I forgot to mention that Xfermode's eldest and second sons have passed away (deprecated). They have been deprecated since API 16. That is to say, this section is basically useless...
You can't say that either. Apache has been neutered in versions after 4.4, but there are still people using HttpClient, or HTTP request frameworks written with this library~ Of course, such people are very, very few! But learning more never hurts, right? The third son in the next sectionPorterDuffXfermodeis not outdated, and is also very important. Well, don't worry, it won't ruin photos again! Okay, that's all I have to say, thanks~