Introduction:
In this section, we continue to learn about Paint's API – PathEffect. We set the paint's style to Stroke, and then we can draw shapes composed of lines. But these lines can sometimes look monotonous, right? For example, if you want to change these lines into dashed lines, or make the corners of the path rounded, then you can consider using PathEffect to achieve this!
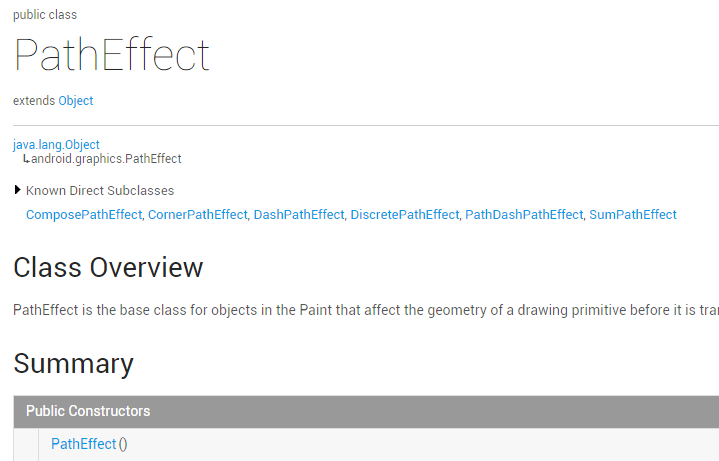
Official API Documentation:PathEffectWhen you look at the documentation, you can see that PathEffect, like the MaskFilter and ColorFilter we learned earlier, has almost no usable methods:
We generally use its six subclasses:
Let's analyze their functions and constructors in order below!
1. Subclass Functions and Constructor Parameter Analysis:
1)CornerPathEffect
CornerPathEffect(float radius)
It connects the angles between the connected line segments of the Path in a smoother way, similar to the effect of an arc and tangent line. radius specifies the radius of the arc.
2)DashPathEffect
DashPathEffect(float[] intervals, float phase)
It turns the line segments of the Path into dashed lines. intervals is an array of ON and OFF values for the dashes; the number of elements in the array must be >= 2; phase is the offset at drawing time.
3)DiscretePathEffect
DiscretePathEffect(float segmentLength, float deviation)
It breaks apart the line segments of the Path, creating a scattered effect based on the original path. segmentLength specifies the maximum segment length, and deviation is the offset at drawing time.
4)PathDashPathEffect
PathDashPathEffect(Path shape, float advance, float phase, PathDashPathEffect.Style style)
Its function is to use Path shapes to fill the current path. shape refers to the filling shape, advance is the interval between each shape, and style is the class's own enum value, with three cases:ROTATE、MORPHandTRANSLATE。
- In the ROTATE case: the shape at the line segment connection rotates to an angle that aligns with the movement direction of the next segment for connection.
- In the MORPH case: the shape is connected to the next segment with deformation such as stretching or compression.
- In the TRANSLATE case: the shape is connected to the next segment by means of positional translation.
5)ComposePathEffect
ComposePathEffect(PathEffect outerpe, PathEffect innerpe)
Its function is:Combined effectIt will first render innerpe, then add the outerpe effect on the basis of innerpe.
6)SumPathEffect
SumPathEffect(PathEffect first, PathEffect second)
Its function is: overlay effect. Unlike ComposePathEffect, when rendering, it displays the effects of both parameters independently, then simply overlaps the two effects together.
2. Write Code to Verify Each Effect
Enough talk, writing code is the most practical. Let's write code to test the effects of each of these subclasses!
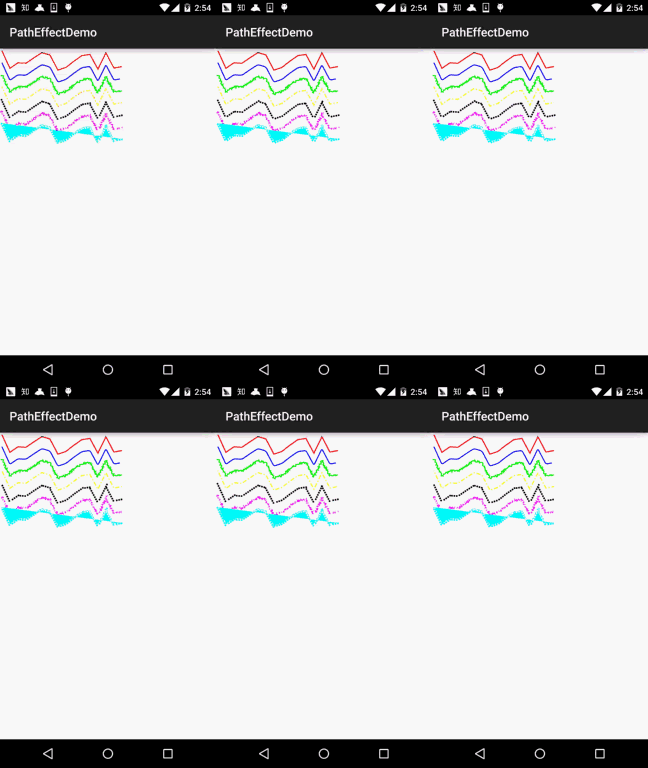
Running effect screenshot:
Implementation code:
We'll write a View ourselves. The line movement effect inside is caused by increasing phase by +2 each time, then invalidate to redraw, so don't be surprised!PathEffectView.java:
/**
 * Created by Jay on 2015/10/30 0030.
 */
public class PathEffectView extends View {

    private Paint mPaint;
    private Path mPath;
    private float phase = 0;
    private PathEffect[] effects = new PathEffect[7];
    private int[] colors;

    public PathEffectView(Context context) {
        this(context, null);
    }

    public PathEffectView(Context context, AttributeSet attrs) {
        super(context, attrs);
        init();
    }

    public PathEffectView(Context context, AttributeSet attrs, int defStyleAttr) {
        super(context, attrs, defStyleAttr);
    }

    //初始化画笔
    private void init() {
        mPaint = new Paint(Paint.ANTI_ALIAS_FLAG); //抗锯齿
        mPaint.setStyle(Paint.Style.STROKE);       //绘画风格:空心
        mPaint.setStrokeWidth(5);                  //笔触粗细
        mPath = new Path();
        mPath.moveTo(0, 0);
        for (int i = 1; i <= 15; i++) {
            // 生成15个点,随机生成它们的坐标,并将它们连成一条Path
            mPath.lineTo(i * 40, (float) Math.random() * 100);
        }
        // 初始化7个颜色
        colors = new int[] { Color.RED, Color.BLUE, Color.GREEN,
                Color.YELLOW, Color.BLACK, Color.MAGENTA, Color.CYAN };
    }


    @Override
    protected void onDraw(Canvas canvas) {
        canvas.drawColor(Color.WHITE);
        //初始化其中路径效果:
        effects[0] = null;                                    //无效果
        effects[1] = new CornerPathEffect(10);                //CornerPathEffect
        effects[2] = new DiscretePathEffect(3.0f, 5.0f);      //DiscretePathEffect
        effects[3] = new DashPathEffect(new float[] { 20, 10, 5, 10 },phase);   //DashPathEffect
        Path p = new Path();
        p.addRect(0, 0, 8, 8, Path.Direction.CCW);
        effects[4] = new PathDashPathEffect(p, 12, phase,
                PathDashPathEffect.Style.ROTATE);             //PathDashPathEffect
        effects[5] = new ComposePathEffect(effects[2], effects[4]);    //ComposePathEffect
        effects[6] = new SumPathEffect(effects[2], effects[4]);   //SumPathEffect
        // 将画布移动到(10,10)处开始绘制
        canvas.translate(10, 10);
        // 依次使用7中不同的路径效果、7中不同的颜色来绘制路径
        for (int i = 0; i < effects.length; i++) {
            mPaint.setPathEffect(effects[i]);
            mPaint.setColor(colors[i]);
            canvas.drawPath(mPath, mPaint);
            canvas.translate(0, 60);
        }
        // 改变phase值,形成动画效果
        phase += 2;
        invalidate();
    }
}
Okay, the code comments are already very clear, so I won't ramble on here~
3. Download Sample Code for This Section:
PathEffectDemo.zip
Section Summary
There is nothing difficult in this section; it just introduces the functions of the six subclasses of PathEffect. You just need to call the setPathEffect method to apply it to a Paint object. It's very simple. Well, that's all, thanks~