The current mainstream Android development environments are: ① Eclipse + ADT + SDK ② Android Studio + SDK ③ IntelliJ IDEA + SDK Currently, most developers in China still use Eclipse. However, after Google announced it would no longer update ADT, and the official website also removed the Eclipse download link that integrates the Android development environment, all these signs indicate that developers will eventually transition to Android Studio. Of course, this transition period will be long, but if you are just learning Android, it is recommended to start directly with Android Studio. Moreover, many excellent open-source projects are based on Android Studio! Of course, this tutorial will introduce both development environments; which one to use depends on yourself~ There is also IntelliJ, which is similar to Android Studio, and it will not be covered here!
1. JDK Installation and Configuration
Step 1: Download JDKYou can download from the official website:JDK Official DownloadYou can also download from the author's cloud drive:Author's Cloud DrivePS: You can download any of these; it doesn't matter much. For 32-bit systems, you can only download the 32-bit version!
Step 2: JDK InstallationJust click Next in the foolproof wizard!
Step 3: Environment Variable ConfigurationConfiguring environment variables is to facilitate some command-line operations; you will need them later!Right-click My Computer -> Advanced -> Environment Variables
Create a new JAVA_HOME
Modify the PATH variable. Don't delete the original entries!!!
Create a new CLASSPATH
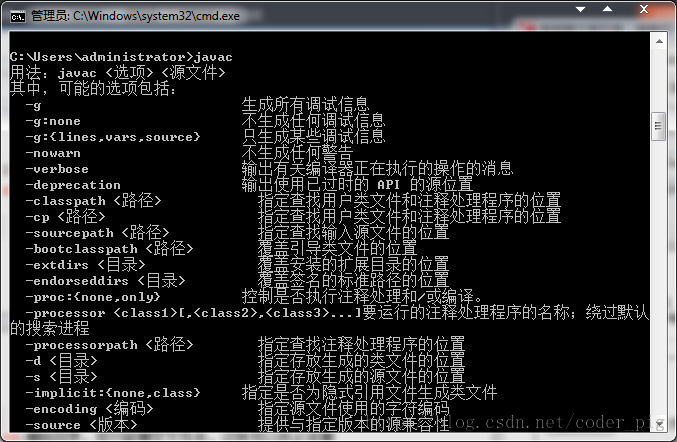
Verify whether the environment is configured successfullyOpen the computer's cmd (command line), press Win + R and enter cmd, then run javac and java in sequence in the command line. If the effect shown in the figure appears, the configuration is complete:
2. Choose One of Two Development Tools
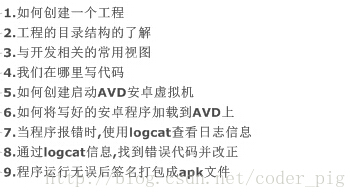
We already talked about the current state of IDE development environments at the beginning. Also, one thing I forgot to mention earlier: Android Studio is quite resource-hungry. If your computer is not that great, it is recommended to use Eclipse for Android development first. Below, let's first talk about the process of developing an APP with an IDE; follow the process below to get familiar with using the IDE:
Then choose one of the following two and start our Android development journey!
Eclipse + ADT + SDK: Android Studio + SDK:
3. Explanation of Related Terms
- Dalvik:Android's unique virtual machine, unlike the JVM, the Dalvik virtual machine is very suitable for use on mobile terminals!
- AVD:(android virtual machine): Android virtual device, which is the Android emulator.
- ADT:(android development tools) Android development tools
- SDK:(software development kit) Software development kit, which is a collection of tools for the Android system, platform architecture, etc., such as adb.exe
- DDMS:(dalvik debug monitor service) Android debugging tool
- adb:Android Debug Bridge, located in the platform-tools directory of the SDK, has many functions and is essential for the command line.
- DX tool:Converts .class files into .dex files
- AAPT:(android asset packing tool), Android resource packaging tool
- R.java file:Automatically generated by the aapt tool based on the resource files in the App; it can be understood as a resource dictionary.
- AndroidManifest.xml:App package name + component declarations + minimum compatible version of the program + required permissions, etc. - the program's configuration file.
The following content may be a bit difficult for you as a beginner, but when you look back later, you will find these things very useful. If you don't understand it, you can skip it for now.
4. Some ADB Command Line Commands
Before executing ADB commands, we also need to configure environment variables for our SDK.Step 1:Create a new environment variable ANDROID_HOME and paste the SDK root directory address into it:
Step 2:Update the PATH environment variable, and add the following at the beginning of PATH:%ANDROID_HOME%\tools;That's it. Once configured, let's move on to learning the commands:

5. APP Packaging and Installation Process:

6. APP Installation Process:

7. Summary of This Section
In this section, we analyzed the current state of Android development IDEs. We recommend that beginners, if hardware conditions permit, use Android Studio for Android APP development. We covered the installation and configuration of JDK, the process of getting familiar with IDEs, explanations of some key terms, common ADB command-line commands, and finally an analysis of the program packaging, installation, and installation process! After this chapter, I believe everyone has a basic understanding of Android development, understands the process of developing a program, and the corresponding project directory structure! I believe you may complain that the AVD emulator runs very slowly. In the next section, we will introduce an Android emulator that is faster than a real device - the installation and use of Genymotion!