Section Introduction:
In the previous section, we had a preliminary study of Android property animation. I believe you are no longer in a state of half-understanding. In this section, we continue to explore some more advanced usages of Android property animation! As usual, here are the three articles by Master Guo~
The content is still based on the above three articles. Okay, let's start this section~
1. Custom Evaluator
1) Introduction to Evaluator
In the previous section,8.4.3 Android Animation Collection: Property Animation - First Encounter, the first step in using animation is:
Call ValueAnimator'sofInt(),ofFloatofInt() orofObjectofFloat() static method to create a ValueAnimator instance!
In the examples, we used both ofInt and ofFloat, respectively used for animating integer and floating-point data!
ThenofObjectofObject()? The initial object and the end object? How does the transition work? Or how is this thing used?
Okay, with these questions, let's first understand something: Evaluator. We actually talked about this thing when we were rambling about property animation concepts:
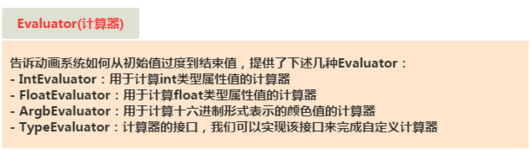
used to tell the animation system how to transition from the initial value to the end value!Good, our starting point is right! Let's go into the source code of IntEvaluator and see what's inside?
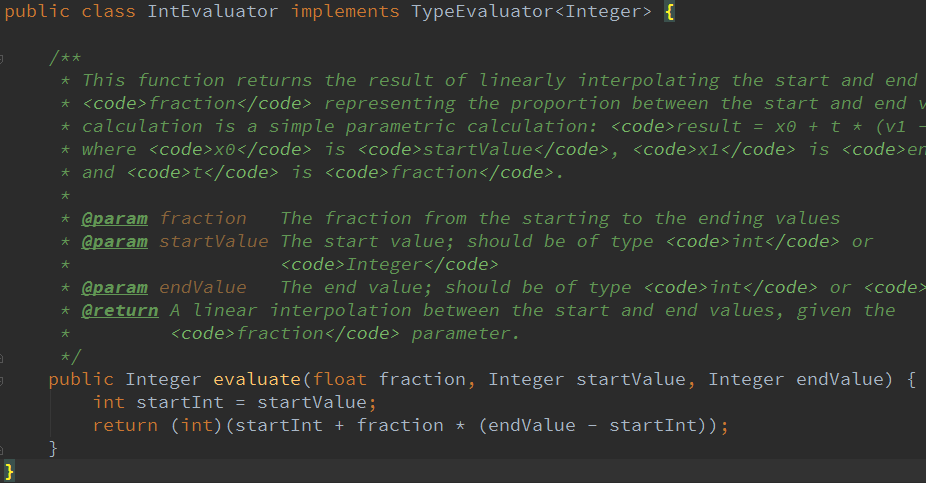
Well, it implements theTypeEvaluatorTypeEvaluator interface, and then overrides theevaluate()evaluate method. There are three parameters, in order:
- fraction: the animation completion degree. We calculate what the animation value should be based on it.
- startValue: the animation start value.
- endValue: the animation end value.
Animation value = initial value + completion degree * (end value - initial value)
Similarly, there is FloatEvaluator. If we want to tell the system how to transition from the initial object to the end object, then we need to implement it ourselves.TypeEvaluatorinterface, that is, custom Evaluator. Words are useless, let's write an example to see:
2) Usage example
Running effect screenshot:

Code implementation:
Define an objectPoint.java, the object only has two properties, x and y, plus get and set methods~
/**
 * Created by Jay on 2015/11/18 0018.
 */
public class Point {

    private float x;
    private float y;

    public Point() {
    }

    public Point(float x, float y) {
        this.x = x;
        this.y = y;
    }

    public float getX() {
        return x;
    }

    public float getY() {
        return y;
    }

    public void setX(float x) {
        this.x = x;
    }

    public void setY(float y) {
        this.y = y;
    }
}
Then define a custom Evaluator class:PointEvaluator.java, implement the interface and override the evaluate method~
/**
 * Created by Jay on 2015/11/18 0018.
 */
public class PointEvaluator implements TypeEvaluator<Point>{
    @Override
    public Point evaluate(float fraction, Point startValue, Point endValue) {
        float x = startValue.getX() + fraction * (endValue.getX() - startValue.getX());
        float y = startValue.getY() + fraction * (endValue.getY() - startValue.getY());
        Point point = new Point(x, y);
        return point;
    }
}
Then define a custom View class:AnimView.java, very simple~
/**
 * Created by Jay on 2015/11/18 0018.
 */
public class AnimView extends View {

    public static final float RADIUS = 80.0f;
    private Point currentPoint;
    private Paint mPaint;

    public AnimView(Context context) {
        this(context, null);
    }

    public AnimView(Context context, AttributeSet attrs) {
        super(context, attrs);
        init();
    }

    public AnimView(Context context, AttributeSet attrs, int defStyleAttr) {
        super(context, attrs, defStyleAttr);
    }

    private void init() {
        mPaint = new Paint(Paint.ANTI_ALIAS_FLAG);
        mPaint.setColor(Color.BLUE);
    }

    private void drawCircle(Canvas canvas){
        float x = currentPoint.getX();
        float y = currentPoint.getY();
        canvas.drawCircle(x, y, RADIUS, mPaint);
    }

    private void startAnimation() {
        Point startPoint = new Point(RADIUS, RADIUS);
        Point endPoint = new Point(getWidth() - RADIUS, getHeight() - RADIUS);
        ValueAnimator anim = ValueAnimator.ofObject(new PointEvaluator(), startPoint, endPoint);
        anim.addUpdateListener(new ValueAnimator.AnimatorUpdateListener() {
            @Override
            public void onAnimationUpdate(ValueAnimator animation) {
                currentPoint = (Point) animation.getAnimatedValue();
                invalidate();
            }
        });
        anim.setDuration(3000l);
        anim.start();
    }

    @Override
    protected void onDraw(Canvas canvas) {
        if (currentPoint == null) {
            currentPoint = new Point(RADIUS, RADIUS);
            drawCircle(canvas);
            startAnimation();
        } else {
            drawCircle(canvas);
        }
    }
}
FinallyMainActivity.javajust instantiate this View at the location~
public class MainActivity extends AppCompatActivity {
    @Override
    protected void onCreate(Bundle savedInstanceState) {
        super.onCreate(savedInstanceState);
        setContentView(new AnimView(this));
    }
}
3) Enhanced version of the example
Based on the above example, add color changes while the circle moves. Here we additionally use an ObjectAnimator to load the color change animation. We add an int color in the View to control the color, and also write the getColor() and setColor() methods. Let's first define a custom Evaluator~
Running effect screenshot:

Implementation code:
ColorEvaluator.java:
/**
 * Created by Jay on 2015/11/18 0018.
 */
public class ColorEvaluator implements TypeEvaluator<Integer>{
    @Override
    public Integer evaluate(float fraction, Integer startValue, Integer endValue) {
        int alpha = (int) (Color.alpha(startValue) + fraction *
                (Color.alpha(endValue) - Color.alpha(startValue)));
        int red = (int) (Color.red(startValue) + fraction *
                (Color.red(endValue) - Color.red(startValue)));
        int green = (int) (Color.green(startValue) + fraction *
                (Color.green(endValue) - Color.green(startValue)));
        int blue = (int) (Color.blue(startValue) + fraction *
                (Color.blue(endValue) - Color.blue(startValue)));
        return Color.argb(alpha, red, green, blue);
    }
}
Then add a color, get and set methods in the custom View; create an ObjectAnimator and AnimatorSet, and then combine the animations together. That's all it is. To avoid problems for readers, let's just create another View class~
AnimView2.java:
/**
 * Created by Jay on 2015/11/18 0018.
 */
public class AnimView2 extends View {

    public static final float RADIUS = 80.0f;
    private Point currentPoint;
    private Paint mPaint;
    private int mColor;

    public AnimView2(Context context) {
        this(context, null);
    }

    public AnimView2(Context context, AttributeSet attrs) {
        super(context, attrs);
        init();
    }

    public AnimView2(Context context, AttributeSet attrs, int defStyleAttr) {
        super(context, attrs, defStyleAttr);
    }

    private void init() {
        mPaint = new Paint(Paint.ANTI_ALIAS_FLAG);
        mPaint.setColor(Color.BLUE);
    }


    private void drawCircle(Canvas canvas){
        float x = currentPoint.getX();
        float y = currentPoint.getY();
        canvas.drawCircle(x, y, RADIUS, mPaint);
    }

    private void startAnimation() {
        Point startPoint = new Point(RADIUS, RADIUS);
        Point endPoint = new Point(getWidth() - RADIUS, getHeight() - RADIUS);
        ValueAnimator anim = ValueAnimator.ofObject(new PointEvaluator(), startPoint, endPoint);
        anim.addUpdateListener(new ValueAnimator.AnimatorUpdateListener() {
            @Override
            public void onAnimationUpdate(ValueAnimator animation) {
                currentPoint = (Point) animation.getAnimatedValue();
                invalidate();
            }
        });

        ObjectAnimator objectAnimator = ObjectAnimator.ofObject(this, "color", new ColorEvaluator(),
                Color.BLUE, Color.RED);
        //动画集合将前面两个动画加到一起,with同时播放
        AnimatorSet animatorSet = new AnimatorSet();
        animatorSet.play(anim).with(objectAnimator);
        animatorSet.setStartDelay(1000l);
        animatorSet.setDuration(3000l);
        animatorSet.start();
    }

    @Override
    protected void onDraw(Canvas canvas) {
        if (currentPoint == null) {
            currentPoint = new Point(RADIUS, RADIUS);
            drawCircle(canvas);
            startAnimation();
        } else {
            drawCircle(canvas);
        }
    }

    //color的get和set方法~
    public int getColor() {
        return mColor;
    }

    public void setColor(int color) {
        mColor = color;
        mPaint.setColor(color);
        invalidate();
    }
}
Then in MainActivity, at setContentView, just change AnimView to AnimView2~
2. Interpolator (Tween)
Well, we already talked about this thing when discussing tween animation~ Do you still have any impression?
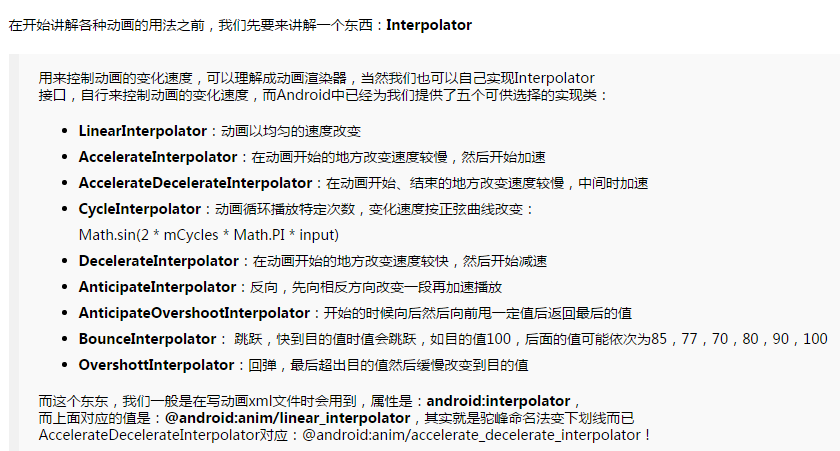
The above interpolators are available for both tween animation and property animation, and property animation also added a newTimeInterpolatorinterface. This interface is used to be compatible with the previous Interpolator, so all past Interpolator implementation classes can be directly brought over and used in property animation! We can call the animation object's setInterpolator() method to set different Interpolators! First let's change something so that the ball falls from the top center of the screen to the bottom. Then we will call the following statement for our combined animation:animatorSet.setInterpolator(new AccelerateInterpolator(2f));The value in parentheses is used to control acceleration~
Running effect:
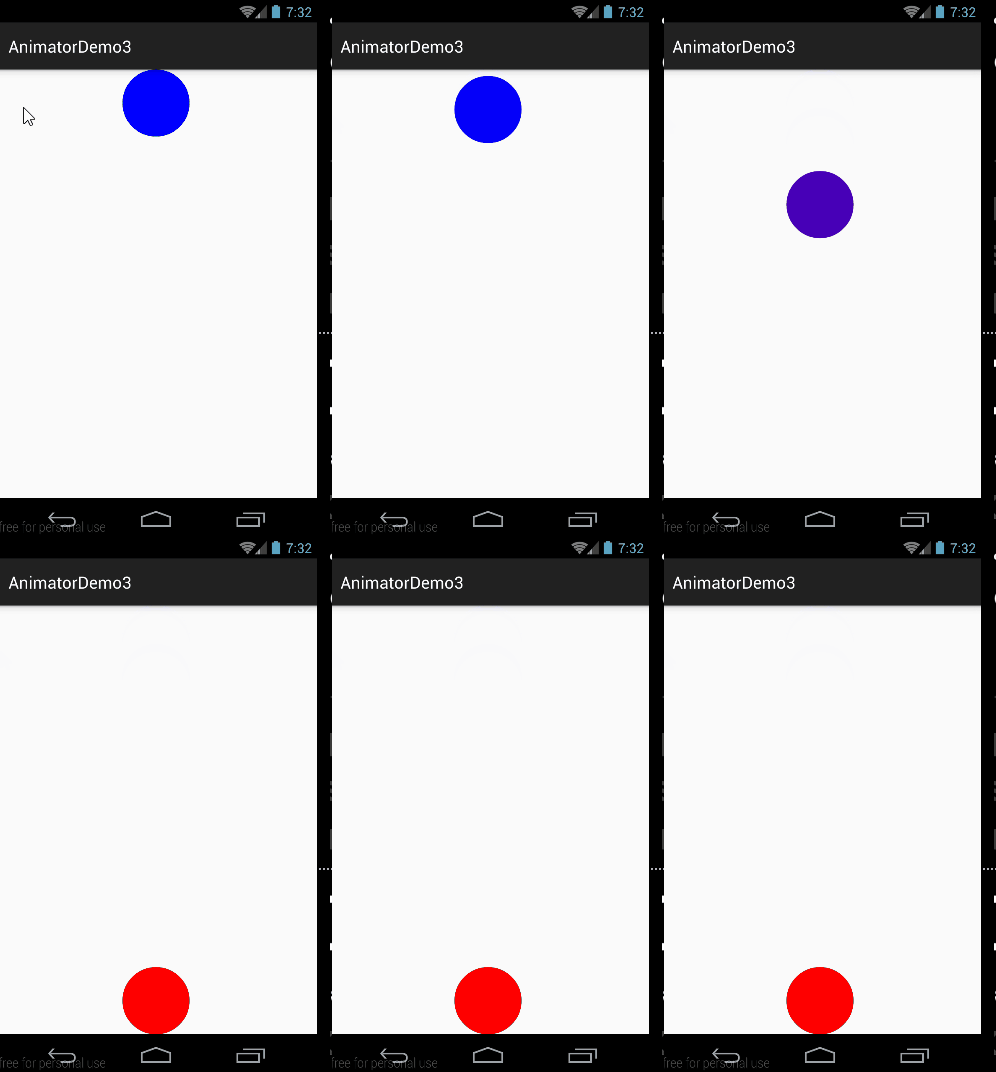
It seems a bit unreasonable. Normally it should bounce, right? Let's change toBounceInterpolatortry it~

Hehe, the effect is pretty nice. Of course, there are also many system-provided Interpolators. You can try them one by one. I won't bother going through them slowly here~
Next, let's take a look:
1) The internal implementation mechanism of Interpolator
Let's go to the source code of the TimeInterpolator interface and find that there is only onegetInterpolationgetInterpolation() method;
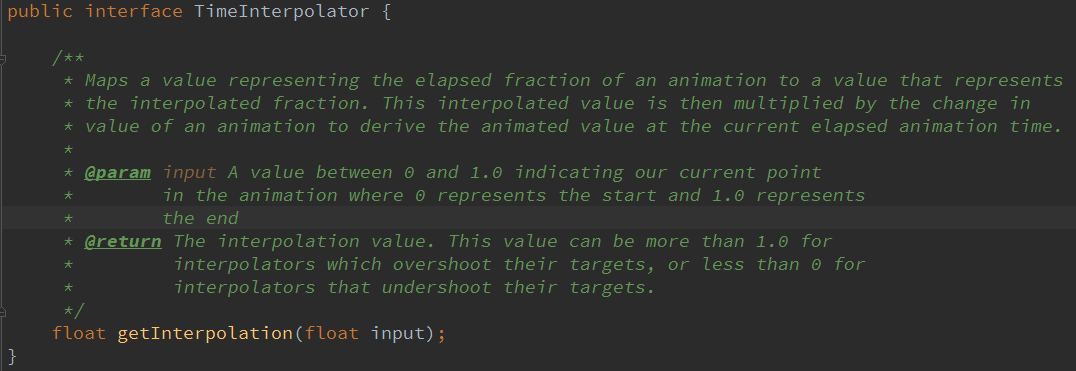
Simple explanationThe getInterpolation() method receives an input parameter. The value of this parameter changes continuously as the animation runs, but its change is very regular: it increases uniformly according to the set animation duration, with a change range from 0 to 1. That is, when the animation starts, the value of input is 0; when the animation ends, the value of input is 1; and the middle values change between 0 and 1 as the animation runs.
Here,inputthe value determines ourTypeEvaluatorTypeEvaluator interface'sfractionfraction value.getInterpolationThe value of input is computed by the system and passed into the getInterpolation() method, and then we can implement
the algorithm in the getInterpolation() method. Based on the value of input, calculate a return value, and this return value is fraction.LinearInterpolatorWe can look at
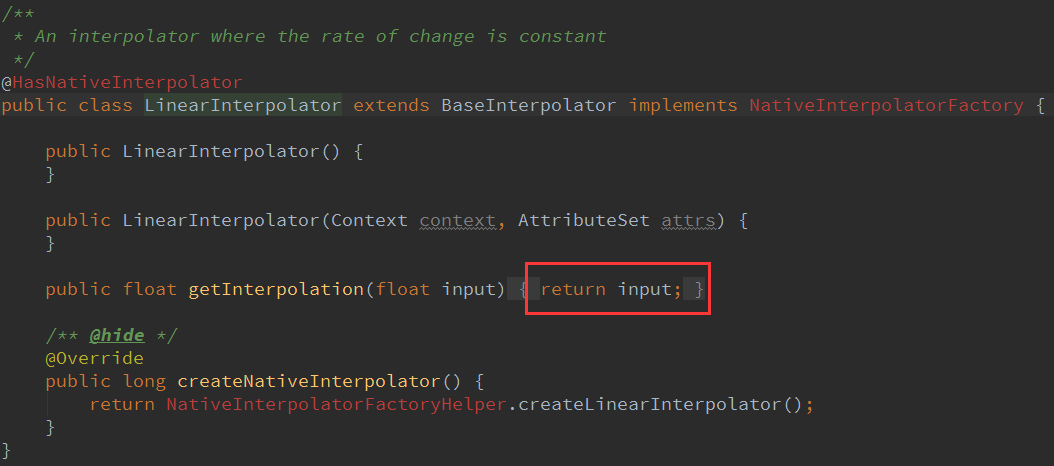
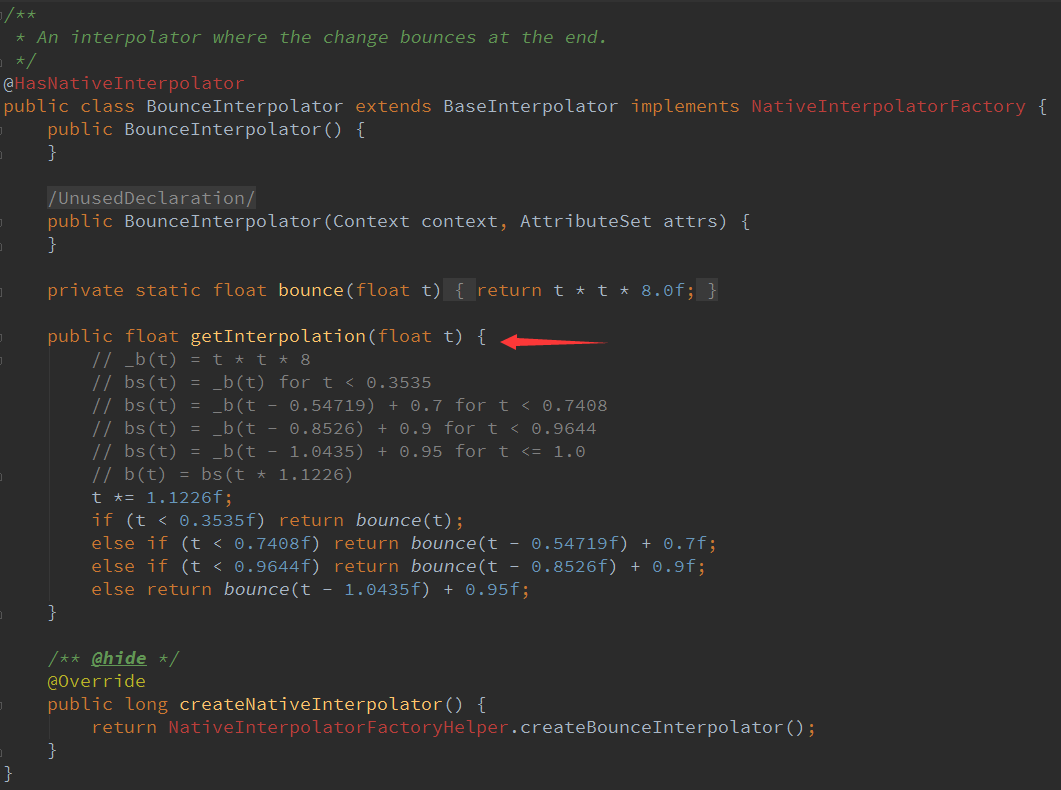
the code inside:BounceInterpolatorHere, it directly returns the input value without any processing, that is, the value of fraction is equal to the value of input. This is how a uniform motion Interpolator is implemented! Actually, it's nothing more than different algorithms, which involves some mathematics. Once again, we realize the importance of mathematics. Here I'll also post the
source code:AccelerateDecelerateInterpolator
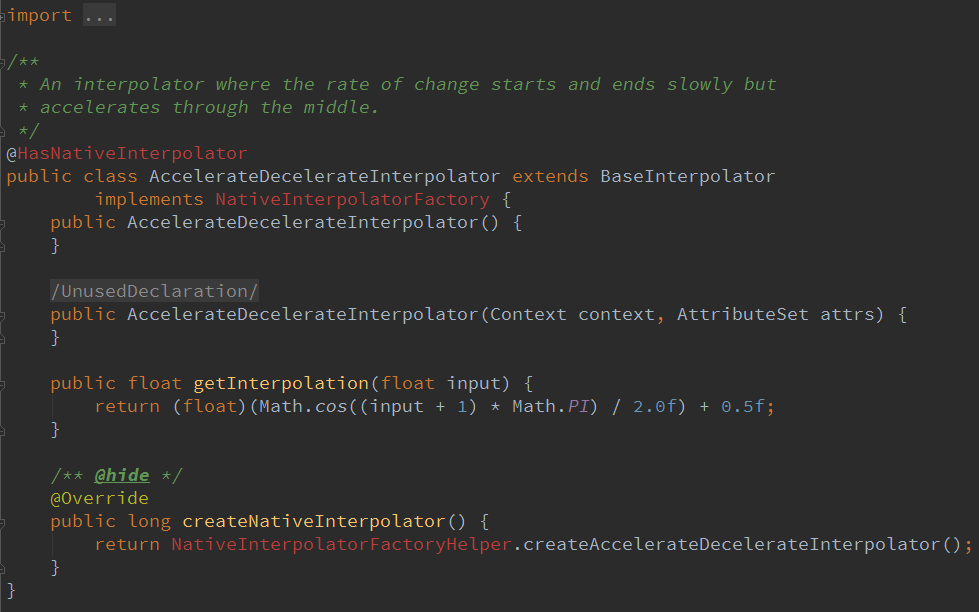
Don't ask me about the algorithm here, I don't know it either. Let's find one that is easier to understand:(float)(Math.cos((input + 1) * Math.PI) / 2.0f) + 0.5fThis Interpolator has the effect of accelerating first and then decelerating:
Understanding the algorithm:
Solution: Since the value range of input is [0,1], it can be concluded that the value inside cos has a range of [π,2π], and the corresponding values are -1 and 1; after dividing this value by 2 and adding 0.5, the final result returned by getInterpolation() is still in the range [0,1]. The corresponding curve is as follows:
So it is a process of accelerating first and then decelerating! Well, as a study slacker, I can't play anymore...
The above is all copied from Uncle Guo's article... I want to be alone for a while...
2) Custom Interpolator
Well, let's be sad later. First, write a custom Interpolator example: It's very simple. Implement the TimeInterpolator interface and override the getInterpolation method.
private class DecelerateAccelerateInterpolator implements TimeInterpolator {
    @Override
    public float getInterpolation(float input) {
        if (input < 0.5) {
            return (float) (Math.sin(input * Math.PI) / 2);
        } else {
            return 1 - (float) (Math.sin(input * Math.PI) / 2);
        }
    }
}
The sample code is as follows
3.ViewPropertyAnimator
Just call setInterpolator(new DecelerateAccelerateInterpolator()) to set it. Due to space limitations, I won't post the screenshot~
ObjectAnimator animator = ObjectAnimator.ofFloat(textview, "alpha", 0f);
animator.start();
A new feature added to the system after 3.1, providing a more convenient usage for View animation operations! If in the past, to make a TextView go from normal state to transparent state, you would write:
textview.animate().alpha(0f);
But using ViewPropertyAnimator to achieve the same effect is more understandable:It also supportschained usage
textview.animate().x(500).y(500).setDuration(5000)
        .setInterpolator(new BounceInterpolator());
, combining multiple animations, setting duration, setting Interpolator, etc~
- The usage is very simple. Just check the documentation when using it. Also, there are a few details to note below!
- The entire functionality of ViewPropertyAnimator is built on the new animate() method added to the View class. This method creates and returns a ViewPropertyAnimator instance. All subsequent method calls and all property settings are completed through this instance.After the animation definition is completed, the animation willstart automatically.startthe () method to start the animation.
- All interfaces of ViewPropertyAnimator are designed using chaining syntax, and the return value of each method isits own instance, so after calling one method you can directly chain another method, connecting all the functionality together; we can even accomplish animation of arbitrary complexity with just one line of code.
4. Download the sample code for this section
AnimatorDemo3.zip
On Github I found a project of animation collections, which has many animation effects. Here is the address:
BaseAnimation Animation Collection
If you want to study how various animations are implemented, you can check the source code yourself~
Section Summary
Well, in this section we talked about some slightly more advanced things: Evaluator, Interpolator, and ViewPropertyAnimator. Hasn't it expanded everyone's horizons~ This section is also the last subsection of Android basics introduction to drawing and custom controls. If you have mastered the content in this chapter, then when you go on to learn custom controls, or look at custom controls written by others, you should no longer be so at a loss about where to start, or run into a bunch of unfamiliar terms!
Well, thanks again to Guo Shen's article; most of the property animation content was taken directly from Guo Shen.
Hehe~ that's all for this section, thanks~
PS: The later screenshots use an emulator because my N5 was acting up...