Vibe Coding Tutorial for Beginners
Vibe Coding is a brand-new programming paradigm: instead of writing code line by line, you describe what you want in natural language; AI writes the code, and we are responsible for reviewing and steering the direction.
Vibe Coding Tutorial Reference:https://www.example.com/vibe-coding/vibe-coding-tutorial.html
What is Vibe Coding
Vibe CodingThe term was first coined by Andrej Karpathy, former AI Director at Tesla and co-founder of OpenAI, in February 2025.
He summarized this brand-new programming approach in one sentence:
「I just vibe. I don't even touch the keyboard sometimes. I just talk to the AI, it writes the code, I review it, and we iterate.」
In other words: you just describe your "vibe", AI writes the code, you review it, and then iterate back and forth.
Simply put, Vibe Coding is: you tell the AI in plain language what feature you want, and the AI writes the code for you. No need to worry about syntax details, no need to memorize API parameters, no need to manually debug every error — the AI handles all of that.
Our role shifts from "the person who writes code" to "the person who describes requirements" — or rather, from programmer to product manager + architect.

Vibe Coding isn't about letting AI replace your thinking; it's about letting AI handle low-value repetitive work, allowing you to focus on the more creative parts: understanding problems, designing architecture, and verifying results.
Vibe Coding vs Traditional Programming
Understanding the differences between Vibe Coding and traditional programming approaches helps you use it better.
| Dimension | Traditional Programming | Vibe Coding |
|---|---|---|
| Input Method | Writing code line by line manually | Describing requirements in natural language |
| Focus | Syntax, APIs, implementation details | Requirements, architecture, verification |
| Debugging Method | Manual breakpoint/log debugging | Throwing error messages to AI and letting it fix them |
| Speed | Depends on typing speed and proficiency | Depends on the clarity of requirement descriptions |
| Applicable Scenarios | All programming tasks | Prototype development, CRUD, scripting tools, UI pages |
| Core Skills | Programming language proficiency | Requirement decomposition + result verification ability |
Why Vibe Coding is Possible Now
Vibe Coding became possible in 2025 because several key conditions matured.
The Leap in Large Model Coding Capabilities
Models like GPT-5.5, Claude 5, and Gemini have significantly improved accuracy in code generation.
They can not only write syntactically correct code, but also understand project context, follow best practices, and handle edge cases.
More importantly, they can handle extremely long contexts — reading an entire project at once and understanding your codebase structure.
The Explosion of AI Programming Tools
Tools like Cursor, Claude Code, GitHub Copilot, and Windsurf have deeply integrated AI capabilities into the development workflow.
These tools can not only complete code, but also directly modify files, run terminal commands, and search the codebase — working like a real developer.
The Emergence of Agent Mode
Tools in Agent mode can autonomously execute multi-step tasks: reading files, writing code, running tests, and fixing errors based on test results.
You only need to give an initial instruction, and the Agent will loop and iterate on its own until the task is complete.
Introduction to Mainstream Tools
The following are the most mainstream Vibe Coding tools currently available, each with its own focus.
| Tool | Type | Core Features | Suitable Scenarios |
|---|---|---|---|
| Qoder | Agent IDE | Deep codebase understanding, Quest automated tasks, multi-Agent, Repo Wiki, CLI/IDE dual mode | Medium-to-large projects, long-term project maintenance |
| Trae | AI-native IDE | Conversation-driven development, automatic code generation and modification | Vibe Coding, rapid new project scaffolding |
| Cursor | AI editor | Project-level understanding, multi-file modification, Agent mode | Full-stack development, large projects |
| Claude Code | CLI Agent | Execute complex tasks in the terminal, automatically modify projects | Backend, automated development |
| GitHub Copilot | AI coding assistant | Intelligent completion, chat, Agent | Everyday development assistance |
| Windsurf | AI editor | Cascade workflow, automatic multi-file modification | Rapid development, small-to-medium projects |
| OpenAI Codex | AI coding Agent | Understand tasks and execute the complete development workflow | Automated development |
| Bolt.new | Online AI development platform | Generate a complete application from one sentence | MVP, prototype validation |
| v0 by Vercel | UI generation tool | Automatically generate React pages | Page design, component development |
| Replit AI | Online IDE | Cloud development + AI collaboration | Teaching, rapid testing |
| Lovable | AI application generator | Generate SaaS directly from a description | Startups, product validation |
| Firebase Studio | AI application platform | AI + backend service integration | App / Web development |
If you are new to Vibe Coding, you can start with a domesticQoderorTraeStart; it operates similarly to VS Code, has the gentlest learning curve, and won't change the editor environment you're familiar with.
Quick Start
Below, usingClaude Code (terminal CLI)as an example, we'll demonstrate a typical Vibe Coding workflow.
For the complete Claude Code tutorial, see:https://www.example.com/claude-code/claude-code-tutorial.html
First Project: Hello, Vibe World!
Goal:In 5 minutes, use pure natural language to let Claude Code help you create a personal business card webpage.
Step 1: Create a project folder
mkdir my-card && cd my-card
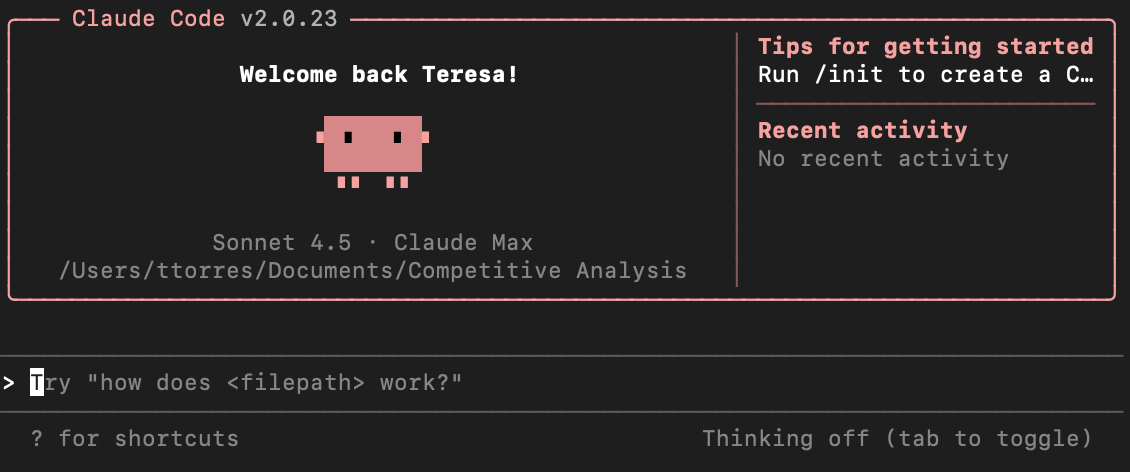
claude
Step 2: Describe what you want to Claude
In the Claude Code interface, enter:
帮我创建一个个人名片网页,要求:
- 显示我的名字(张三)和职业(前端开发者)
- 有一个简短的个人简介区域
- 列出3个技能标签(React、Python、设计)
- 设计风格:简洁现代,深色背景,有轻微的渐变效果
- 单个 HTML 文件,不需要外部依赖
Step 3: Watch Claude work
You will see Claude Code automatically:
分析你的需求
创建 index.html 文件
写入完整的 HTML、CSS 和少量 JavaScript
Step 4: View the result
open index.html   # macOS
# 或
xdg-open index.html   # Linux
Step 5: Iterate and modify
If you're not satisfied, continue the conversation:
把背景色改成深蓝色渐变,字体换成更现代的 sans-serif,
技能标签加上悬停动画效果
Claude Code will directly modify the files without you touching any code.
Vibe Coding Core Workflow
The core workflow of Vibe Coding can be summarized in four steps: Describe, Review, Iterate, Deliver.
Complete Workflow Diagram
描述需求
    ↓
AI 生成代码
    ↓
你审查 Diff
    ↓
  ┌─ 不满意 → 描述修改意见 → AI 重新生成
  │
  └─ 满意 → 运行测试
              ↓
            ┌─ 测试失败 → 把报错贴给 AI → 修复
            │
            └─ 测试通过 → 提交代码
Step 1: Describe Requirements
Tell Claude Code what you want in natural language.
There's no need to write code or mention technical details. Just clearly state "what to do".
A simple example of a requirement description:
帮我创建一个 Python Flask 项目,有一个 /api/tasks 接口,
支持 GET 获取任务列表和 POST 创建新任务,
任务数据用 JSON 文件存储。
After receiving it, Claude Code will plan the file structure, generate code, install dependencies, and run tests on its own.
Step 2: Review the Diff
After generating code, Claude Code will display all changes (Diff) for you to review.
This is the most important step in Vibe Coding——you must understand what the AI changed.
When reviewing, focus on:
| Check item | What to look at specifically |
|---|---|
| Logical correctness | Whether conditional logic is reasonable and edge cases are handled |
| Security | Whether there are security vulnerabilities such as SQL injection and XSS |
| Data flow | Whether data input, processing, and output meet expectations |
| Naming conventions | Whether variable names and function names are clear and easy to understand |
| Redundant code | Whether there is unnecessary duplication or unused imports |
Reviewing is not about nitpicking, but ensuring you understand what every line of code does. If you don't understand a piece of code, just ask Claude Code: "What does this code mean? Why was it written this way?"
Step 3: Iterate and Modify
After identifying issues during review, describe the changes you want in natural language.
Examples of common iteration commands:
把 JSON 文件存储改成 SQLite,用 SQLAlchemy 做 ORM。
给 POST 接口加个验证:title 必填,不能为空字符串。
报错了,看一下:
Traceback (most recent call last):
  File "app.py", line 42, in create_task
    db.session.add(task)
AttributeError: 'NoneType' object has no attribute 'session'
After each iteration, Claude Code will regenerate the code and show the Diff, and you review again until you are satisfied.
Step 4: Deliver
Once all features meet expectations and tests pass, commit the code.
Claude Code will help you write the commit message and commit it:
$ git log --oneline
a1b2c3d feat: add task CRUD API with SQLite storage
Hands-on Demo: Building a Todo App from Scratch with Claude Code
Below, we use a complete practical case to demonstrate the entire Vibe Coding workflow.
We will use Claude Code to build a Todo app from scratch, including a frontend page and backend API.
Project Goal
| Feature | Description |
|---|---|
| Add task | Enter the task title and add it to the list |
| Complete task | Click the checkbox to mark the task as completed |
| Delete task | Delete unnecessary tasks |
| Filter | Filter by All / In Progress / Completed |
| Persistence | Data is saved to SQLite and is not lost on refresh |
Step 1: Initialize the Project
Create the project directory in the terminal and start Claude Code:
$ mkdir vibe-todo && cd vibe-todo
$ claude
Then describe your requirements to Claude Code:
帮我创建一个 Todo 应用,要求:
1. 后端用 Python Flask + SQLAlchemy + SQLite
2. 前端用纯 HTML/CSS/JS,风格简约现代
3. 支持添加、完成、删除、筛选任务
4. 所有 API 返回 JSON,前端用 fetch 调用
5. 代码注释用中文
Step 2: What Claude Code Did
After receiving the requirements, Claude Code automatically completed the following steps:
First, it created the project structure:
vibe-todo/
├── app.py              # Flask 主应用
├── models.py           # 数据库模型
├── requirements.txt    # 依赖清单
├── static/
│   ├── style.css       # 样式文件
│   └── script.js       # 前端逻辑
└── templates/
    └── index.html      # 页面模板
Then it generated the backend code. Here are the core contents of app.py:
Example
# Flask main application, defining API routes and page entry
from flask import Flask, render_template, request, jsonify
from models import db, Task
app = Flask(__name__)
# Configure SQLite database path
app.config['SQLALCHEMY_DATABASE_URI'] = 'sqlite:///todo.db'
app.config['SQLALCHEMY_TRACK_MODIFICATIONS'] = False
# Initialize database extensions
db.init_app(app)
# Automatically create table structure on application startup
with app.app_context():
db.create_all()
@app.route('/')
def index():
"""Return the main page"""
return render_template('index.html')
@app.route('/api/tasks', methods=['GET'])
def get_tasks():
"""Get all task lists, support filtering by status"""
# Get the filter condition from the query parameter, defaulting to 'all'
status = request.args.get('status', 'all')
# Filter tasks based on status
if status == 'completed':
tasks = Task.query.filter_by(completed=True).all()
elif status == 'active':
tasks = Task.query.filter_by(completed=False).all()
else:
tasks = Task.query.all()
# Convert task objects to a list of dictionaries for easy JSON serialization
return jsonify([t.to_dict() for t in tasks])
@app.route('/api/tasks', methods=['POST'])
def create_task():
"""Create a new task"""
data = request.get_json()
# Validate the required field 'title'
title = data.get('title', '').strip()
if not title:
return jsonify({'error': 'The task title cannot be empty'}), 400
# Create a task object and save it to the database
task = Task(title=title)
db.session.add(task)
db.session.commit()
return jsonify(task.to_dict()), 201
@app.route('/api/tasks/<int:task_id>', methods=['PUT'])
def update_task(task_id):
"""Update task status (complete/incomplete)"""
task = Task.query.get_or_404(task_id)
data = request.get_json()
# If the request contains the 'completed' field, update the status
if 'completed' in data:
task.completed = data['completed']
db.session.commit()
return jsonify(task.to_dict())
@app.route('/api/tasks/<int:task_id>', methods=['DELETE'])
def delete_task(task_id):
"""Delete a specified task"""
task = Task.query.get_or_404(task_id)
db.session.delete(task)
db.session.commit()
return jsonify({'message': 'Deleted successfully'}), 200
if __name__ == '__main__':
app.run(debug=True)
There is also the database model models.py:
Example
# Database model definitions, using SQLAlchemy ORM
from flask_sqlalchemy import SQLAlchemy
from datetime import datetime
# Create database instance, initialized later in app.py
db = SQLAlchemy()
class Task(db.Model):
"""Task model, corresponding to the tasks table in the database"""
__tablename__ = 'tasks'
# Primary key, auto-increment integer
id = db.Column(db.Integer, primary_key=True)
# Task title, required, cannot be empty
title = db.Column(db.String(200), nullable=False)
# Completion status, defaults to False
completed = db.Column(db.Boolean, default=False)
# Creation time, automatically recorded
created_at = db.Column(db.DateTime, default=datetime.utcnow)
def to_dict(self):
"""Convert task object to dictionary for easy JSON serialization"""
return {
'id': self.id,
'title': self.title,
'completed': self.completed,
'created_at': self.created_at.isoformat()
}
Step 3: Review the Code
After Claude Code shows the Diff, you review it line by line.
You might find some issues and suggest changes.
For example, you notice the API routes don't have a unified prefix, and suggest a change:
把所有 API 路由加上 /api/v1 前缀,方便以后版本管理。
Claude Code will automatically update all routes, and after your review it's approved.
Step 4: Run Tests
After the review passes, ask Claude Code to start the application and test it:
$ python app.py
 * Running on http://127.0.0.1:5000
Open a browser and visit http://127.0.0.1:5000 to see the complete Todo app interface.
Test the add task feature:
$ curl -X POST http://127.0.0.1:5000/api/v1/tasks \
  -H "Content-Type: application/json" \
  -d '{"title": "学习 Vibe Coding"}'
Returned result:
{
  "completed": false,
  "created_at": "2026-06-24T10:30:00",
  "id": 1,
  "title": "学习 Vibe Coding"
}
Step 5: Commit the Code
After all features are verified, commit the code:
$ git add .
$ git commit -m "feat: 完成 Todo 应用基础功能"
Throughout this hands-on process, you didn't write a single line of code manually. What you did was: describe requirements, review Diff, describe changes, run tests, and commit code. This is the core experience of Vibe Coding.
Tips for Writing Good Prompts
The effectiveness of Vibe Coding largely depends on how you describe the requirements.
Good prompts can enable AI to generate code close to expectations in one go, reducing the number of iterations.
The Four-Element Model
A high-quality prompt should include four elements:
| Element | Description | Example |
|---|---|---|
| What to do | Clearly describe the functionality to be implemented | "Create a user registration API" |
| What to use | Specify the tech stack and tools | "Use Flask + SQLAlchemy + SQLite" |
| How to constrain | Provide constraints and boundaries | "Email is required and needs format validation" |
| Expected format | Describe output preferences | "Code comments in Chinese, add docstring to every function" |
Good Prompts vs Bad Prompts
| Bad prompt | Good prompts |
|---|---|
| Help me create a login feature. | Help me implement a login endpoint using Flask that receives email and password, encrypts the password with bcrypt, and returns a token using JWT, with a token validity of 24 hours. Return specific error messages on login failure. |
| This button is too ugly. | Change this submit button to have 8px rounded corners, blue background #2563eb, white text, darken the color by 10% on hover, and add a 0.2s transition animation. |
| There's an error, help me fix it. | When running python app.py, I get an error: AttributeError: 'NoneType' object has no attribute 'session'. It looks like a database initialization issue. Help me troubleshoot and fix it. |
Core principle of prompts: the more specific, the better the results. Vague requirements only produce vague code.
Common Misconceptions and Cautions
Misconception 1: AI Can Replace All Programming Knowledge
Vibe Coding lowers the programming barrier, but does not eliminate it.
We still need to understand basic concepts: variables, functions, APIs, databases, HTTP, async, etc. Otherwise, we can't judge whether AI-generated code is correct, nor can we describe requirements effectively.
Misconception 2: Describing All Features at Once
Don't copy the entire product PRD document to AI, expecting it to generate perfect code in one go.
AI's attention has a limit; the more requirements, the more errors.
A more effective approach is: core feature → validate → add feature → validate → continue iterating.
Misconception 3: Not Reading AI-Generated Code
Some developers merge AI-generated code directly without review, which is very dangerous.
AI may introduce security vulnerabilities, performance issues, or completely unreasonable architecture.
We at least need to quickly review the key logic to ensure there are no obvious issues.
Notes
- Don't write sensitive information (API keys, database passwords) directly in the conversation — first use environment variable placeholders in code, then fill them in manually.
- Commit to Git after every key change, making it easy to roll back when problems arise.
- AI-generated code may not conform to your team's coding standards, so manual adjustments are needed.
- For code that requires high reliability (payments, authentication, data processing), be sure to manually review it after AI generation.
Scenarios Suitable for Vibe Coding
Vibe Coding is not a silver bullet; knowing which scenarios fit it can help you allocate your energy better.
| Scenario | Suitability | Description |
|---|---|---|
| Prototype/MVP development | Extremely high | Quickly validate ideas, get a usable demo in a few hours |
| CRUD APIs | Extremely high | Clear repetitive patterns, AI completion quality is high |
| Frontend pages/components | Very high | HTML/CSS/React components, AI is very good at these |
| Scripts/automation tools | Very high | One-off scripts, data processing, file operations |
| Unit test writing | Very high | Generate test cases based on function signatures |
| Complex algorithm implementation | Medium | Requires clear algorithm description, and correctness needs manual verification |
| Low-level system optimization | Relatively low | Involves memory layout, cache lines, hardware characteristics; AI is prone to subtle errors |
| Code with high security requirements | Caution | Encryption, authentication, payment code; AI-generated output must be reviewed by experts |