Vue3 Tailwind CSS
Using Tailwind CSS in a Vue project is a very popular choice because it provides a utility-first approach to writing CSS, allowing you to apply styles directly in class names. This approach makes writing styles more concise and intuitive.
Tailwind CSS Tutorial:https://www.example.com/tailwindcss/tailwindcss-tutorial.html
Tailwind CSS Official Website:https://tailwindcss.com/
GitHub address:https://github.com/tailwindlabs/tailwindcss
Tailwind CSS is a powerful CSS framework that makes style writing more concise and modular through a utility-first approach. Unlike traditional class-based CSS frameworks, Tailwind provides a set of low-level utility classes that can be used directly on HTML elements to quickly and flexibly build custom designs.
The following is a complete introductory example using Vue 3 and Tailwind CSS, showing how to integrate Tailwind CSS with Vue 3 and use its features to build responsive interfaces.
Install Vue 3 and Tailwind CSS
First, make sure you have installed Vue 3 and Tailwind CSS.
Install Vue 3: In the terminal, executenpm create vue@latestcommand to create a new Vue 3 project:
npm create vue@latest
In the output window, enter the project name, then press Enter all the way:
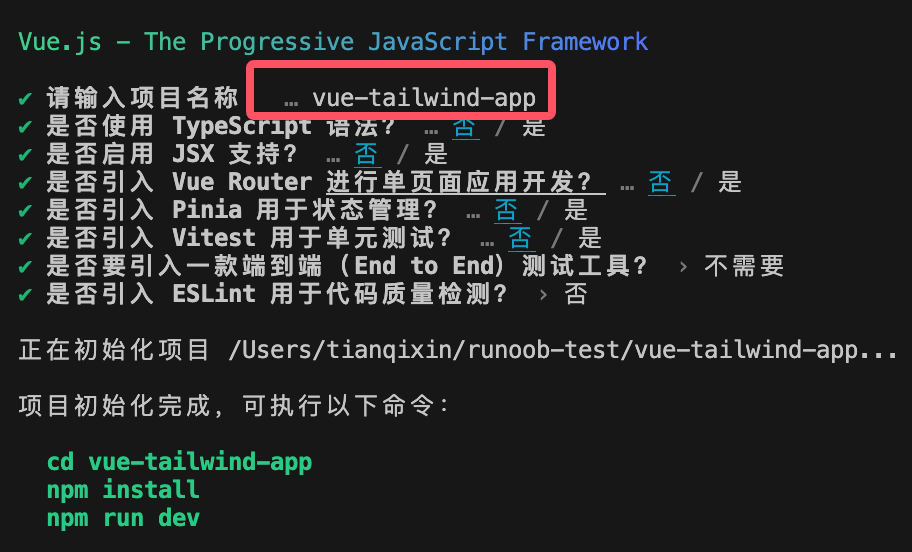
Executing the above command requires setting some initialization options; use the arrow keys to select.
Enter the initialized directory vue-tailwind-app and install dependencies:
cd vue-tailwind-app
npm install
Install Tailwind CSS: Install Tailwind CSS and related dependencies:
npm install -D tailwindcss@latest postcss@latest autoprefixer@latest
npx tailwindcss init -p
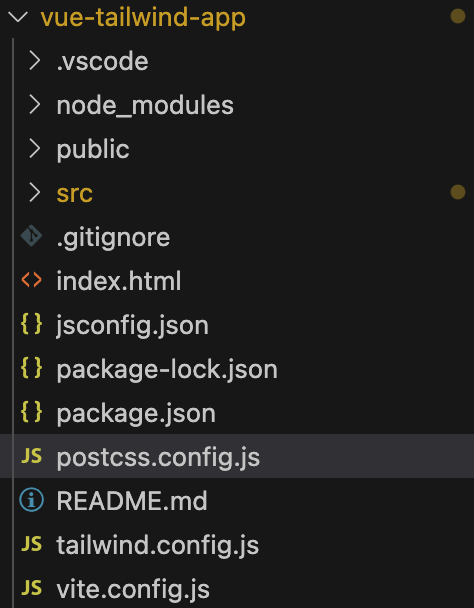
After creation is complete, the directory structure is as follows:
Configure Tailwind CSS: Open the tailwind.config.js file and modify it to:
Example
export default {
content: [
"./index.html",
"./src/**/*.{vue,js,ts,jsx,tsx}",
],
theme: {
extend: {},
},
plugins: [],
}
Add Tailwind directives: Create a styles.css file in the src/assets directory and add the following content:
/* src/assets/styles.css */
@tailwind base;
@tailwind components;
@tailwind utilities;
Then import this file in src/assets/main.js:
import './assets/styles.css
Create Vue components and styles
Now, you can start writing your Vue 3 components and use Tailwind CSS to beautify the page.
App.vue
App.vue is the main component of the application; it contains the basic usage of Vue 3 and Tailwind CSS.
Example
<div class="min-h-screen bg-gray-50 flex items-center justify-center p-6">
<div class="w-full max-w-md bg-white p-8 rounded-xl shadow-lg">
<h1 class="text-2xl font-semibold text-center text-gray-800 mb-6">
Vue 3 + Tailwind CSS Example
</h1>
<!-- Input box and button -->
<div class="mb-4">
<label for="name" class="block text-sm font-medium text-gray-700">Username</label>
<input
type="text"
id="name"
v-model="username"
placeholder="Please enter username"
class="mt-2 w-full px-4 py-2 border border-gray-300 rounded-md shadow-sm focus:outline-none focus:ring-2 focus:ring-blue-500"
/>
</div>
<button
@click="submitForm"
class="w-full bg-blue-500 text-white py-2 rounded-md shadow-md hover:bg-blue-600 transition duration-200"
>
Submit
</button>
<!-- Display username -->
<p v-if="submitted" class="mt-4 text-center text-gray-600">Welcome, {{ username }}!</p>
</div>
</div>
</template>
<script>
export default {
data() {
return {
username: '',
submitted: false
};
},
methods: {
submitForm() {
if (this.username) {
this.submitted = true;
} else {
alert('Please enter username');
}
}
}
};
</script>
<style scoped>
/* The styles here are custom, if needed */
</style>
In addition, we can set our own port in the vite.config.js file. For example, after setting the port as follows:3000:
Example
import { defineConfig } from 'vite'
import vue from '@vitejs/plugin-vue'
import vueDevTools from 'vite-plugin-vue-devtools'
// https://vite.dev/config/
export default defineConfig({
plugins: [
vue(),
vueDevTools(),
],
resolve: {
alias: {
'@': fileURLToPath(new URL('./src', import.meta.url))
},
},
server: {
port: 3000, // Our own specified port number
},
})
After the settings are completed, execute the followingnpm run devThe command output is as follows:
# npm run dev

> [email protected] dev
> vite


  VITE v6.0.3  ready in 333 ms

  ➜  Local:   http://localhost:3000/
  ➜  Network: use --host to expose
  ➜  Vue DevTools: Open http://localhost:3000/__devtools__/ as a separate window
  ➜  Vue DevTools: Press Option(⌥)+Shift(⇧)+D in App to toggle the Vue DevTools

  ➜  press h + enter to show help
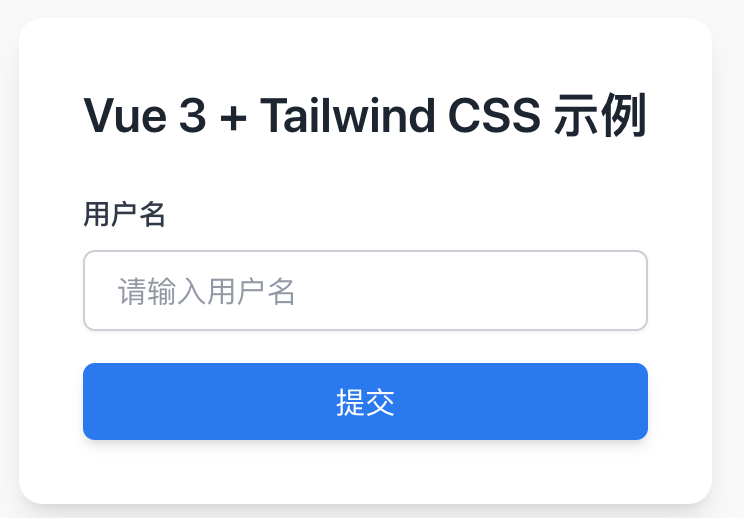
Visithttp://localhost:3000/, and it displays as follows:
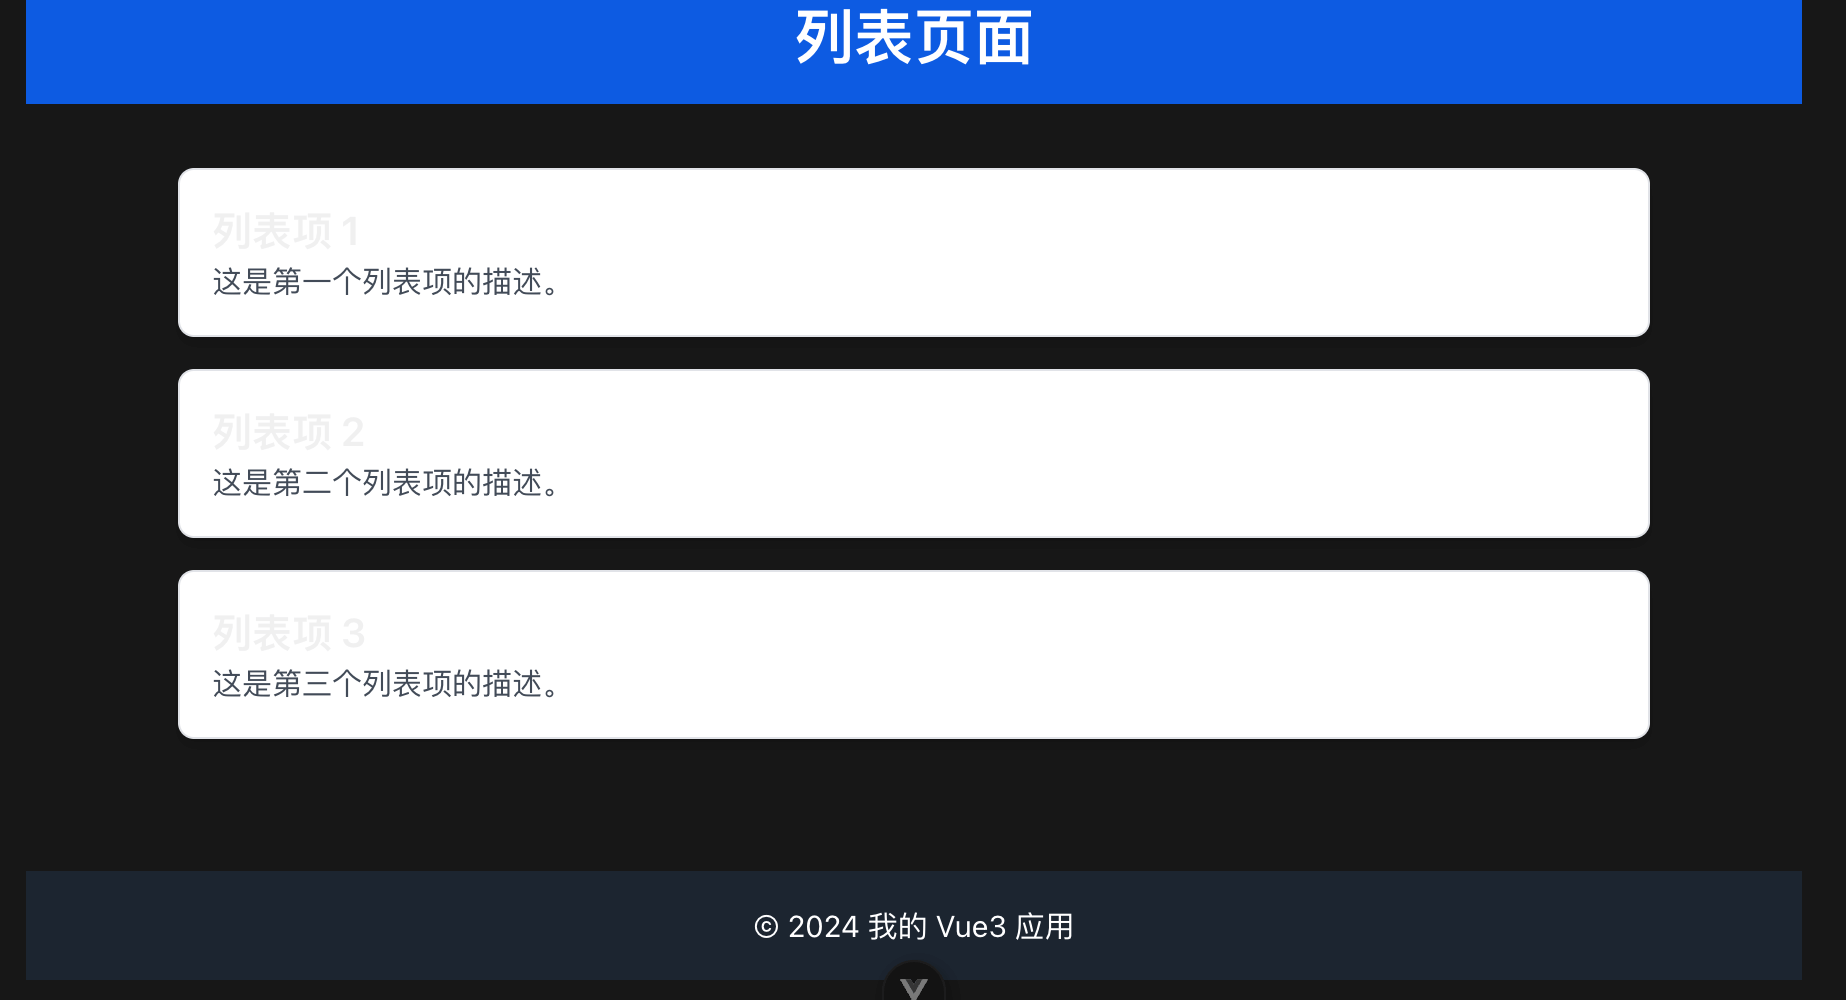
Next, let's try to create a list. Modify the App.vue file, the code is as follows:
Example
<div class="min-h-screen flex flex-col">
<!-- Header -->
<header class="bg-blue-600 text-white py-4">
<div class="container mx-auto text-center">
<h1 class="text-3xl font-semibold">List page</h1>
</div>
</header>
<!-- List -->
<main class="flex-grow py-8">
<div class="container mx-auto px-4">
<ul class="space-y-4">
<li v-for="(item, index) in items" :key="index" class="p-4 bg-white border rounded-lg shadow-md">
<h2 class="text-xl font-semibold">{{ item.title }}</h2>
<p class="text-gray-600">{{ item.description }}</p>
</li>
</ul>
</div>
</main>
<!-- Footer -->
<footer class="bg-gray-800 text-white py-4">
<div class="container mx-auto text-center">
<p>©2024 My Vue3 App</p>
</div>
</footer>
</div>
</template>
<script>
export default {
name: "ListPage",
data() {
return {
items: [
{ title: "List Item 1", description: "This is the description of the first list item." },
{ title: "List Item 2", description: "This is the description of the second list item." },
{ title: "List Item 3", description: "This is the description of the third list item." },
// More list items
],
};
},
};
</script>
<style scoped>
/* Add some extra styles (if needed) */
</style>
Code analysis:
- Header (
header): Usebg-blue-600set the background color,text-whiteset the text color,py-4set vertical padding,container mx-autoused to set a fixed width and center it. - List (
main): Useflex-growto make the list section fill the remaining space,py-8add vertical padding. Each list item usesp-4,bg-white,border,rounded-lg,shadow-mdand other Tailwind classes to set the appearance. - Footer (
footer): Usebg-gray-800set a dark background,text-whiteset white text,py-4set padding.
Visithttp://localhost:3000/, and it displays as follows: