Vue3 Tailwind CSS
Vue プロジェクトで Tailwind CSS を使用することは非常に人気のある選択肢です。ユーティリティファーストのアプローチで CSS を記述でき、クラス名に直接スタイルを適用できるため、スタイルの記述がより簡潔で直感的になります。
Tailwind CSS チュートリアル:https://www.example.com/tailwindcss/tailwindcss-tutorial.html
Tailwind CSS 公式サイト:https://tailwindcss.com/
Github アドレス:https://github.com/tailwindlabs/tailwindcss
Tailwind CSS は強力な CSS フレームワークで、ユーティリティファーストのアプローチによりスタイルの記述をより簡潔かつモジュール化します。従来のクラスベースの CSS フレームワークとは異なり、Tailwind は低レベルのユーティリティクラス群を提供しており、これらを HTML 要素に直接使用することで、カスタムデザインを迅速かつ柔軟に構築できます。
以下は、Vue 3 と Tailwind CSS を使用した完全な入門例です。Tailwind CSS を Vue 3 と統合し、その機能を使用してレスポンシブインターフェースを構築する方法を示しています。
Vue 3 と Tailwind CSS のインストール
まず、Vue 3 と Tailwind CSS がインストールされていることを確認してください。
Vue 3 のインストール:ターミナルで実行npm create vue@latestコマンドで新しい Vue 3 プロジェクトを作成します:
npm create vue@latest
出力ウィンドウでプロジェクト名を入力し、そのまま Enter キーを押し続けます:
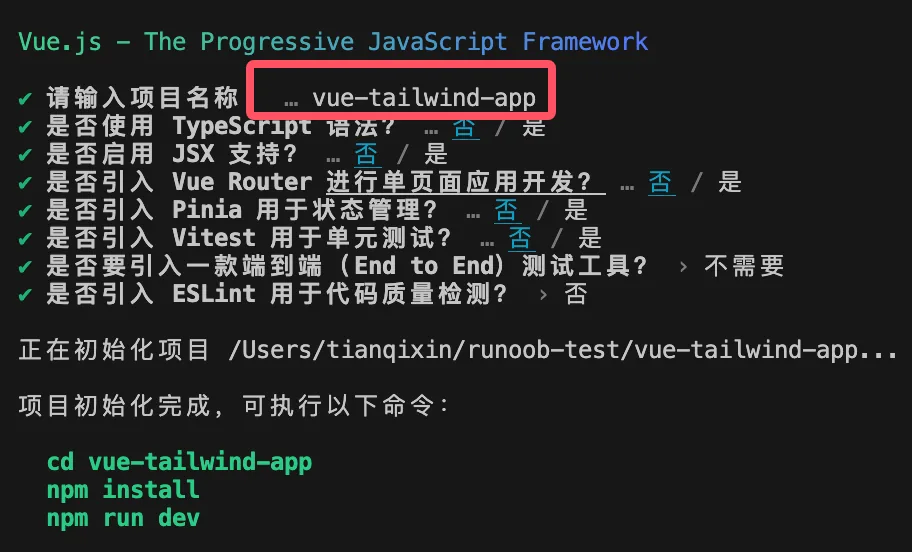
上記のコマンドを実行するには、いくつかの初期化オプションを設定する必要があります。方向キーで選択してください。
初期化されたディレクトリ vue-tailwind-app に移動し、依存関係をインストールします:
cd vue-tailwind-app
npm install
Tailwind CSS のインストール: Tailwind CSS と関連する依存関係をインストールします:
npm install -D tailwindcss@latest postcss@latest autoprefixer@latest
npx tailwindcss init -p
作成が完了すると、ディレクトリ構造は次のようになります:
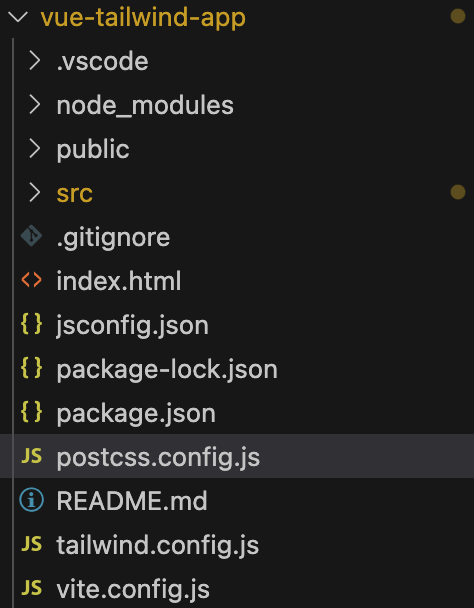
Tailwind CSS の設定: tailwind.config.js ファイルを開いて、次のように変更します:
実例
export default {
content: [
"./index.html",
"./src/**/*.{vue,js,ts,jsx,tsx}",
],
theme: {
extend: {},
},
plugins: [],
}
Tailwind ディレクティブの追加: src/assets ディレクトリに styles.css ファイルを作成し、次の内容を追加します:
/* src/assets/styles.css */
@tailwind base;
@tailwind components;
@tailwind utilities;
次に、src/assets/main.js でこのファイルをインポートします:
import './assets/styles.css
Vue コンポーネントとスタイルの作成
これで、Vue 3 コンポーネントの作成を開始し、Tailwind CSS を使用してページを装飾できます。
App.vue
App.vue はアプリケーションの主要コンポーネントであり、Vue 3 と Tailwind CSS の基本的な使い方が含まれています。
実例
<div class="min-h-screen bg-gray-50 flex items-center justify-center p-6">
<div class="w-full max-w-md bg-white p-8 rounded-xl shadow-lg">
<h1 class="text-2xl font-semibold text-center text-gray-800 mb-6">
Vue 3 + Tailwind CSS の例
</h1>
<!-- 入力フィールドとボタン -->
<div class="mb-4">
<label for="name" class="block text-sm font-medium text-gray-700">ユーザー名</label>
<input
type="text"
id="name"
v-model="username"
placeholder="ユーザー名を入力してください"
class="mt-2 w-full px-4 py-2 border border-gray-300 rounded-md shadow-sm focus:outline-none focus:ring-2 focus:ring-blue-500"
/>
</div>
<button
@click="submitForm"
class="w-full bg-blue-500 text-white py-2 rounded-md shadow-md hover:bg-blue-600 transition duration-200"
>
送信
</button>
<!-- ユーザー名を表示 -->
<p v-if="submitted" class="mt-4 text-center text-gray-600">ようこそ、{{ username }}!</p>
</div>
</div>
</template>
<script>
export default {
data() {
return {
username: '',
submitted: false
};
},
methods: {
submitForm() {
if (this.username) {
this.submitted = true;
} else {
alert('ユーザー名を入力してください');
}
}
}
};
</script>
<style scoped>
/* ここのスタイルはカスタムです。必要に応じて */
</style>
さらに、vite.config.js ファイルで独自のポートを設定できます。たとえば、次のようにポートを設定すると、3000:
実例
import { defineConfig } from 'vite'
import vue from '@vitejs/plugin-vue'
import vueDevTools from 'vite-plugin-vue-devtools'
// https://vite.dev/config/
export default defineConfig({
plugins: [
vue(),
vueDevTools(),
],
resolve: {
alias: {
'@': fileURLToPath(new URL('./src', import.meta.url))
},
},
server: {
port: 3000, // 自分で設定したポート番号
},
})
設定が完了したら、次を実行します:npm run devコマンドの出力内容は次のとおりです:
# npm run dev

> vue-tailwind-app@0.0.0 dev
> vite


  VITE v6.0.3  ready in 333 ms

  ➜  Local:   http://localhost:3000/
  ➜  Network: use --host to expose
  ➜  Vue DevTools: Open http://localhost:3000/__devtools__/ as a separate window
  ➜  Vue DevTools: Press Option(⌥)+Shift(⇧)+D in App to toggle the Vue DevTools

  ➜  press h + enter to show help
アクセスするhttp://localhost:3000/すると、次のように表示されます:
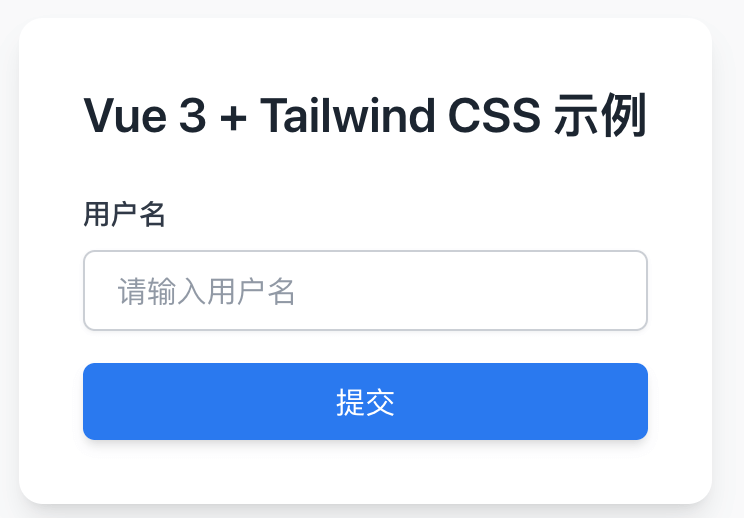
次に、リストを作成してみましょう。App.vue ファイルを次のように変更します:
実例
<div class="min-h-screen flex flex-col">
<!-- ヘッダー -->
<header class="bg-blue-600 text-white py-4">
<div class="container mx-auto text-center">
<h1 class="text-3xl font-semibold">リストページ</h1>
</div>
</header>
<!-- リスト -->
<main class="flex-grow py-8">
<div class="container mx-auto px-4">
<ul class="space-y-4">
<li v-for="(item, index) in items" :key="index" class="p-4 bg-white border rounded-lg shadow-md">
<h2 class="text-xl font-semibold">{{ item.title }}</h2>
<p class="text-gray-600">{{ item.description }}</p>
</li>
</ul>
</div>
</main>
<!-- フッター -->
<footer class="bg-gray-800 text-white py-4">
<div class="container mx-auto text-center">
<p>©2024 私の Vue3 アプリ</p>
</div>
</footer>
</div>
</template>
<script>
export default {
name: "ListPage",
data() {
return {
items: [
{ title: "リスト項目 1", description: "これは最初のリスト項目の説明です。" },
{ title: "リスト項目 2", description: "これは 2 番目のリスト項目の説明です。" },
{ title: "リスト項目 3", description: "これは 3 番目のリスト項目の説明です。" },
// その他のリスト項目
],
};
},
};
</script>
<style scoped>
/* 追加のスタイルをいくつか追加(必要に応じて) */
</style>
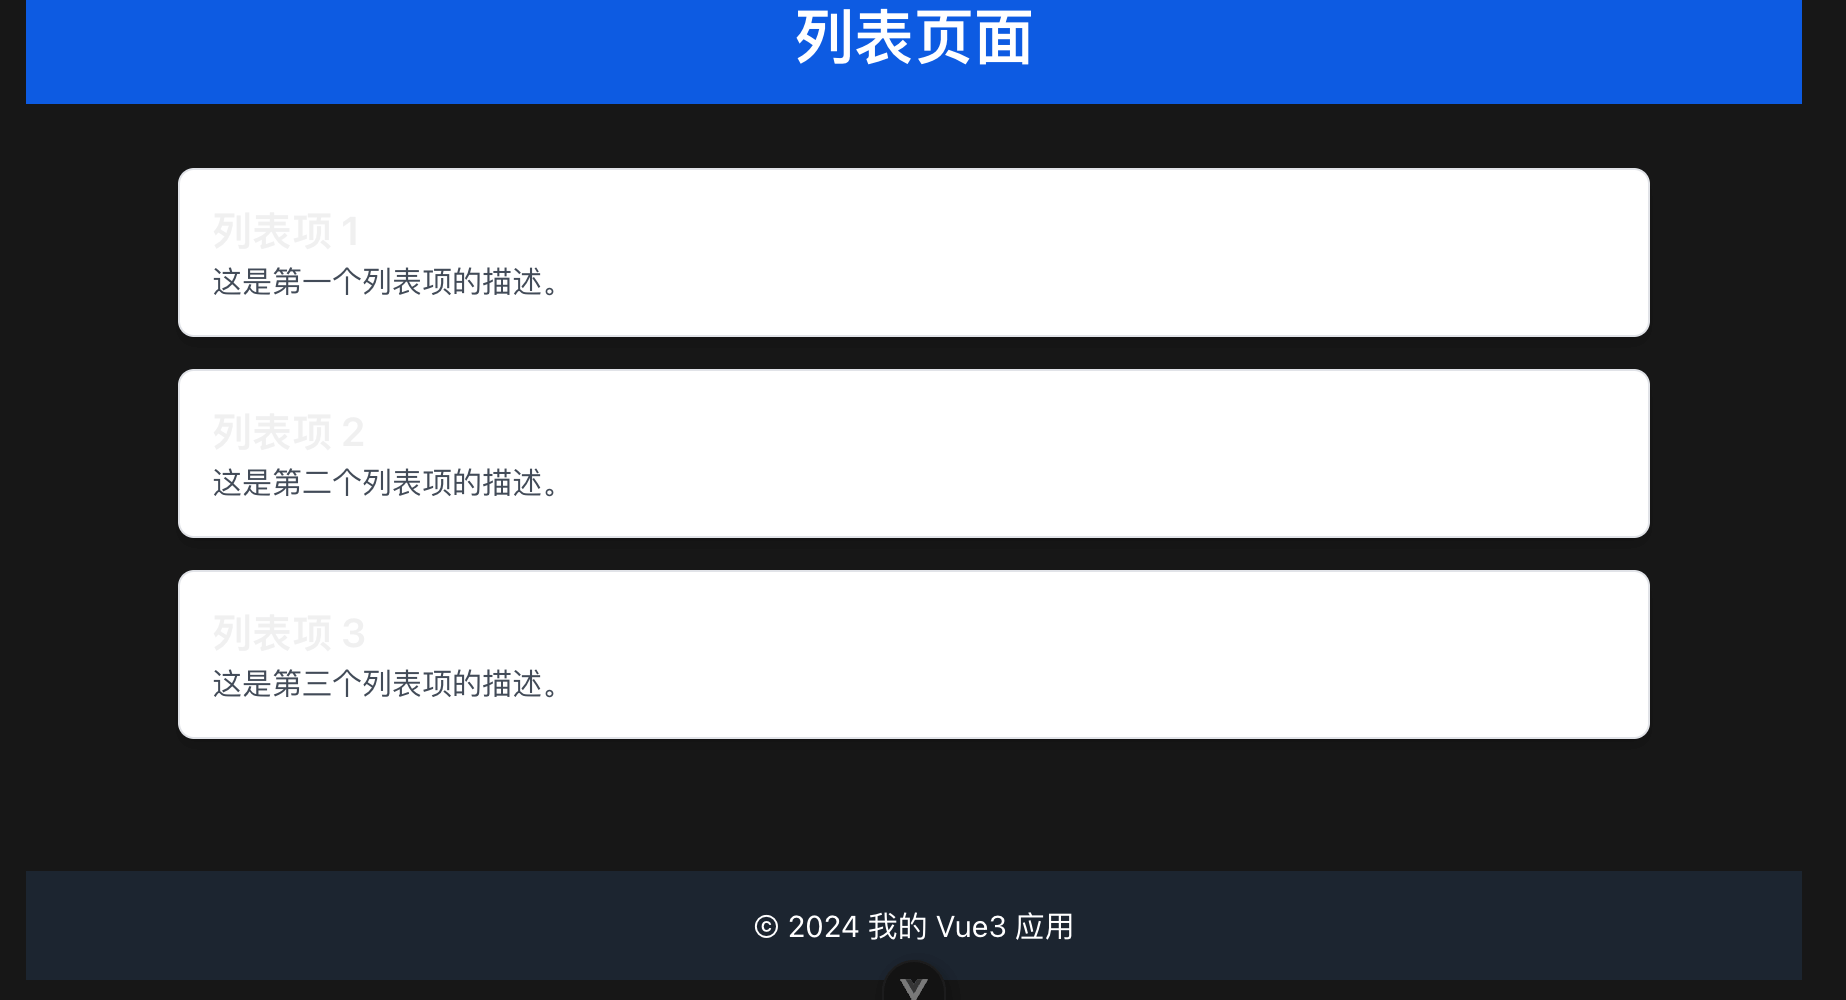
コード解析:
- ヘッダー (
header): 使用bg-blue-600背景色を設定し、text-whiteテキストの色を設定し、py-4上下のパディングを設定し、container mx-auto固定幅を設定して中央揃えにするために使用します。 - リスト (
main): 使用flex-growリスト部分が残りのスペースを埋めるように、py-8垂直方向のパディングを追加します。各リスト項目では、p-4,bg-white,border,rounded-lg,shadow-mdなどの Tailwind クラスを使用して外観を設定します。 - フッター (
footer): 使用bg-gray-800ダークな背景色を設定し、text-white白いテキストを設定し、py-4パディングを設定します。
アクセスするhttp://localhost:3000/すると、次のように表示されます: