LaTeX Document Structure and Typesetting
This chapter solves the "skeleton" problem of a document: how to arrange the title, how to divide the sections, how to generate the table of contents, and how to set page margins, headers, and footers.
The feature of these settings is: configure once, and the entire document takes effect automatically—this is exactly the core advantage of LaTeX for handling long documents.
Title, Author, and Date
Three steps: declare the information in the preamble, then call \maketitle in the body to render it.
Example: Title Block
\title{Thesis Title} % Title (required; must be defined to render the title block)
\author{Zhang San \\andLi Si} % Author; separate multiple authors with \and
\date{\today} % Date: \today automatically gives the current day; {} as an empty argument means it is not displayed
\begin{document}
\maketitle % Render the title block here (centered title, author, and date)
\end{document}
| Command | Purpose | Common Usage |
|---|---|---|
| \title{...} | Declare the title | \\ can be used in the title for a manual line break |
| \author{...} | Declare the author | Zhang San \and Li Si; \thanks can add a footnote to indicate the affiliation |
| \date{...} | Declare the date | \today for the current day; write a fixed date manually; {} to hide it |
| \maketitle | Render the title block | Place it at the beginning of the body |
Sectioning Commands and Automatic Numbering
Sections are the basic units of a structured document. LaTeX uses a set of commands to express the hierarchy, and all numbering is automatic.
| Command | Level | Applicable Document Classes |
|---|---|---|
| \part{...} | Part (level 0, independent numbering) | article / report / book |
| \chapter{...} | Chapter (level 1, starts on a new page) | report / book only |
| \section{...} | Section (level 1 in article) | All |
| \subsection{...} | Subsection (level 2) | All |
| \subsubsection{...} | Subsubsection (level 3) | All |
| \paragraph{...} | Titled paragraph (unnumbered) | All |
Two things best demonstrate the value of "automatic": first, when you insert a new section in the middle, the subsequent numbers are automatically shifted; second, adding an asterisk to a command (e.g., \section*{...}) means it is not numbered and is not included in the table of contents.
Example: Sections and Footnotes
\begin{document}
\section{Introduction}
This is the content of the introduction. All section numbers are generated automatically by LaTeX.
\subsection{Research Background}
This introduces the research background.\footnote{This is a footnote; its numbering and typesetting are both automatic.}。
\subsection{Research Significance}
This explains the research significance.
\section{Method}
\subsection{Data Collection}
\subsubsection{Sample Selection}
The hierarchical numbering goes down to the third level, subsubsection.
\subsection{Model Design}
\section{Conclusion}
\end{document}
Compiled output: note the automatically generated numbers 1, 1.1, 2.1.1, and the footnote at the bottom of the page:
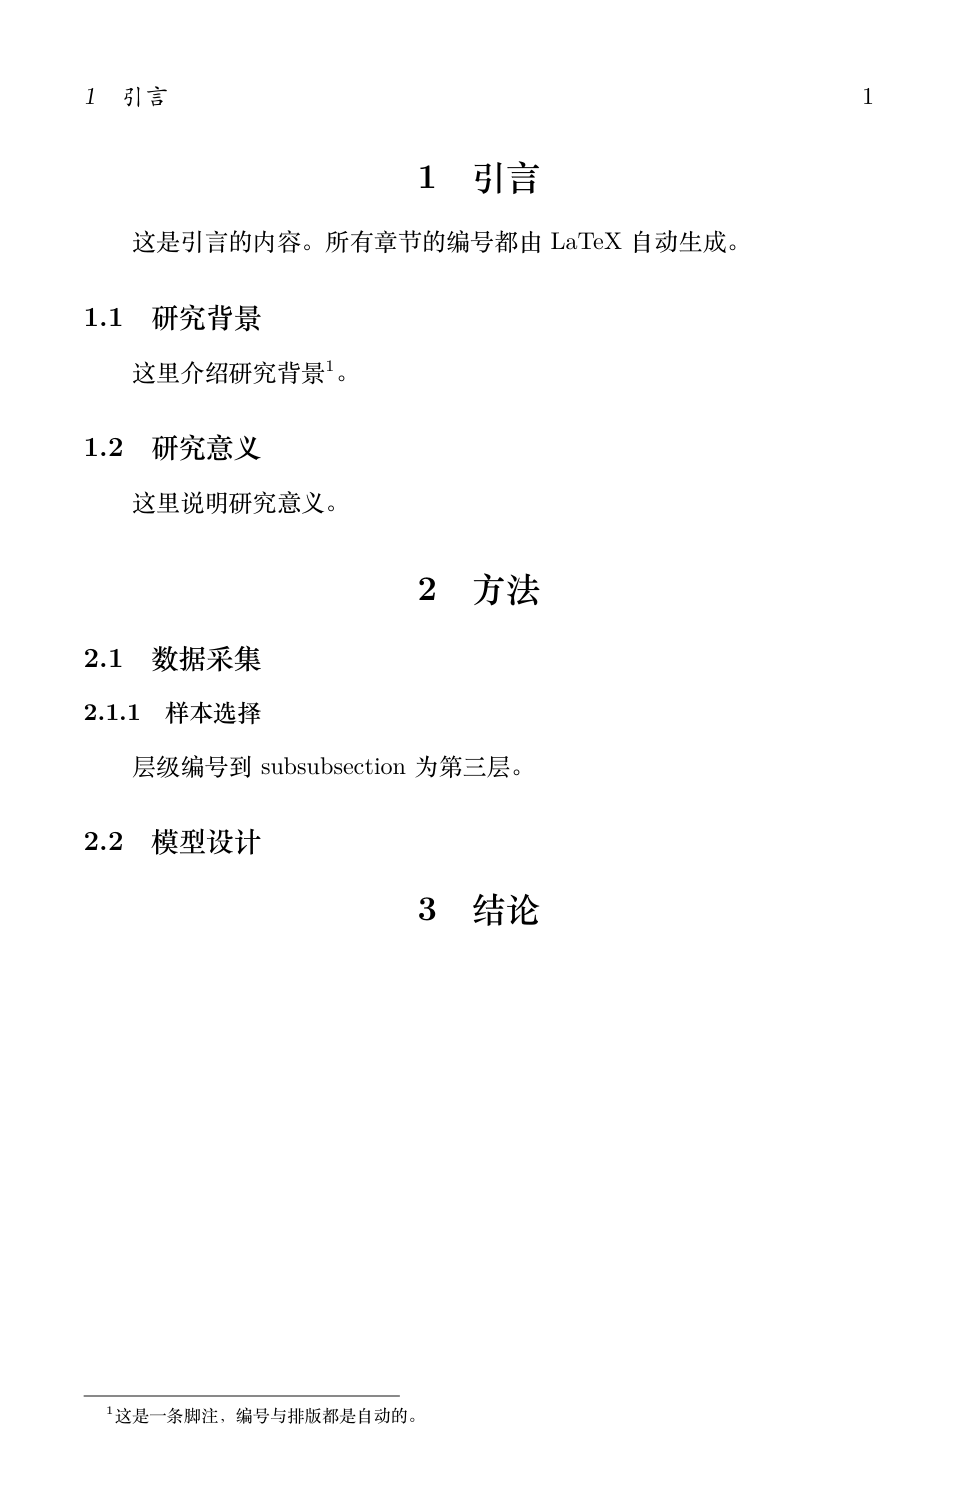
\footnote{footnote text} places a number at the current location and sets the content at the bottom of the current page; the numbering is continuous throughout the document. Do not nest another \footnote inside a footnote—that is asking for trouble.
Table of Contents Generation
The table of contents requires only one command: \tableofcontents. It scans all the sectioning commands in the document and automatically generates a table of contents with page numbers.
Example: Generating a Table of Contents
\begin{document}
\tableofcontents % Generate the table of contents here
\newpage % The table of contents occupies its own page; the body starts on the next page
\section{Introduction}
Introduction content.
\subsection{Research Background}
This introduces the research background.
\section{Method}
Method content.
\section{Conclusion}
Conclusion content.
\end{document}
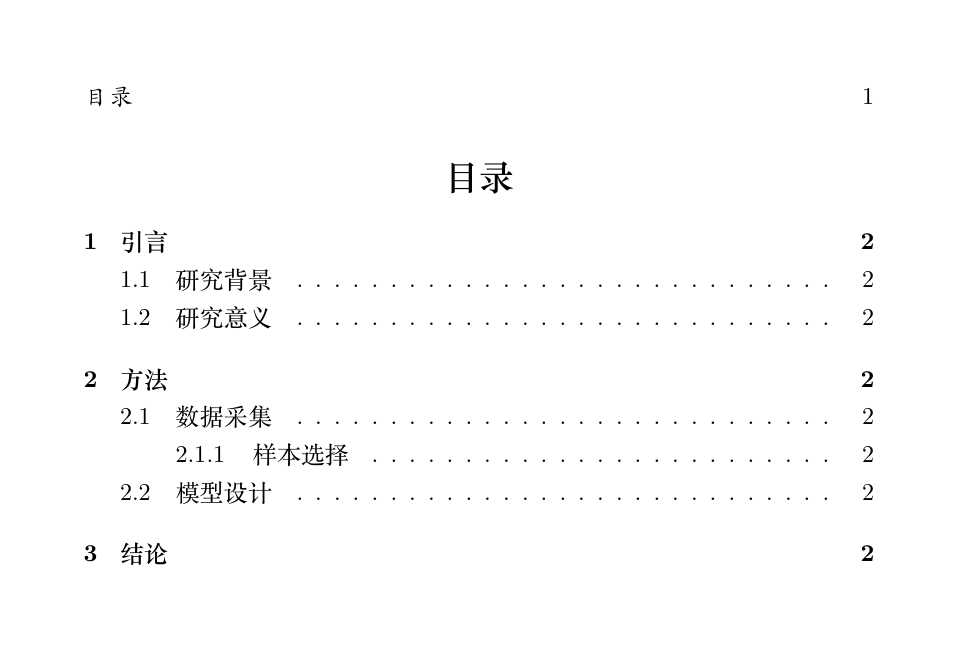
The page numbers in the table of contents are passed through the .aux file, so after adding a section the table of contents will not be correct immediately; just compile again (the same old issue mentioned in Part 2).
To control the depth of the table of contents, set it in the preamble: \setcounter{tocdepth}{2} means only entries down to subsection are included; combined with \setcounter{secnumdepth}{2}, you can also control down to which level sections are numbered in the body.
Page Setup: The geometry Package
Page parameters such as margins and paper size are uniformly managed by the geometry package.
Example: Common Page Settings
\usepackage[a4paper, margin=2.5cm]{geometry}
% Method 2: load it first, then set everything centrally with \geometry (clearer when there are many options)
\usepackage{geometry}
\geometry{
a4paper, % Paper: A4
margin=2.5cm, % Uniform 2.5 cm margin on all four sides
includefoot % Include the footer in the text area so it does not "hang" outside the margin
}
Both methods produce exactly the same effect; choose either one. Note that package options are always written in square brackets [ ]—putting options inside curly braces { } is a common beginner mistake.
| Option | Meaning | Example |
|---|---|---|
| margin | Uniform margin on all four sides | margin=2.5cm |
| top / bottom / left / right | Control a single side individually | left=3cm, right=3cm |
| a4paper / a5paper / letterpaper | Paper size | a4paper |
| landscape | Landscape page | Landscape slides or wide tables |
| textwidth / textheight | Directly specify the width and height of the text area | textwidth=15cm |
Domestic theses commonly use "even-odd symmetric binding": adding bindingoffset=1cm reserves an extra 1 cm for the binding edge.
Headers and Footers: The fancyhdr Package
fancyhdr divides both the header and the footer into three slots—left, center, and right—and you can fill in whatever you want.
| Command | Slot Controlled |
|---|---|
| \fancyhead[L]{...}(\lhead) | Header left |
| \fancyhead[C]{...}(\chead) | Header center |
| \fancyhead[R]{...}(\rhead) | Header right |
| \fancyfoot[L]{...}(\lfoot) | Footer left |
| \fancyfoot[C]{...}(\cfoot) | Footer center |
| \fancyfoot[R]{...}(\rfoot) | Footer right |
Example: Classic Academic Headers and Footers
\usepackage[a4paper, margin=2.5cm]{geometry}
\usepackage{fancyhdr}
\pagestyle{fancy} % Enable the fancyhdr page style
\fancyhf{} % First clear all slots to avoid leftover default page numbers
\fancyhead[L]{\nouppercase\leftmark} % Header left: current level-1 section name
\fancyhead[R]{No.\thepagePage} % Header right: page number
\fancyfoot[C]{EXAMPLE LaTeX Tutorial} % Footer center: custom text
\renewcommand{\headrulewidth}{0.4pt} % Thickness of the rule below the header
\begin{document}
\section{Page Layout}
Body content...
\end{document}
Full-page result (header left shows "2 Page Layout", header right shows "Page 1"; footer center shows the custom text):
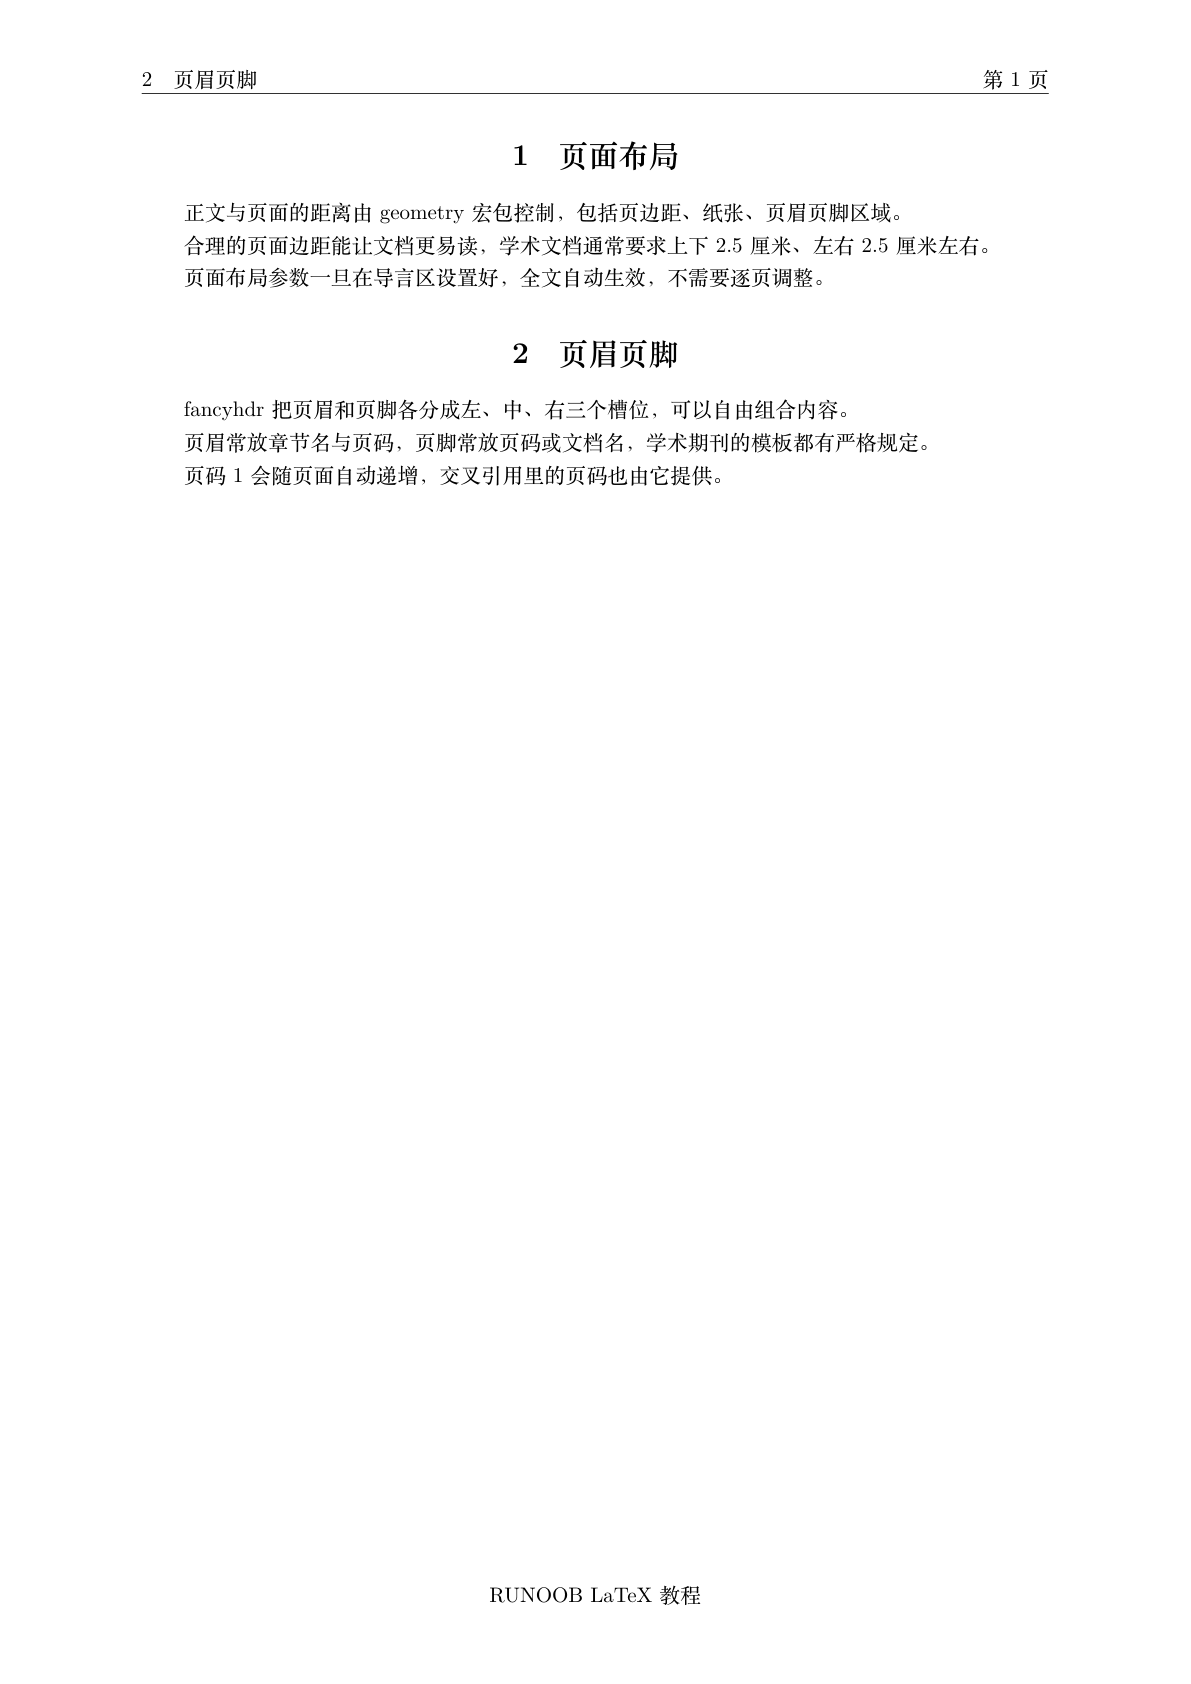
\leftmark and \rightmark are two "dynamic bookmarks". When typesetting each page, LaTeX automatically records the current section name, writes it into the corresponding bookmark, and the header updates accordingly.
Page Break and Line Break Control
Use \\ for a line break within a paragraph (Part 3); for page-level breaks, there are two commands.
| Command | Purpose | Usage Advice |
|---|---|---|
| \newpage | End the current page and continue on a new page | Use this for everyday page breaks |
| \clearpage | Break the page and first output all unprocessed floating figures and tables | Safer to use at the end of a chapter or at the end of the document |
| \linebreak | Force a line break here and justify both ends | Use sparingly; leave it to automatic line breaking |
| \pagebreak | Suggest a page break at this position (compare with \newpage to understand the difference) | Use sparingly |
Do not use manual \newpage frequently just to "align" pages—let LaTeX paginate automatically, so the document does not become completely misaligned when edited. Use manual page breaks only at structural breakpoints, such as after the table of contents or between chapters.
Summary
| Requirement | Command | Location |
|---|---|---|
| Title block | \title、\author、\date + \maketitle | Declare in the preamble, render in the body |
| Sections | \section / \subsection / \subsubsection | Body |
| Footnotes | \footnote{...} | Body |
| Table of contents | \tableofcontents | Body (usually immediately after \begin{document}) |
| Page margins | geometry package | Preamble |
| Headers and footers | fancyhdr package | Preamble |