Java Development Environment Configuration
In this chapter, we will introduce how to set up the Java development environment.
- Installing the development environment on Windows
- Installing the development environment on Linux
- Introduction to Java IDE
Installing Java on Windows
Download JDK
First, we need to download the Java Development Kit (JDK). Download address:https://www.oracle.com/java/technologies/downloads/, on the download page choose the corresponding version according to your system. This article uses Windows 64-bit system as an example:
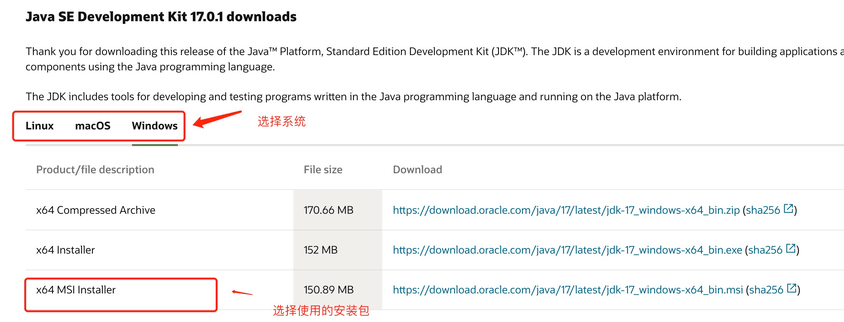
After downloading, follow the prompts to install the JDK. Also, installing the JDK will also install the JRE; just install them together.
Install JDK. During installation, you can customize the installation directory and other information. For example, we choose the installation directory asC:\Program Files (x86)\Java\jdk1.8.0_91。
Configure environment variables
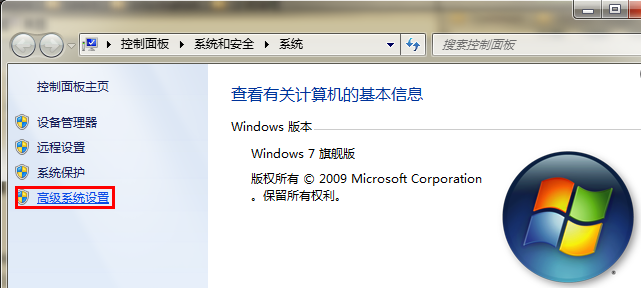
1. After installation, right-click "My Computer", click "Properties", select "Advanced system settings";
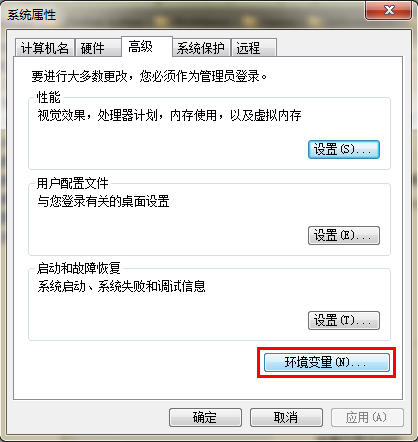
2. Select the "Advanced" tab, click "Environment Variables";
Then a screen as shown below will appear:
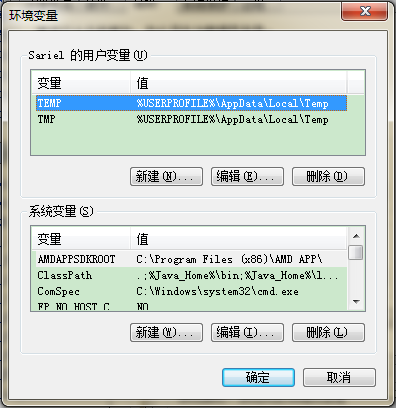
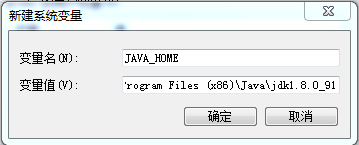
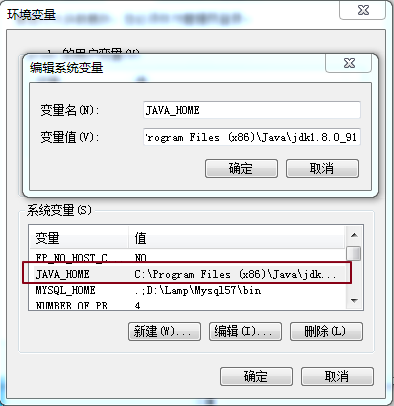
In "System variables", set 3 properties: JAVA_HOME, PATH, CLASSPATH (case doesn't matter). If they already exist, click "Edit"; if not, click "New".
Note:If you use JDK version 1.5 or above, you don't need to set the CLASSPATH environment variable; you can still compile and run Java programs normally.
The variable settings parameters are as follows:
- Variable name:JAVA_HOME
- Variable value:C:\Program Files (x86)\Java\jdk1.8.0_91// Configure according to your actual path
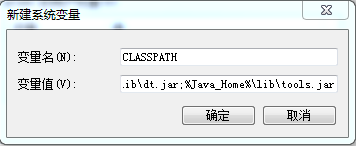
- Variable name:CLASSPATH
- Variable value:.;%JAVA_HOME%\lib\dt.jar;%JAVA_HOME%\lib\tools.jar;// Remember there is a "." in front
- Variable name:Path
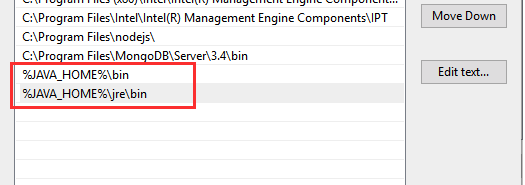
- Variable value:%JAVA_HOME%\bin;%JAVA_HOME%\jre\bin;
JAVA_HOME settings
PATH settings
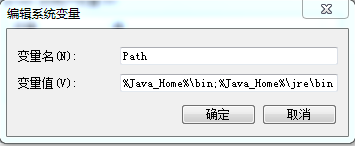
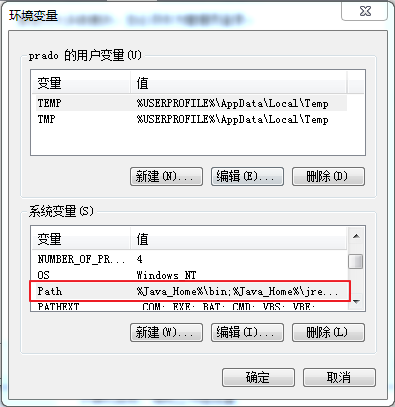
Note:In Windows 10, the Path variable is displayed in separate entries. We need to add%JAVA_HOME%\bin;%JAVA_HOME%\jre\bin;them separately, otherwise they cannot be recognized:
%JAVA_HOME%\bin;
%JAVA_HOME%\jre\bin;
For more information, refer to:Windows 10 Configuring Java Environment Variables
CLASSPATH settings
This is the Java environment configuration. After configuration, you can start Eclipse to write code; it will automatically complete the Java environment configuration.
Test if JDK is installed successfully
1. "Start" -> "Run", type "cmd";
2. Type the command:java -version、java、javacAfter a few commands, if the following information appears, the environment variables have been configured successfully;

Environment variable settings for Linux, UNIX, Solaris, FreeBSD
The environment variable PATH should be set to point to the location where the Java binaries are installed. If you encounter difficulties in setting it, please refer to the shell documentation.
For example, assuming you use bash as your shell, you can add the following to the end of your .bashrc file: export PATH=/path/to/java:$PATH
Popular Java development tools
As the saying goes, "A craftsman must first sharpen his tools to do his work." In the process of developing Java, we also need a good development tool. There are many IDEs on the market. This article recommends the following Java development tools:
JetBrainsIDEA, which many people are starting to use now, has very powerful features. Download address:https://www.jetbrains.com/idea/download/

VSCode : VSCode (full name: Visual Studio Code) is a free, cross-platform source code editor developed by Microsoft.
Download address:https://code.visualstudio.com/
Installation tutorial: https://www.example.com/w3cnote/vscode-tutorial.html
Netbeans:Open-source and free Java IDE. Download address:https://www.netbeans.org/index.html

Eclipse:Another free and open-source Java IDE. Download address:https://www.eclipse.org/downloads/packages/
SelectEclipse IDE for Java Developers:

Create your first Java application using IntelliJ IDEA
- 1. Launch IntelliJ IDEA.
- 2. In the welcome screen, click "New Project".
- 3. In the "New Project" wizard, select "Java" from the left list.
- 4. Name the project (for example, HelloWorld) and change the default location as needed.
- 5. In this tutorial, we will not use version control, so disable the "Create Git repository" option.
- 6. Make sure IntelliJ is selected in the build system.
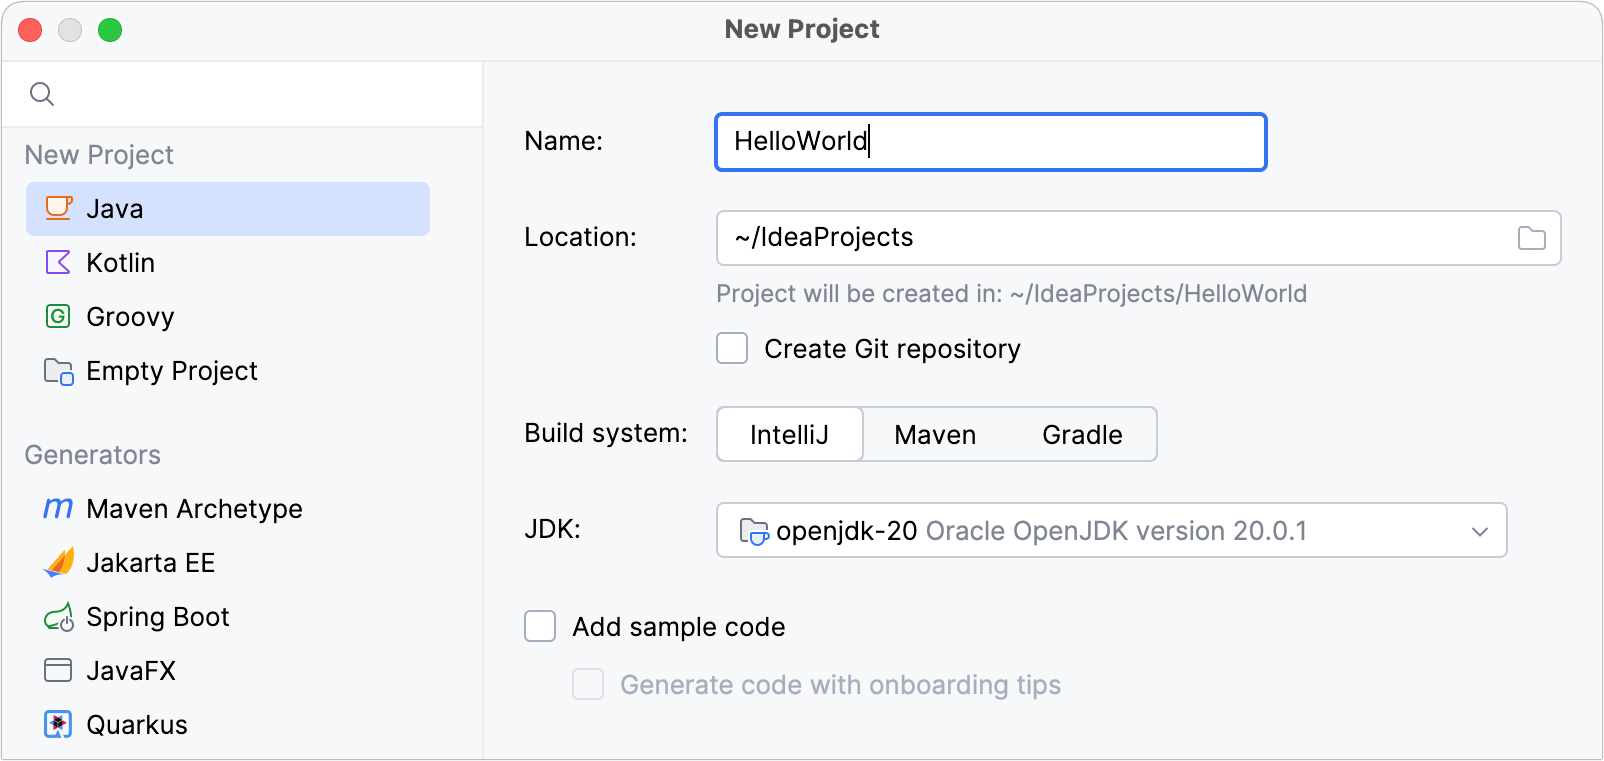
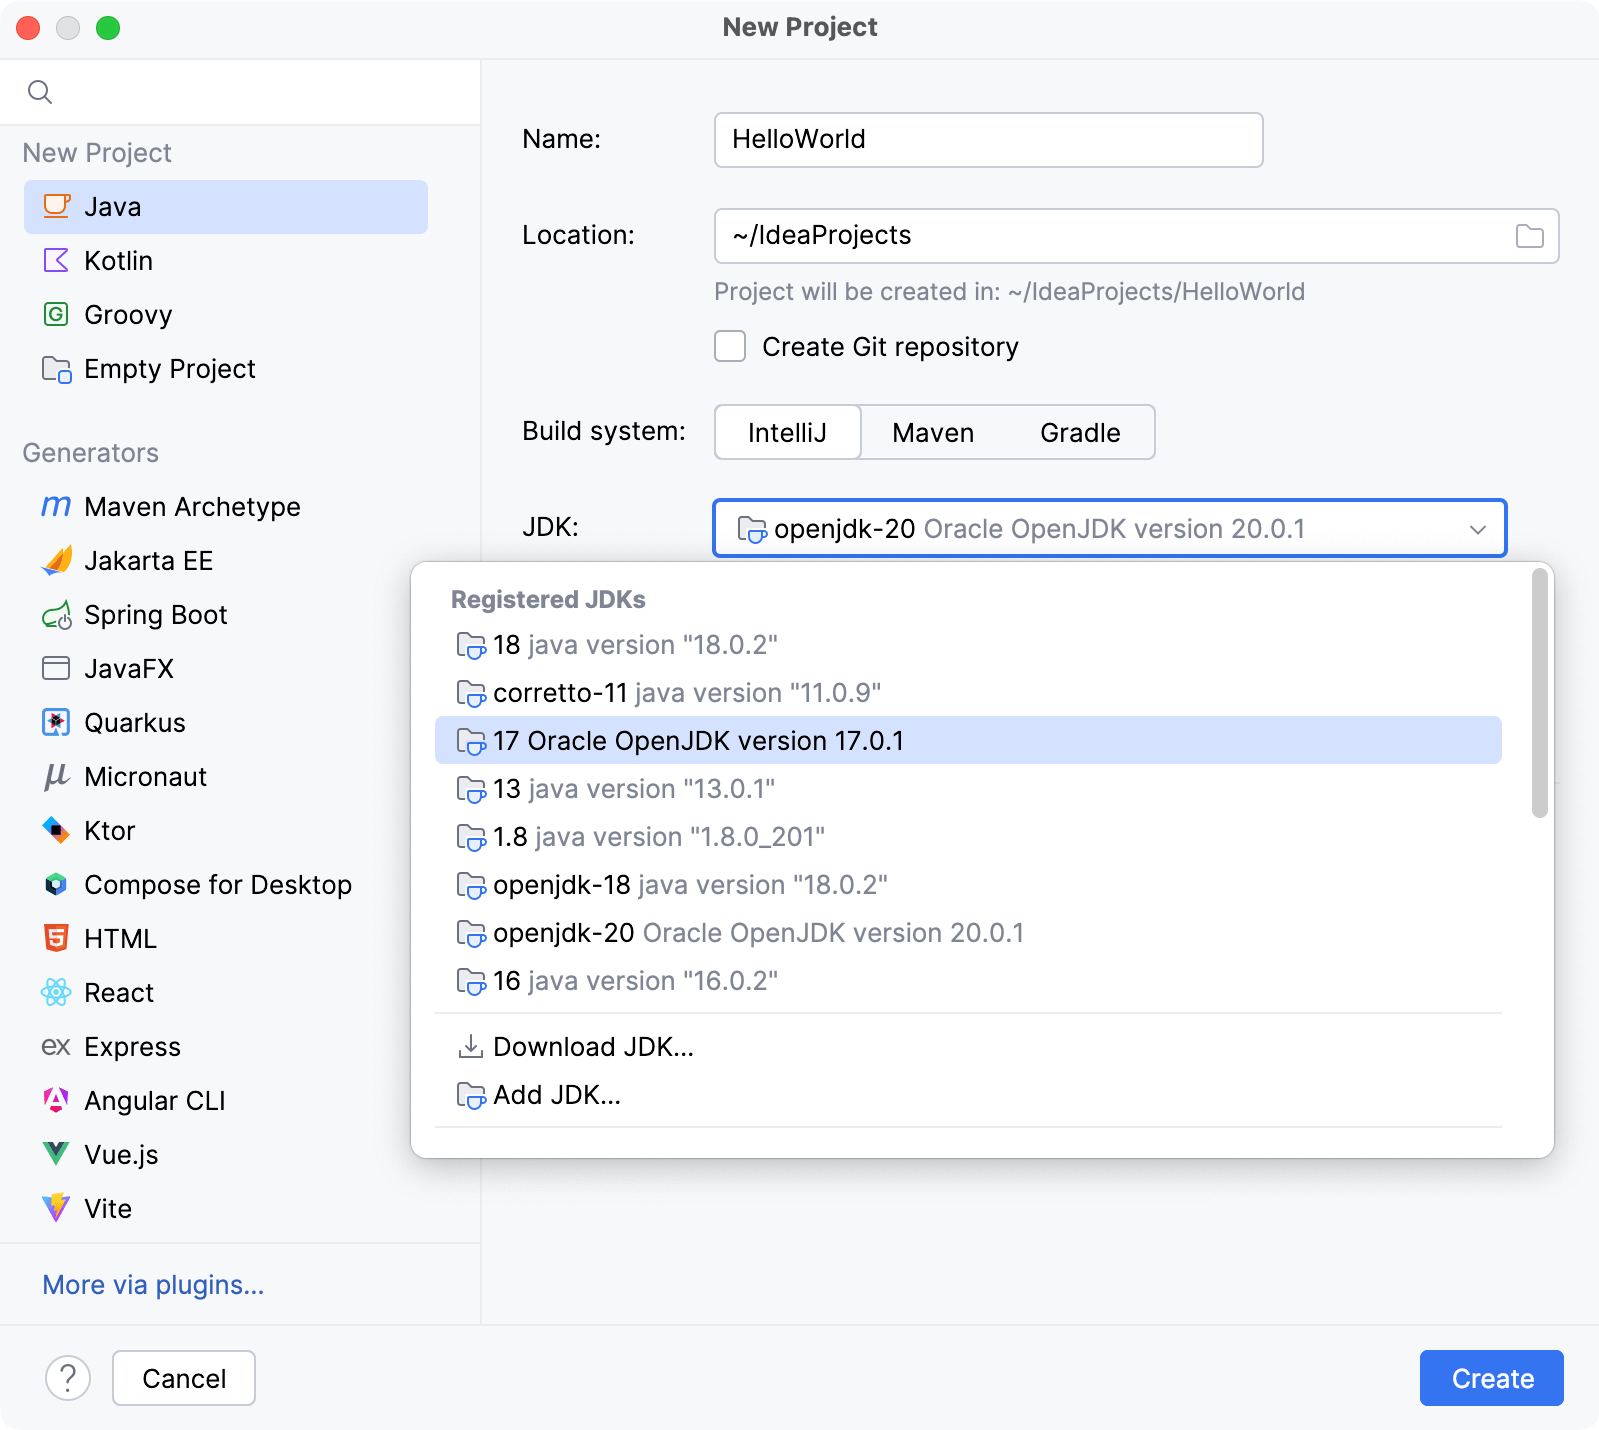
To develop Java applications in IntelliJ IDEA, you need the Java SDK (JDK).
If the required JDK is already defined in IntelliJ IDEA, select it from the JDK list.
If JDK is installed on your computer but not defined in the IDE, select "Add JDK" and specify the path to the JDK home directory (for example, /Library/Java/JavaVirtualMachines/jdk-20.0.1.jdk).
Create packages and classes. In the Project tool window, right-click the src folder, select New, and then select Java Class.
In the Name field, enter com.example.helloworld.HelloWorld and click OK. IntelliJ IDEA will create the com.example.helloworld package and the HelloWorld class.
Start writing code:
Write a code to output "Hello World".
Execute the code and output the result:
Run your first Java program using Eclipse
The video demonstration is as follows:
HelloWorld.java file code: