TRAE Tutorial
Trae (pronounced /treɪ/) is an AI-native integrated development environment (IDE) launched by ByteDance. It deeply integrates large models such as Claude and GPT-4o, providing intelligent Q&A, code completion, and AI-powered automatic programming capabilities.
Trae is developed based on the VS Code kernel, and the interface is friendly and the usageVS Codeis nearly identical.
The main features of Trae include:
- Fully Chinese interface, no need to install a Chinese localization plugin, ready to use out of the box
- Built-in AI assistant, supports two modes: Chat (Q&A) and Builder (project building)
- Compatible with VS Code ecosystem, supports one-click import of plugins, shortcuts, and configuration files
- Supports multiple platforms: Windows and macOS, Linux version available for reservation
- Completely free, no paid subscription needed to use AI features
Install Trae
1. Download the installer
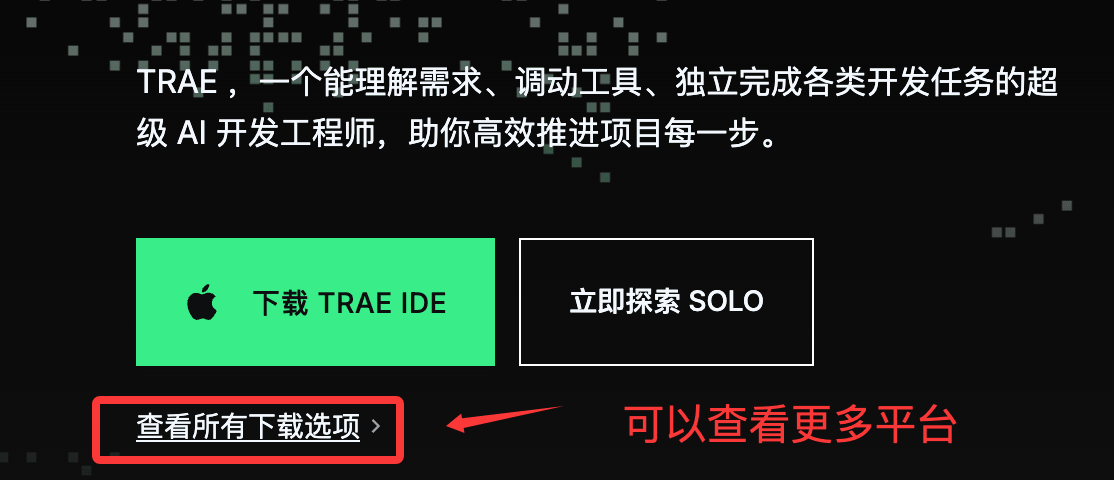
The official website will automatically detect your operating system and recommend the corresponding version. You can also manually choose:
| Operating system | Download version |
|---|---|
| Windows | .exeInstaller |
| macOS(Intel) | .dmgInstaller |
| macOS(Apple Silicon) | .dmgARM version |
2. Installation steps
After the download is complete, double-click the installer and follow the prompts to finish the installation. The whole process is no different from installing ordinary software and takes about 1–2 minutes.
3. Initial configuration
When you first launch Trae, an initial configuration wizard will appear:
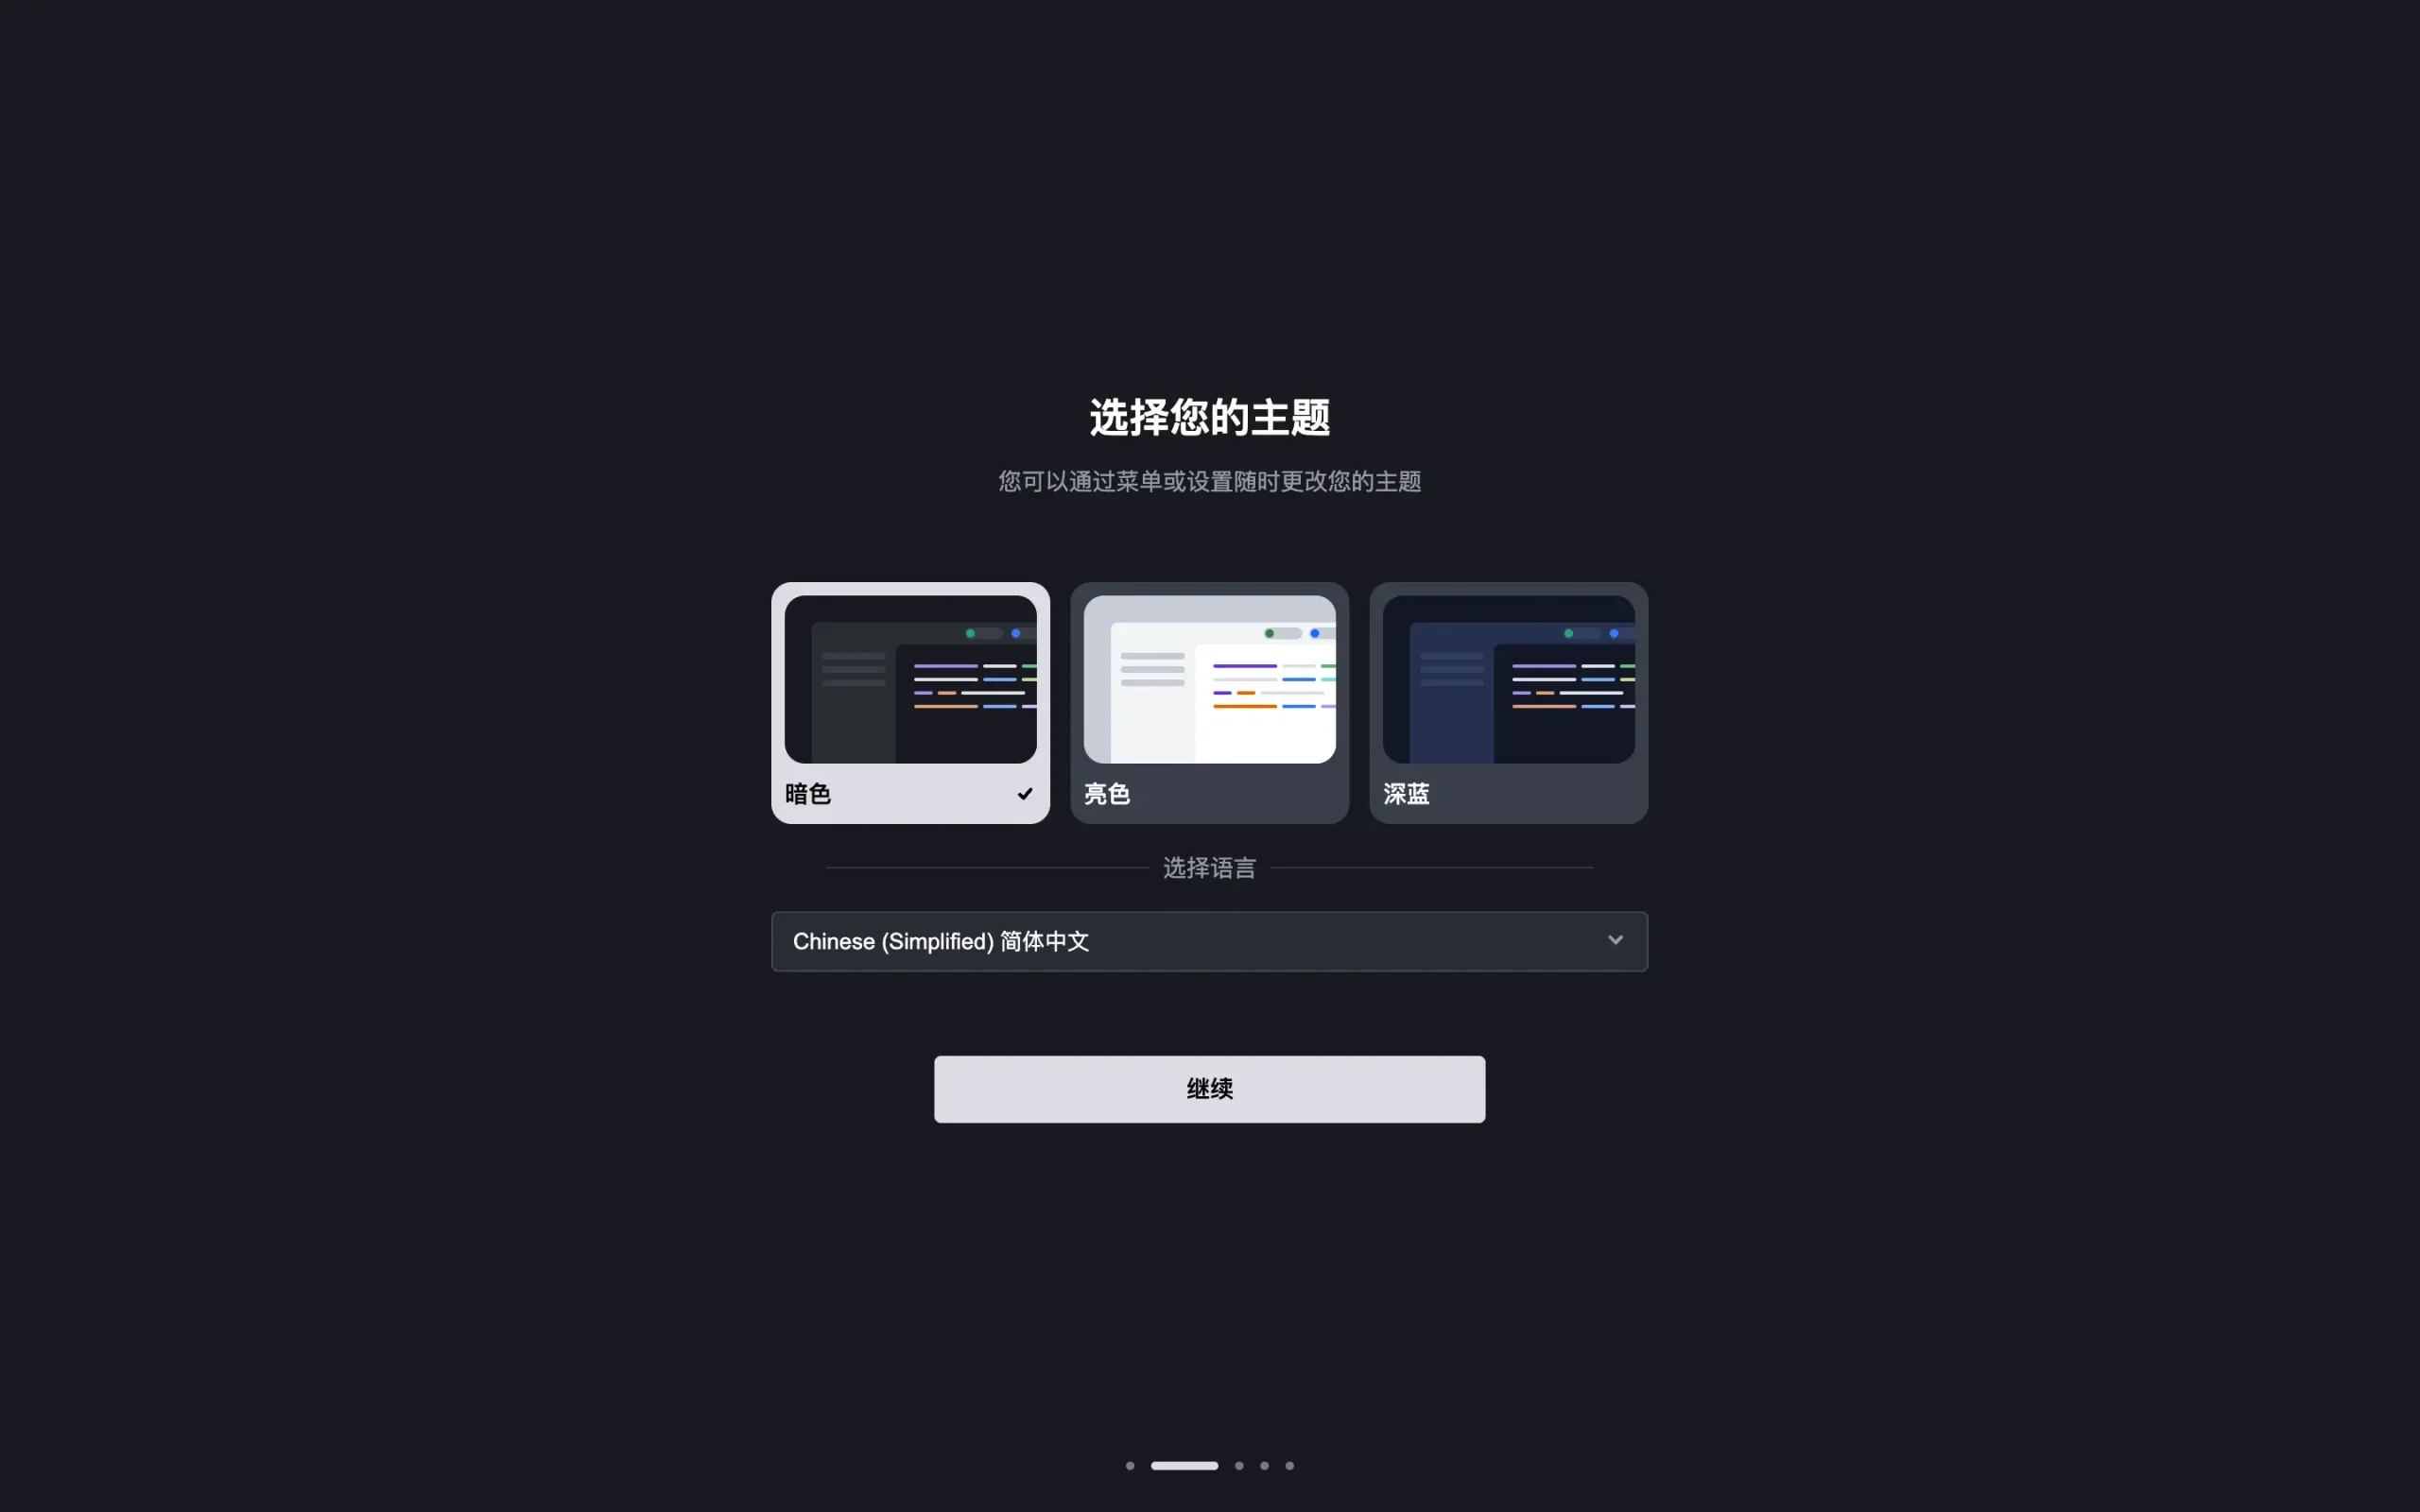
Step 1: Choose a theme
The options are "Dark", "Light", or "Deep Blue". Choose according to your preference; you can change it anytime later in settings.
Step 2: Select display language
You can choose "Simplified Chinese" or "English". Chinese developers can directly select Simplified Chinese, and the interface will be fully localized.
Step 3: Migrate existing configuration (optional)
If you previously used VS Code or Cursor, you can click "Import from VS Code" or "Import from Cursor", and Trae will automatically sync:
- Installed plugins
- IDE settings and preferences
- Keyboard shortcut bindings
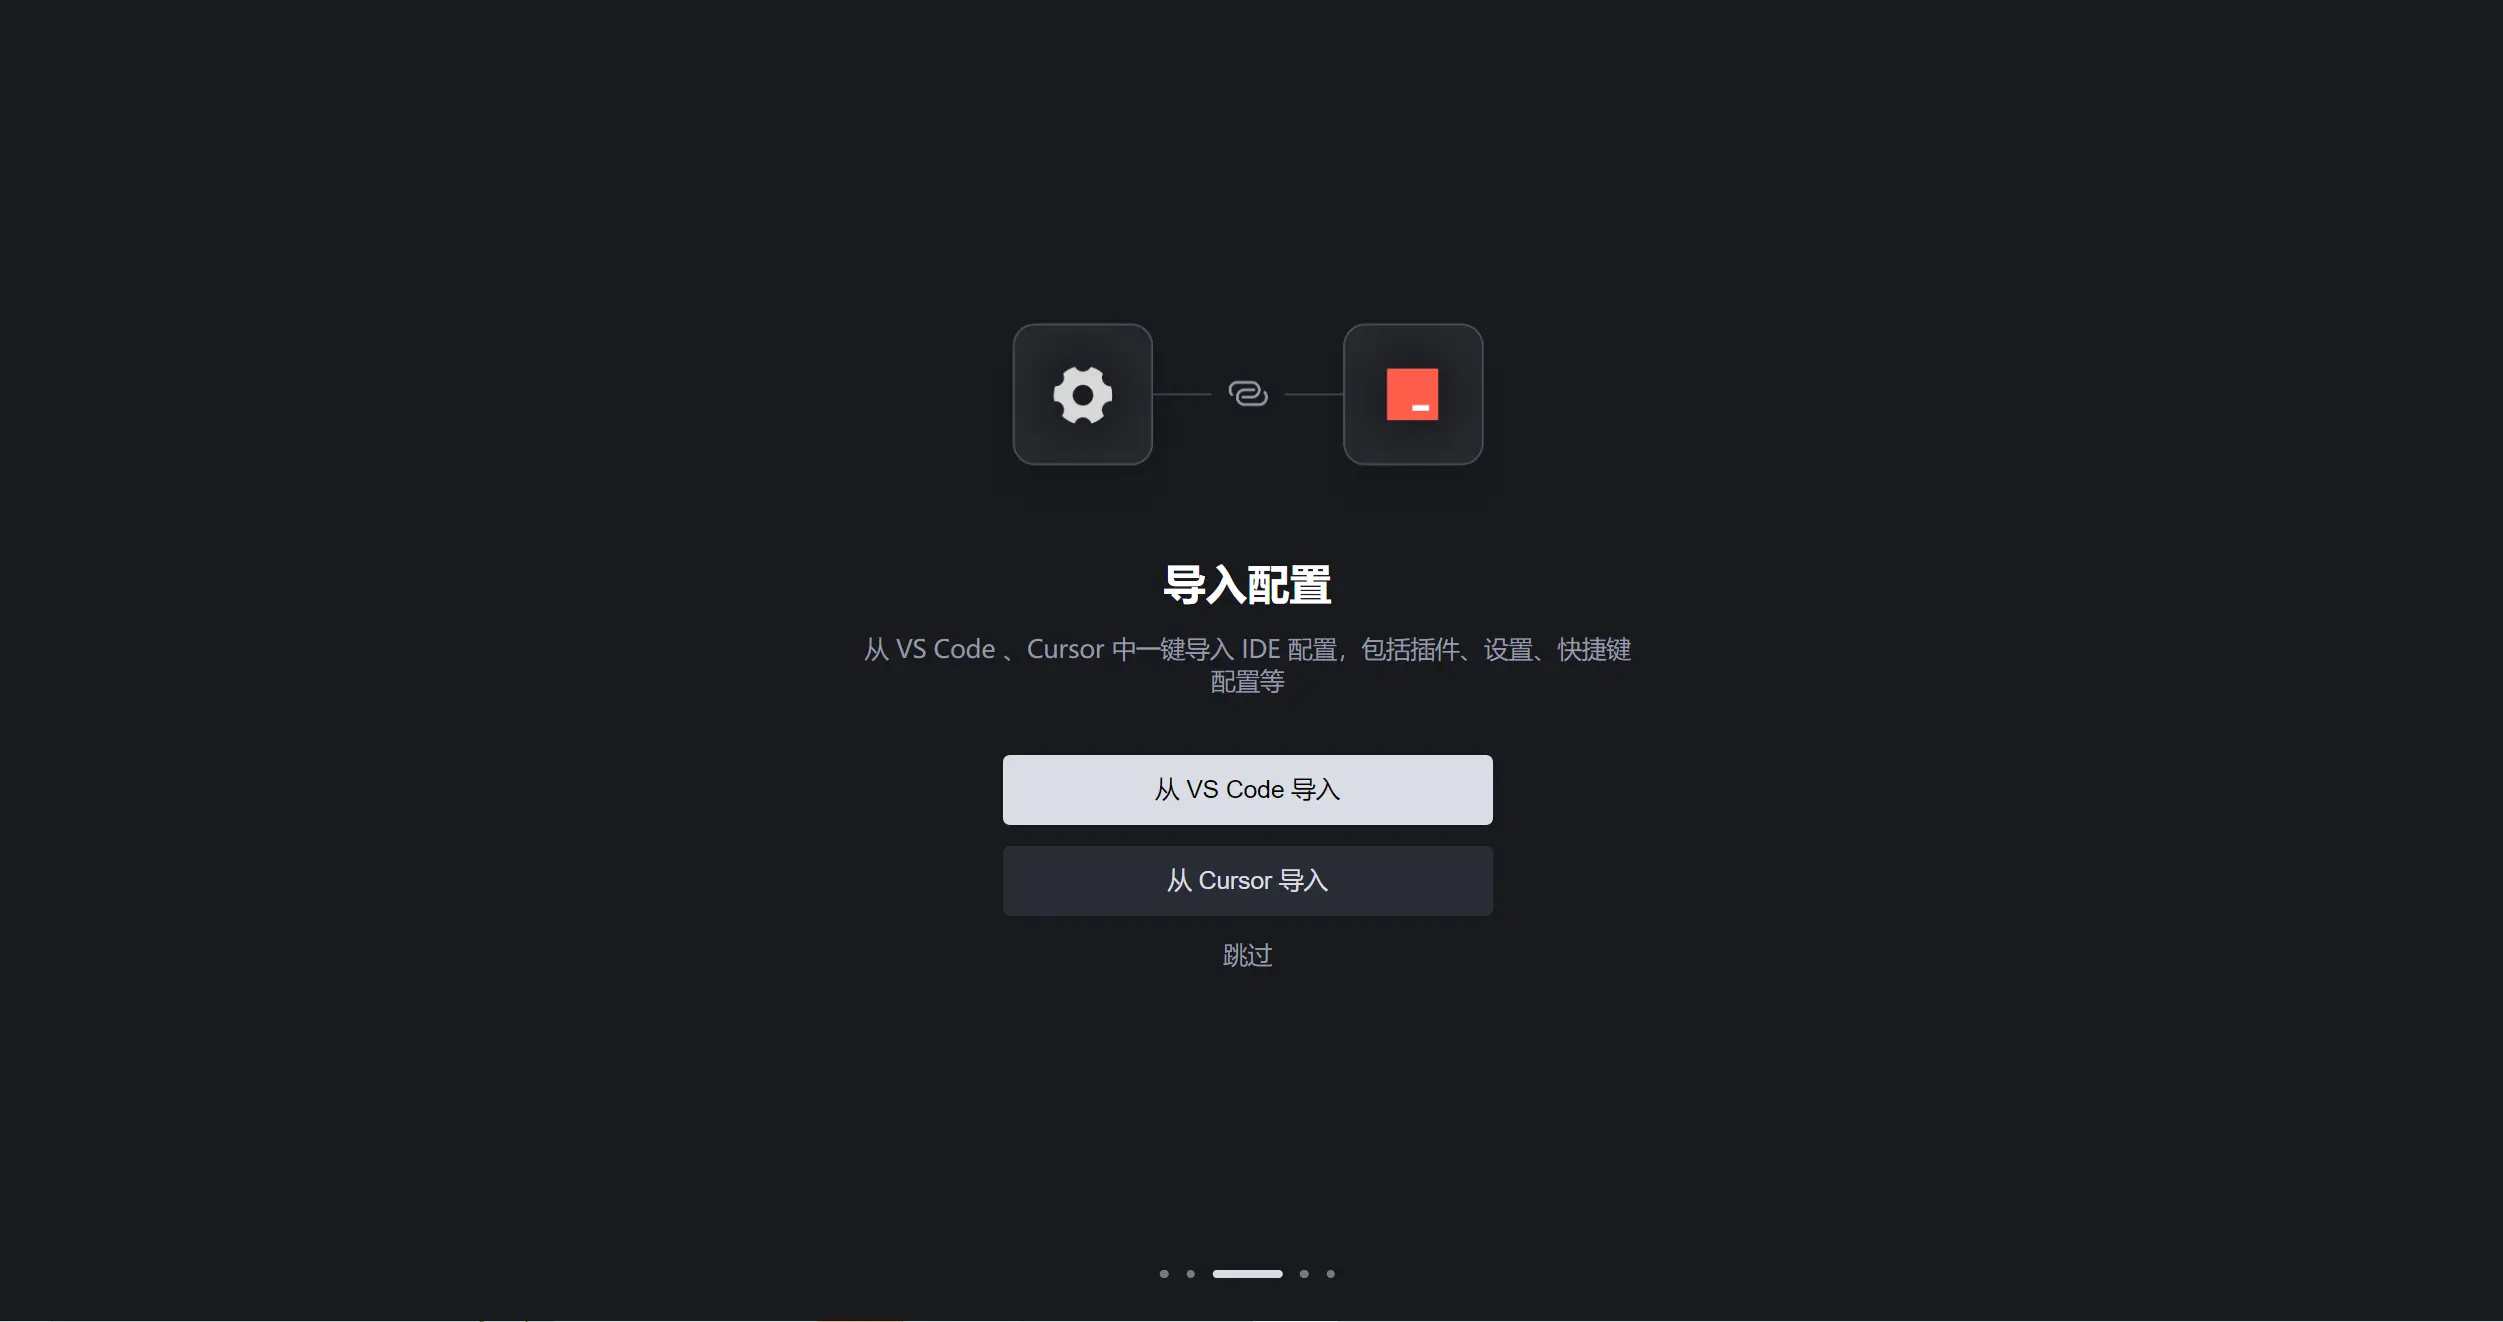
This allows you to switch from your original tools to Trae almost seamlessly, with an extremely low learning curve.
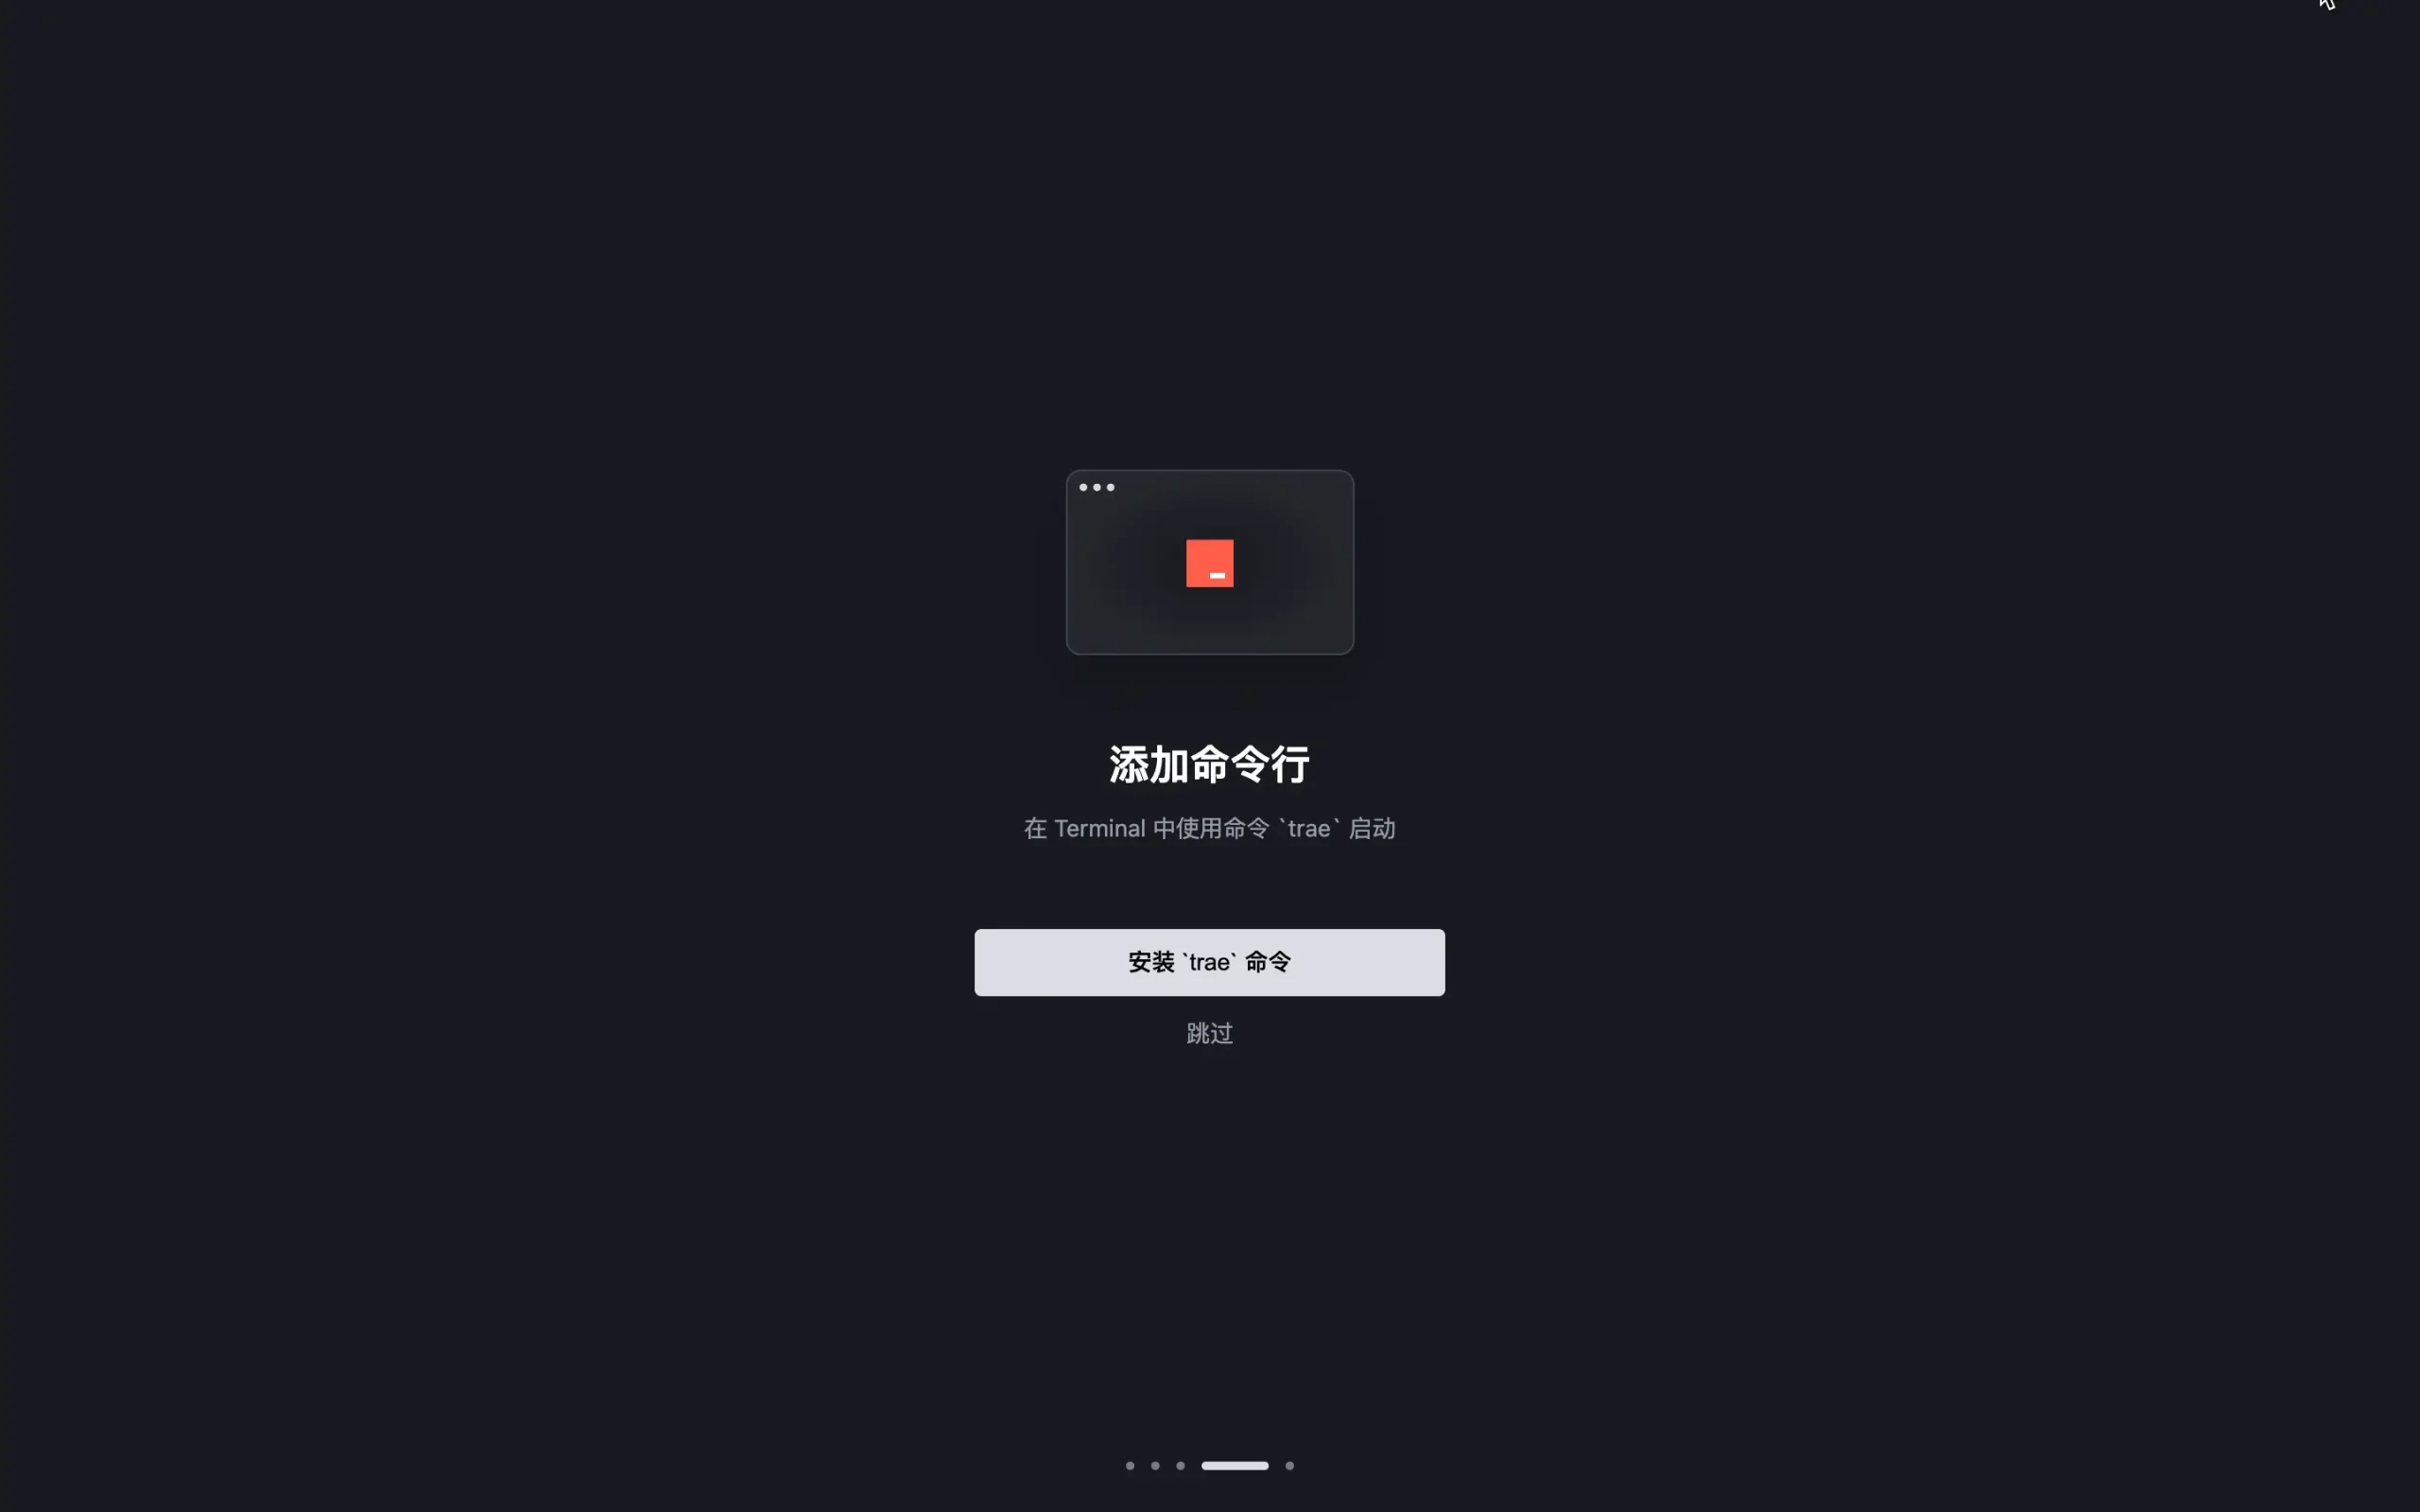
Step 4: Install command-line tools (recommended)
Click "InstalltraeCommand" and complete the authorization, then you can use the following command in the terminal:
# 快速唤起 Trae
trae

# 在 Trae 中打开指定项目
trae my-react-app
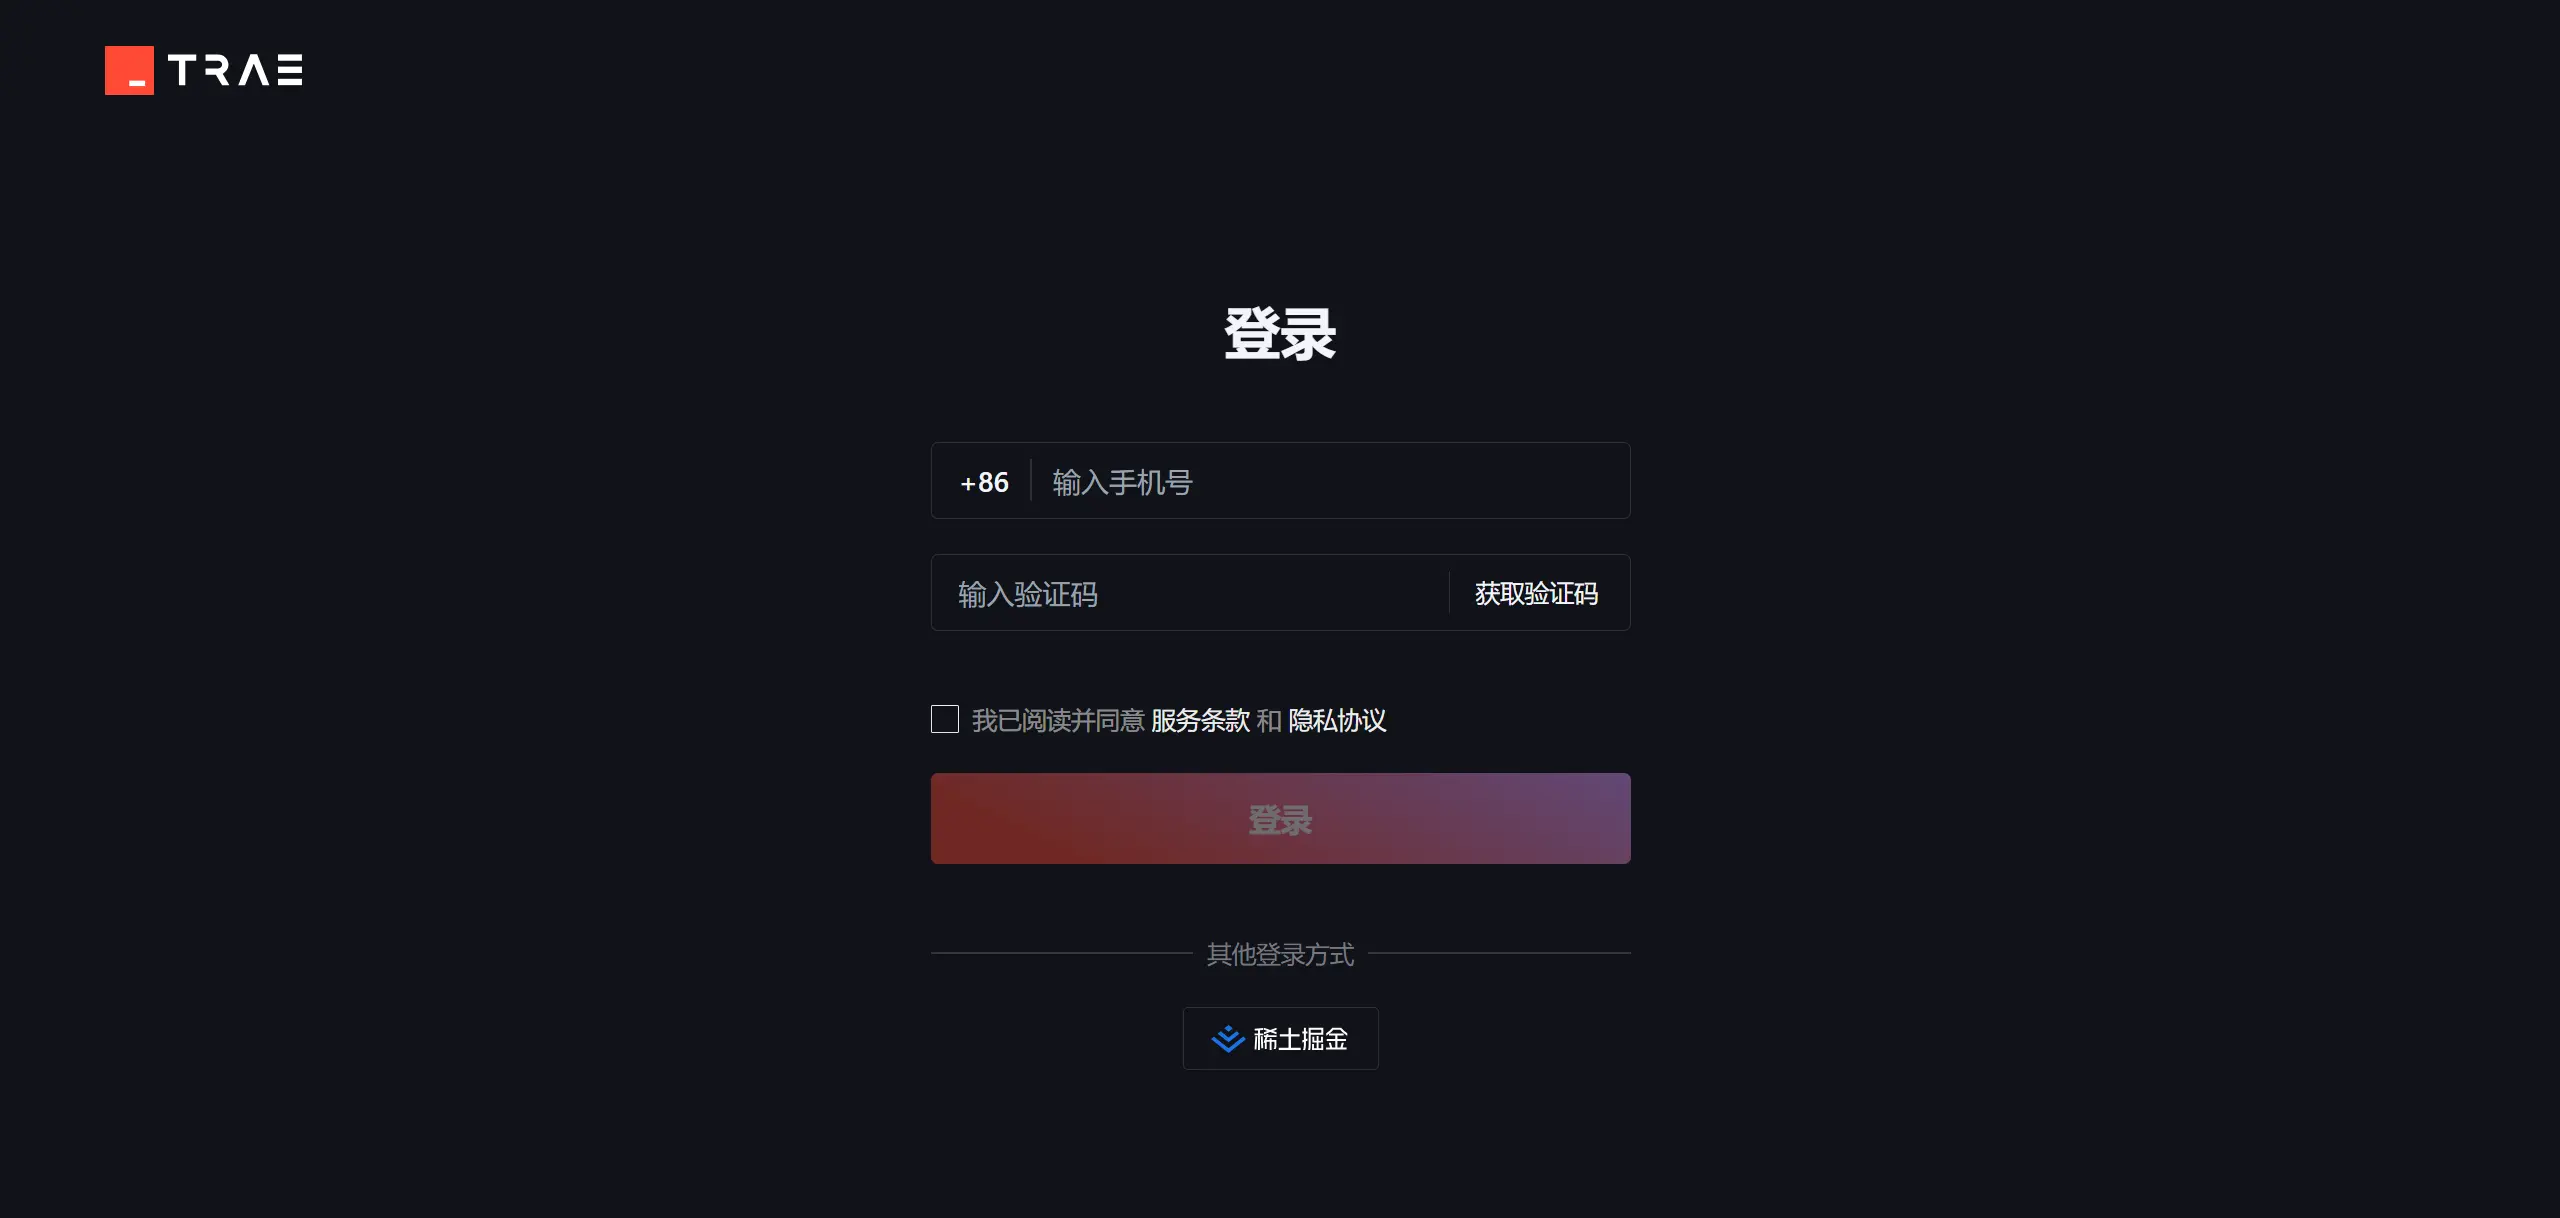
Step 5: Log in to your account
Log in using your phone number or Juejin account. Only after logging in can you use AI services in Trae.
Interface layout
Trae's interface is highly similar to VS Code, mainly divided into the following areas:
┌─────────────────────────────────────────────┐
│  菜单栏(文件 / 编辑 / 视图 / 帮助…)            │
├──────┬──────────────────────┬───────────────┤
│      │                      │               │
│ 侧边栏│    代码编辑区          │  AI 助手面板  │
│      │                      │               │
│(文件 │                      │(Chat / Builder│
│ 资源  │                      │  对话界面)    │
│ 管理器│                      │               │
│ 等)  │                      │               │
├──────┴──────────────────────┴───────────────┤
│  终端(底部面板)                               │
└─────────────────────────────────────────────┘
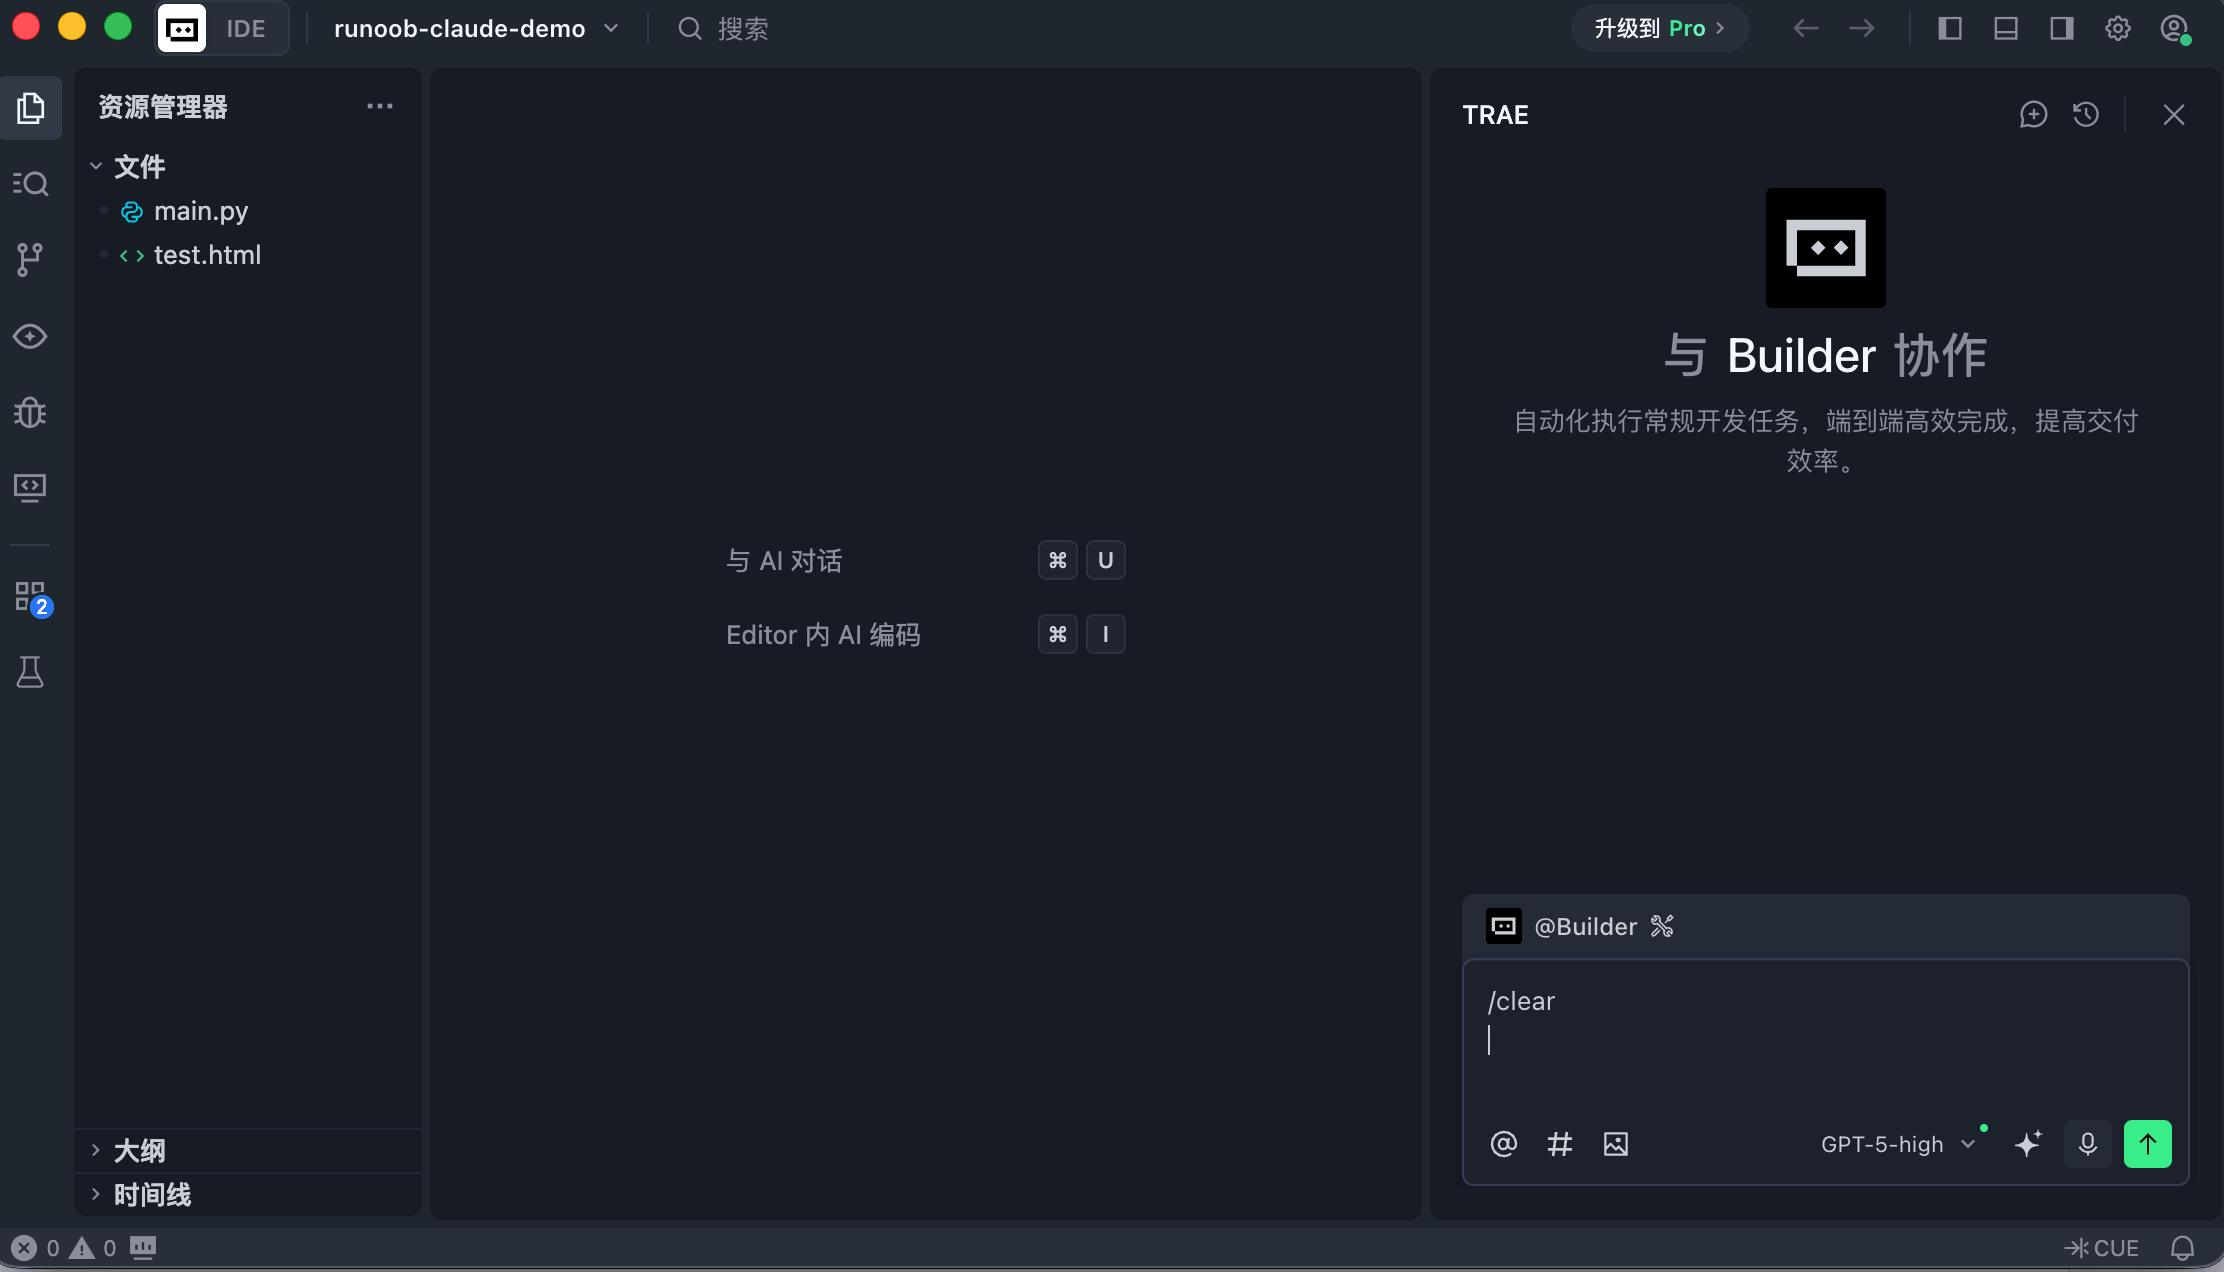
- Sidebar: File Explorer, Search, Source Control, Extensions Marketplace, etc.
- Code editor area: The main code writing area, supporting syntax highlighting and multiple file tabs
- AI Assistant panel: The AI interaction area on the right, supporting both Chat and Builder modes
- Terminal panel: Integrated terminal at the bottom, where you can directly run commands
Open and manage projects
Open an existing project
There are several ways:
- Select "File" → "Open Folder" from the menu bar, then choose a local project directory
- Execute in the terminal
trae project pathto open it directly - Choose "Recent Projects" from the welcome page
To launch Trae from the terminal, use the following command:
trae
Command to open the current directory with Trae:
trae .
To specify a directory path, use the following command:
trae ~/example-test # 打开指定目录的项目
Clone Git repository
On the welcome page, click "Clone Git Repository", enter the repository URL, and the remote project will be pulled to your local machine and opened automatically.
Create new files and projects
- Right-click a folder in the File Explorer → "New File". Trae will automatically recognize the type based on the file extension.
- From the menu bar, "File" → "New Project". You can choose a blank project or use Builder mode to generate one with AI.
Use the AI Assistant
This is Trae's core feature, offering two modes:
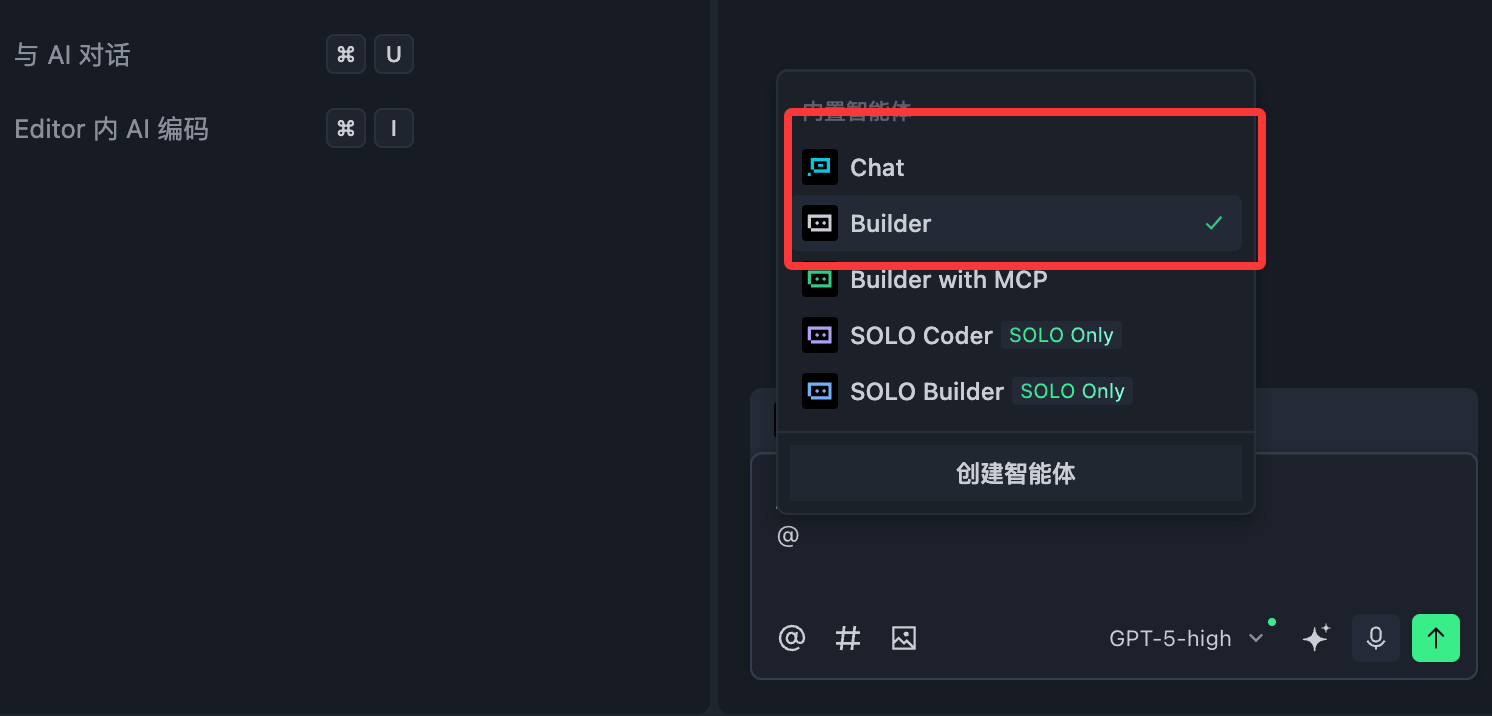
Chat mode (Q&A)
Chat mode is suitable for asking questions anytime during development, serving as a "smart partner" that understands the current code.
Common use cases:
- Explain what a piece of code does
- Find bugs and provide fixes
- Ask about the usage of an API
- Ask AI to help optimize code logic
How to use context:
When chatting with AI, you can specify code, files, or folders as context to make AI's answers more precise. For example, in the Chat input box, use@filenameto reference a specific file.
Builder mode (project building)
Builder mode is suitable for building a project from scratch. You only need to describe what application you want in natural language, and AI will automatically invoke tools, analyze requirements, generate files, and execute commands.
Usage example:
请帮我创建一个 React 待办事项应用,支持添加、删除和标记完成功能
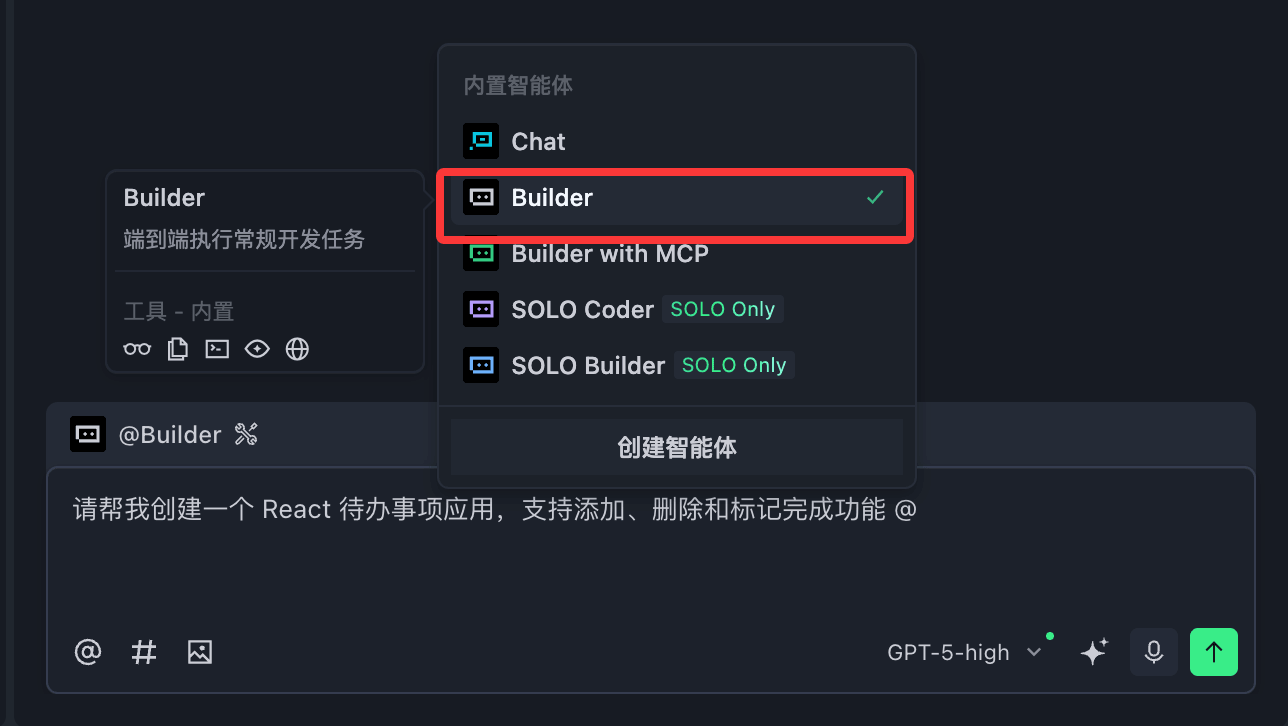
Builder mode will automatically:
- Create the project directory structure
- Generate all necessary code files
- Install dependency packages
- Run the project for preview
Note (Windows users): To use Builder mode, you need to configure PowerShell 6 or later. In "Settings" → "Terminal Profiles", select the one marked
\PowerShell\{版本号}\with that wording.
Handling AI-generated code changes
After AI generates code, you can choose to accept or reject:
| Action | macOS shortcut | Windows shortcut |
|---|---|---|
| Accept all changes in the current file | Command + Enter | Ctrl + Enter |
| Reject all changes in the current file | Command + Backspace | Ctrl + Backspace |
| Accept all changes in batch | Click the "Accept All" button above the input box | Same as left |
| Reject all changes in batch | Click the "Reject All" button above the input box | Same as left |
Inline Chat
Besides the side AI panel, you can also invoke AI directly in the editor:
- Shortcut:
Command + I(macOS)/Ctrl + I(Windows) - After selecting a piece of code, press the shortcut to directly ask questions or request modifications on the selected content.
- When an error occurs in the code, you can also click the "AI Fix" button next to the error message to let AI automatically analyze and fix it.
Code completion
Trae has a built-in AI code completion feature that gives real-time suggestions as you write code. No additional configuration is needed; it's ready to use after opening a project:
- When AI provides a completion suggestion, press the
Tabkey to accept - press
Esckey to ignore the suggestion - Completion scope covers single lines of code, entire function bodies, and even cross-file logic.

Plugin management
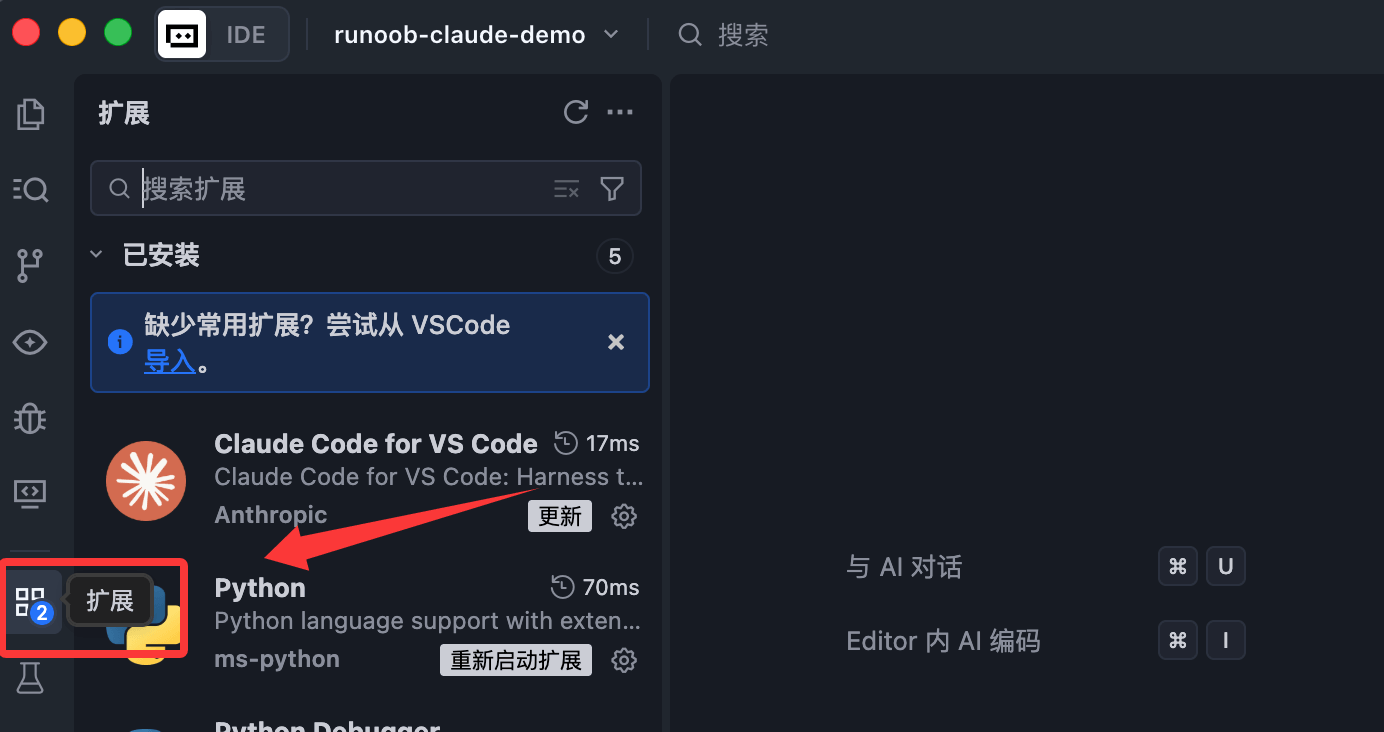
Trae is compatible with the VS Code plugin ecosystem. Here's how to install plugins:
- Click the "Extensions" icon in the left sidebar (or press
Ctrl+Shift+X) - Enter the plugin name in the search box and click "Install".
- If you have already imported configuration from VS Code, your existing plugins will sync automatically, no need to reinstall.
Version control
Trae has built-in Git integration. The "Source Control" panel in the sidebar provides visual version control operations:
- View file changes, stage files
- Commit code, push/pull remote repository
- View commit history and Diff comparison
For developers accustomed to the command line, the integrated terminal at the bottom can also run Git commands directly.
Personalization settings
Change theme and language
"Settings" → "General" → "Preferences", where you can change the interface theme and display language.

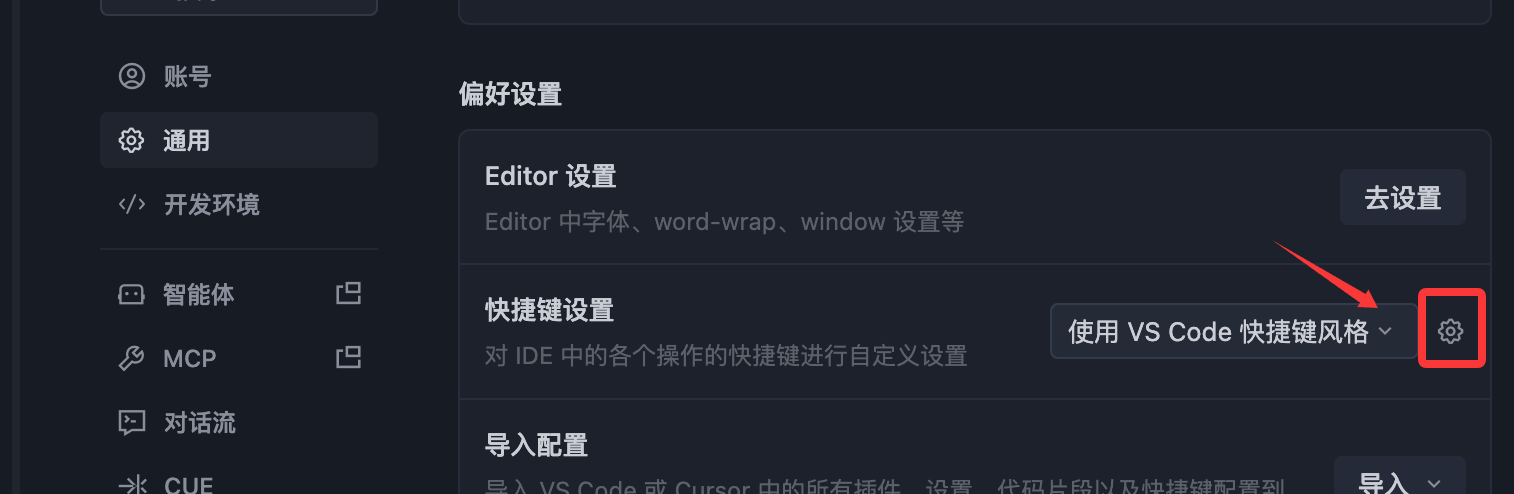
Customize keyboard shortcuts
"Settings" → "General" → "Preferences" → "Keyboard Shortcut Settings", where you can add, modify, or delete keyboard shortcut bindings.
AI-related settings
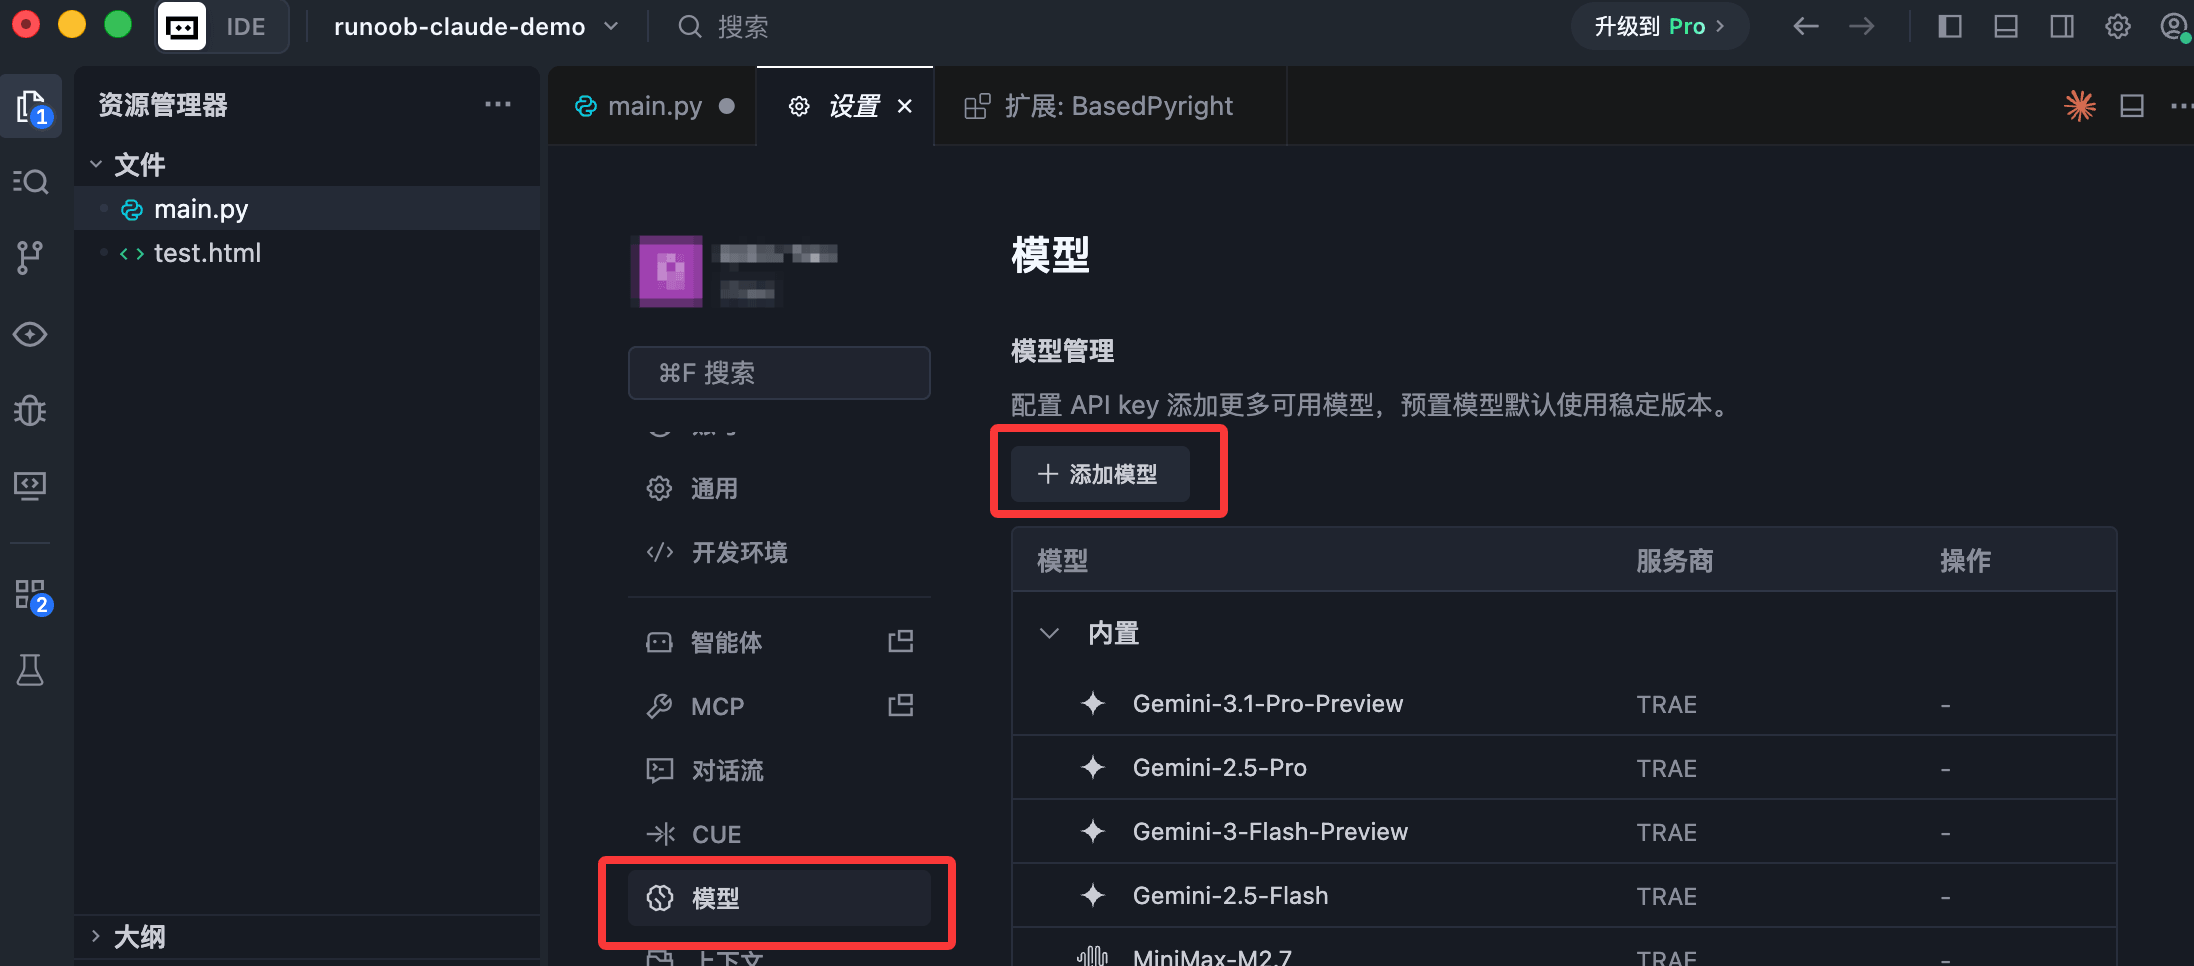
"Settings" → "Model", where you can configure options such as the model to use.