Reasonix Getting Started Tutorial
Reasonix is an open-source terminal AI coding agent deeply optimized for DeepSeek. Its entire runtime loop is designed from scratch around DeepSeek's prefix-cache mechanism, aiming to make AI coding cheap enough to keep running indefinitely.
Reasonix's design philosophy:"A coding agent that stays cheap enough to leave on."(An AI coding agent cheap enough to keep running indefinitely).

Who is it for?
| Scenario | Description |
|---|---|
| Using DeepSeek as the primary tool for coding tasks | Deep adaptation to the DeepSeek API, with cache hit rates far exceeding general-purpose tools |
| Concerned about AI usage costs | Precise cost control, with budget caps and real-time cost statistics |
| Prefer terminal workflows | Terminal-first design: diffs live in git diff, file trees live in ls |
| Running agents continuously for long periods | Ideal for large codebase analysis, batch refactoring, and similar scenarios |
What Reasonix doesn't do
Reasonix has opinions; here's what it deliberately doesn't do:
| What it doesn't do | Reason |
|---|---|
| Flexible switching between multiple providers | DeepSeek-only; this is by design, not a limitation |
| IDE integration | Terminal-first; does not pursue IDE plugins |
| Hardest reasoning benchmarks | Claude Opus still leads on certain benchmarks; start with Claude for PhD-level proof problems |
| Offline / completely free | Requires a paid DeepSeek API Key; for offline solutions, see Aider + Ollama |
Before using Reasonix, you need to obtain a DeepSeek API Key. Visitplatform.deepseek.com/api_keys, log in or register an account.
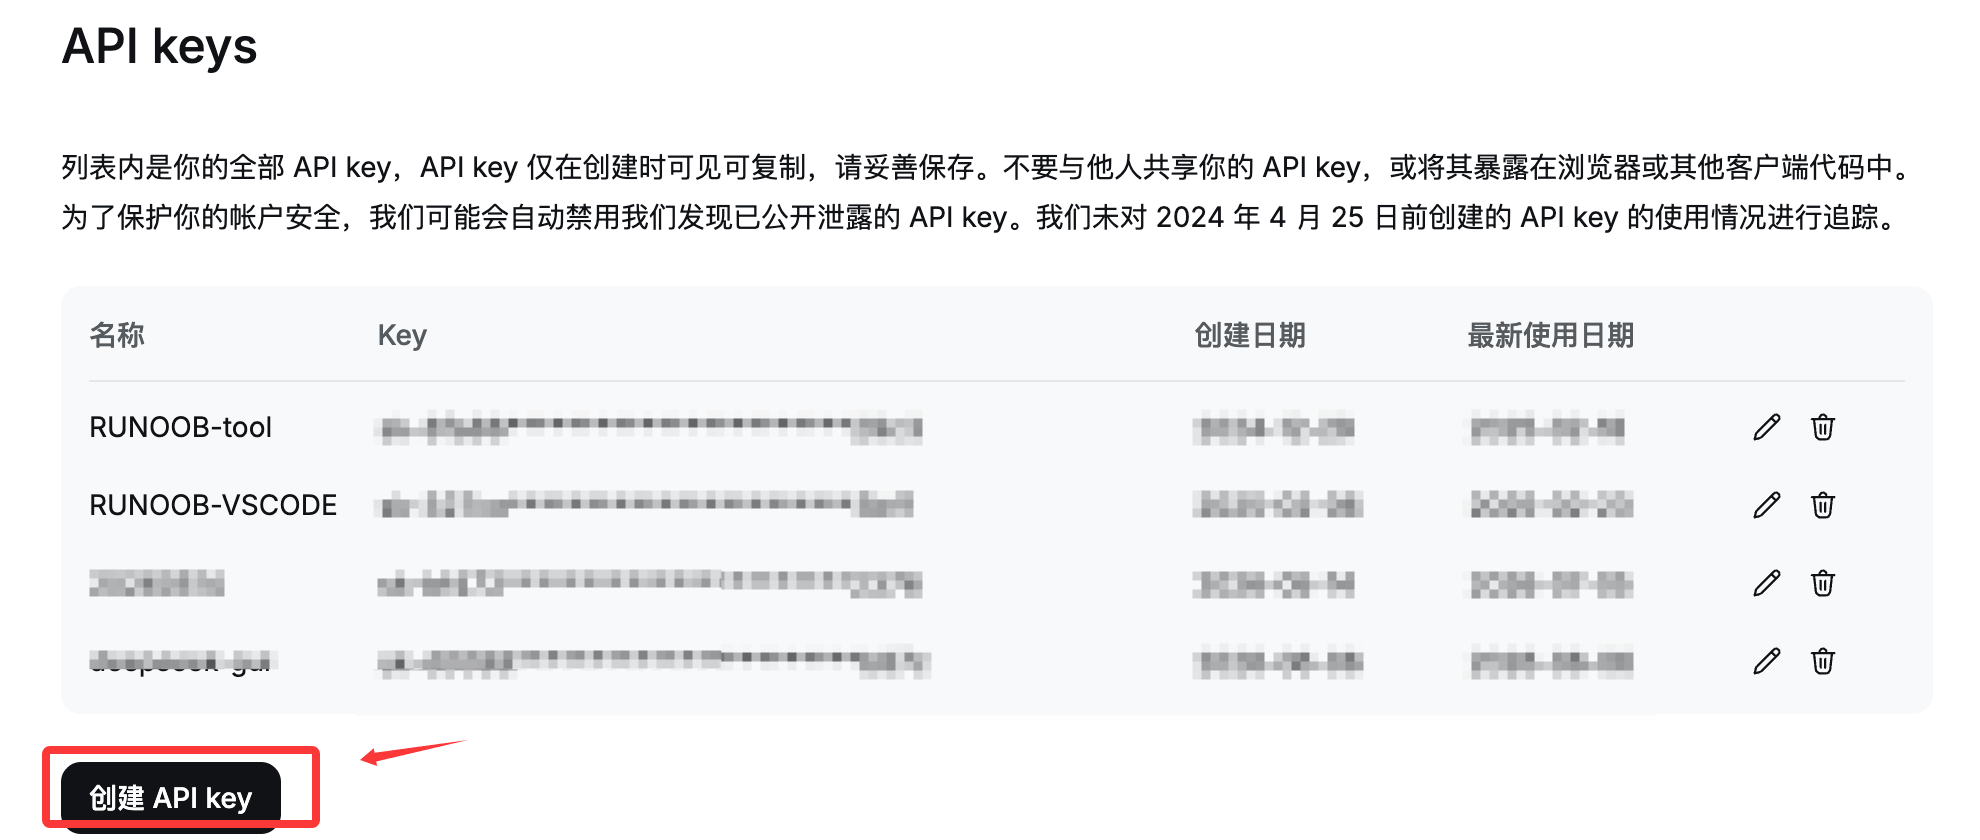
ClickCreate API key, name it (e.g., reasonix), copy and save it.
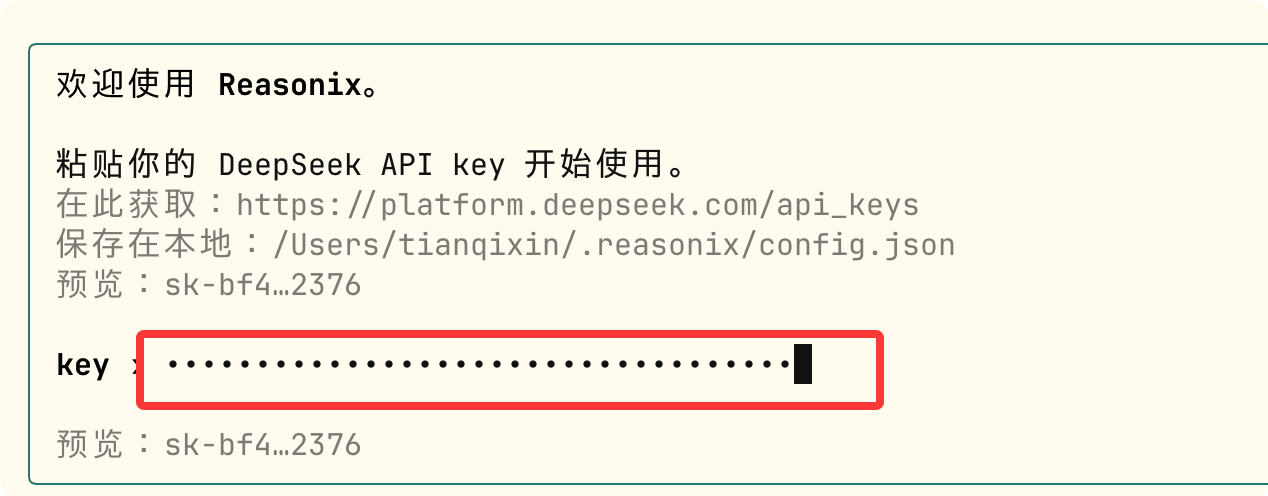
On first runreasonix, you'll be prompted to paste the API Key. After entering it, it's persisted automatically, and you won't need to enter it again.
Installation: CLI and Desktop
Reasonix offers two installation methods: CLI and Desktop. They are described separately below.
CLI Installation
System requirements: Node.js ≥ 22, supports macOS, Linux, Windows (PowerShell, Git Bash, Windows Terminal).
Global installation (recommended for daily use):
npm install -g reasonix
Installation-free experience (npx, always uses the latest version):
# 进入项目目录,直接使用 npx 运行
cd my-project
npx reasonix code
Verification and health check: view the version number:
reasonix --version
Health check: Node version, API Key reachability, MCP configuration:
reasonix doctor
Upgrade to the latest version:
reasonix update
Complete configuration through an interactive wizard to initialize API Key, language, theme, and other settings.
reasonix setup
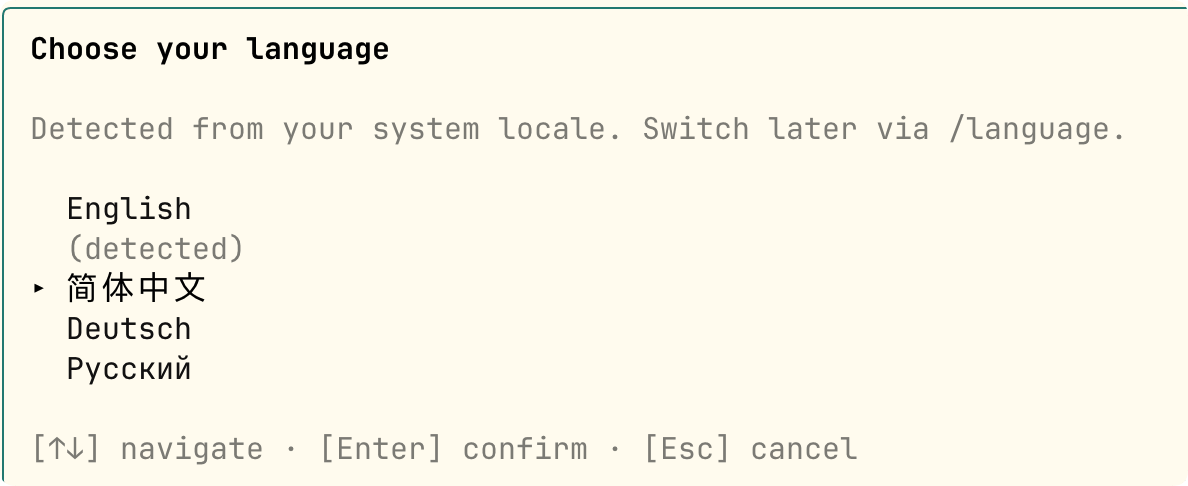
Select language:
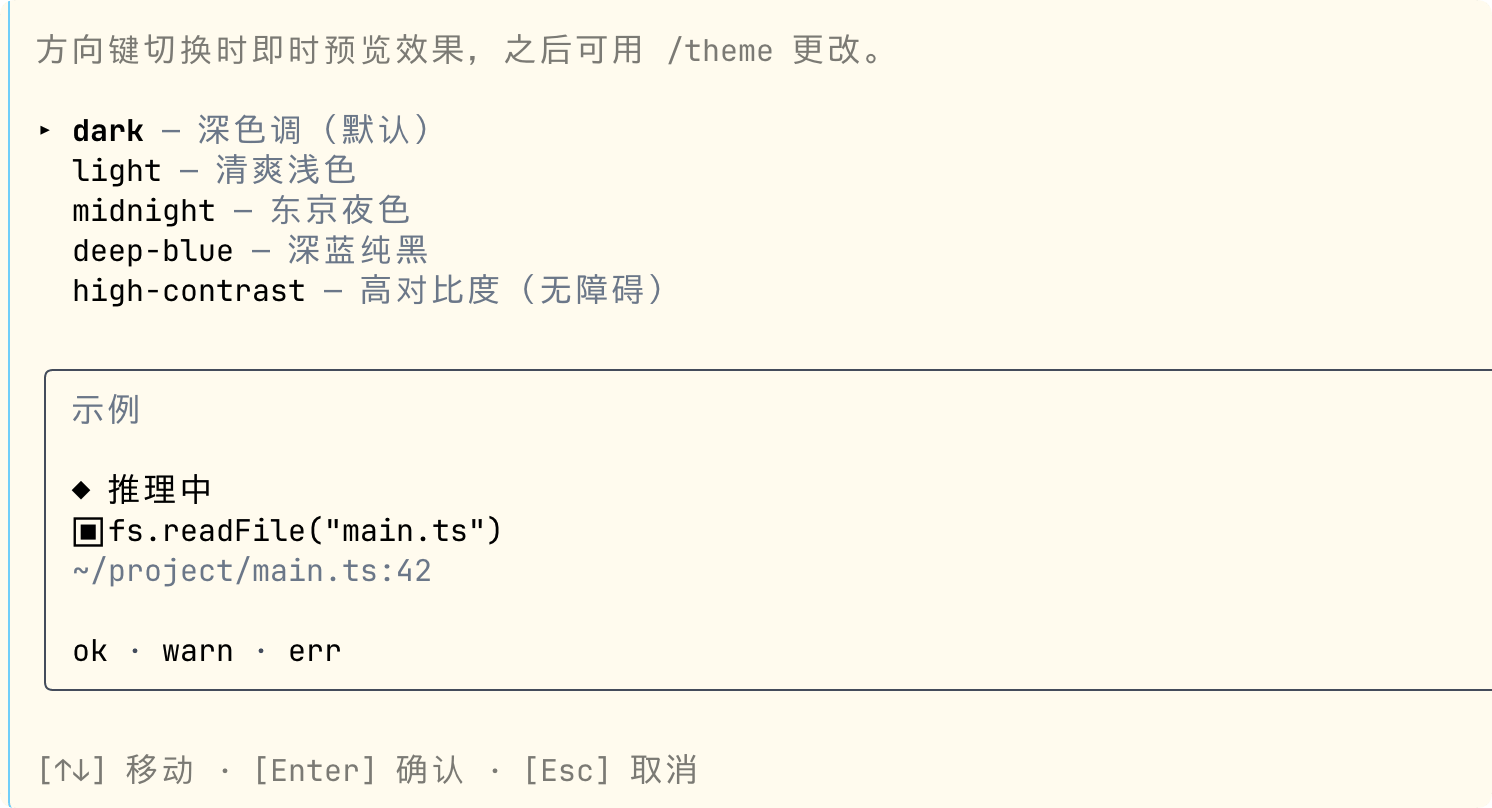
Select theme:
Enter DeepSeek API key:
Press Enter to save:
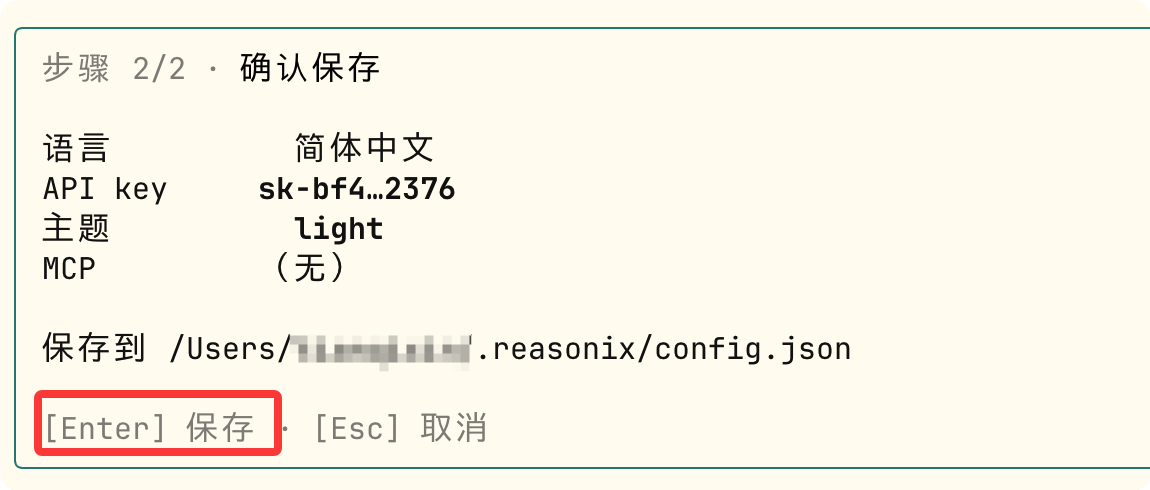
Next, enter the project vibe-coding-example, and you can start using it:
cd vibe-coding-example
Enter the following command to start:
reasonix
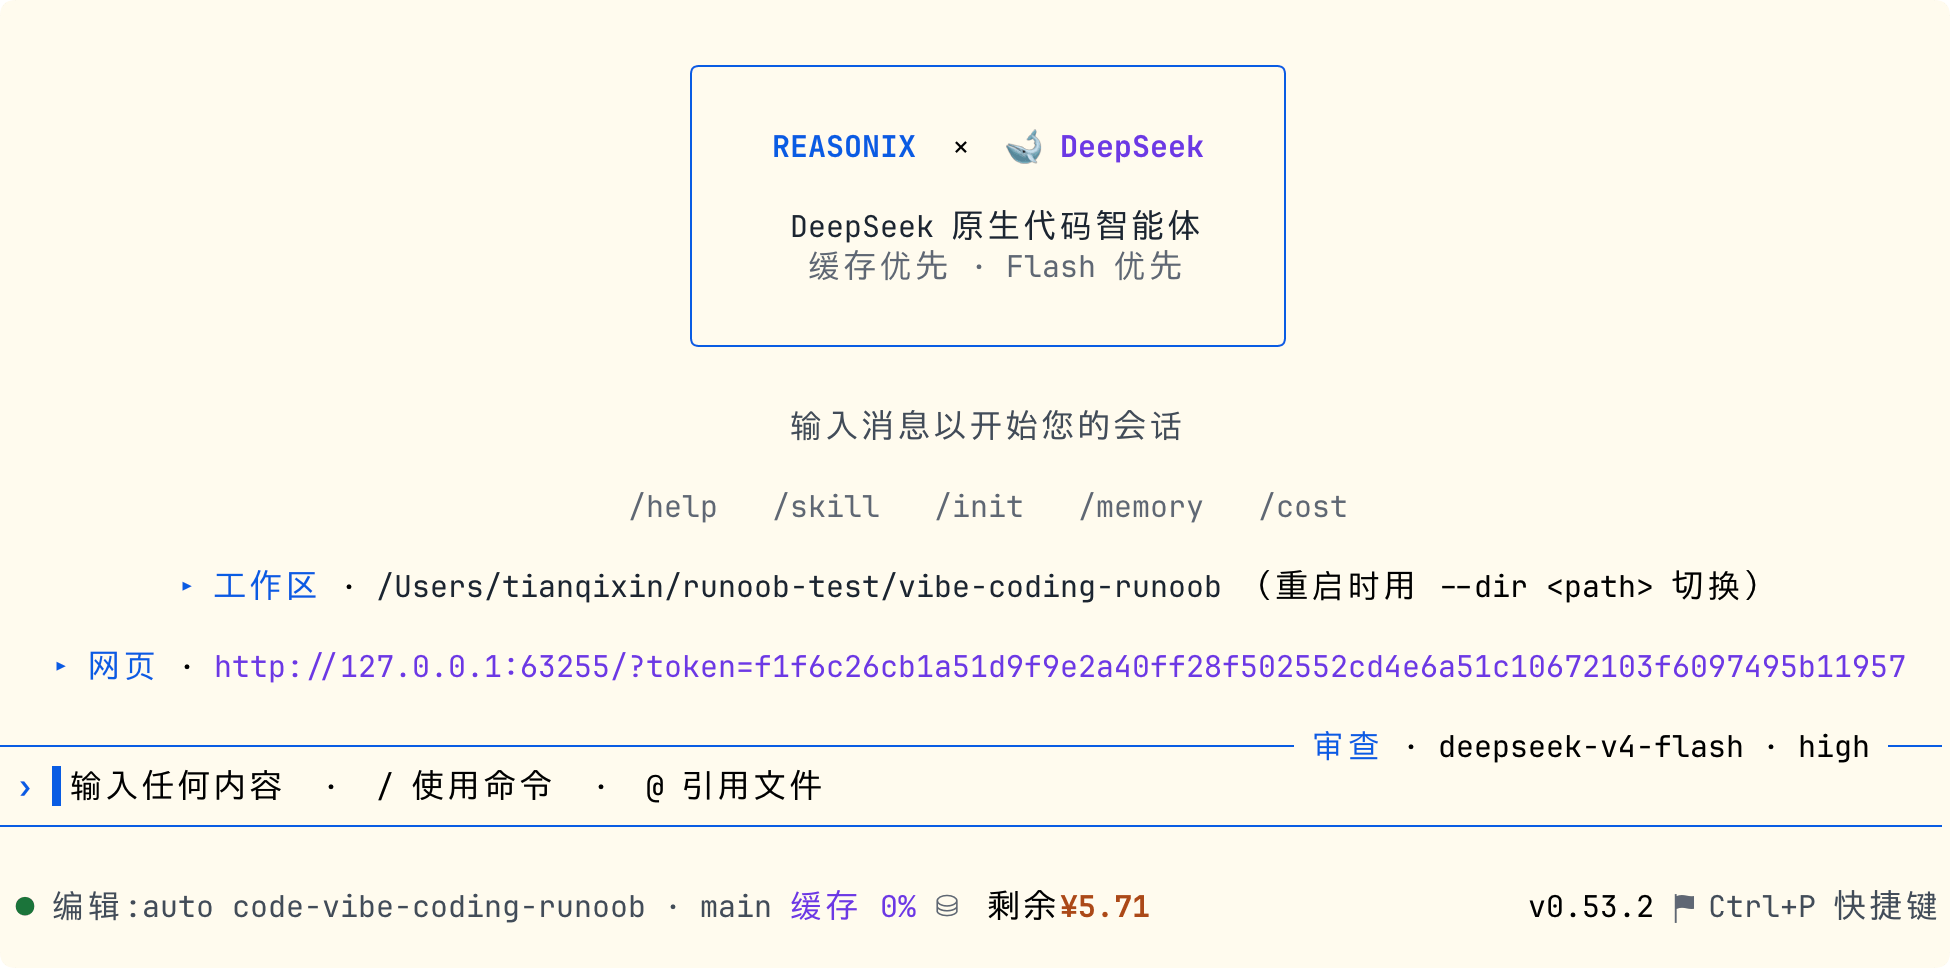
Enter/to view supported commands:

Desktop Installation
The Desktop version is a native client based on Tauri, with multiple tabs; the right panel shows files the Agent has read or edited in the current session.
The bottom displays the same cost/cache/token counters as the CLI top bar. It uses the same DeepSeek API Key and ~/.reasonix configuration.
The Desktop version has a built-in Node runtime; no separate npm install is needed.
From the official website (https://reasonix.io/#start) download the installer for your platform:
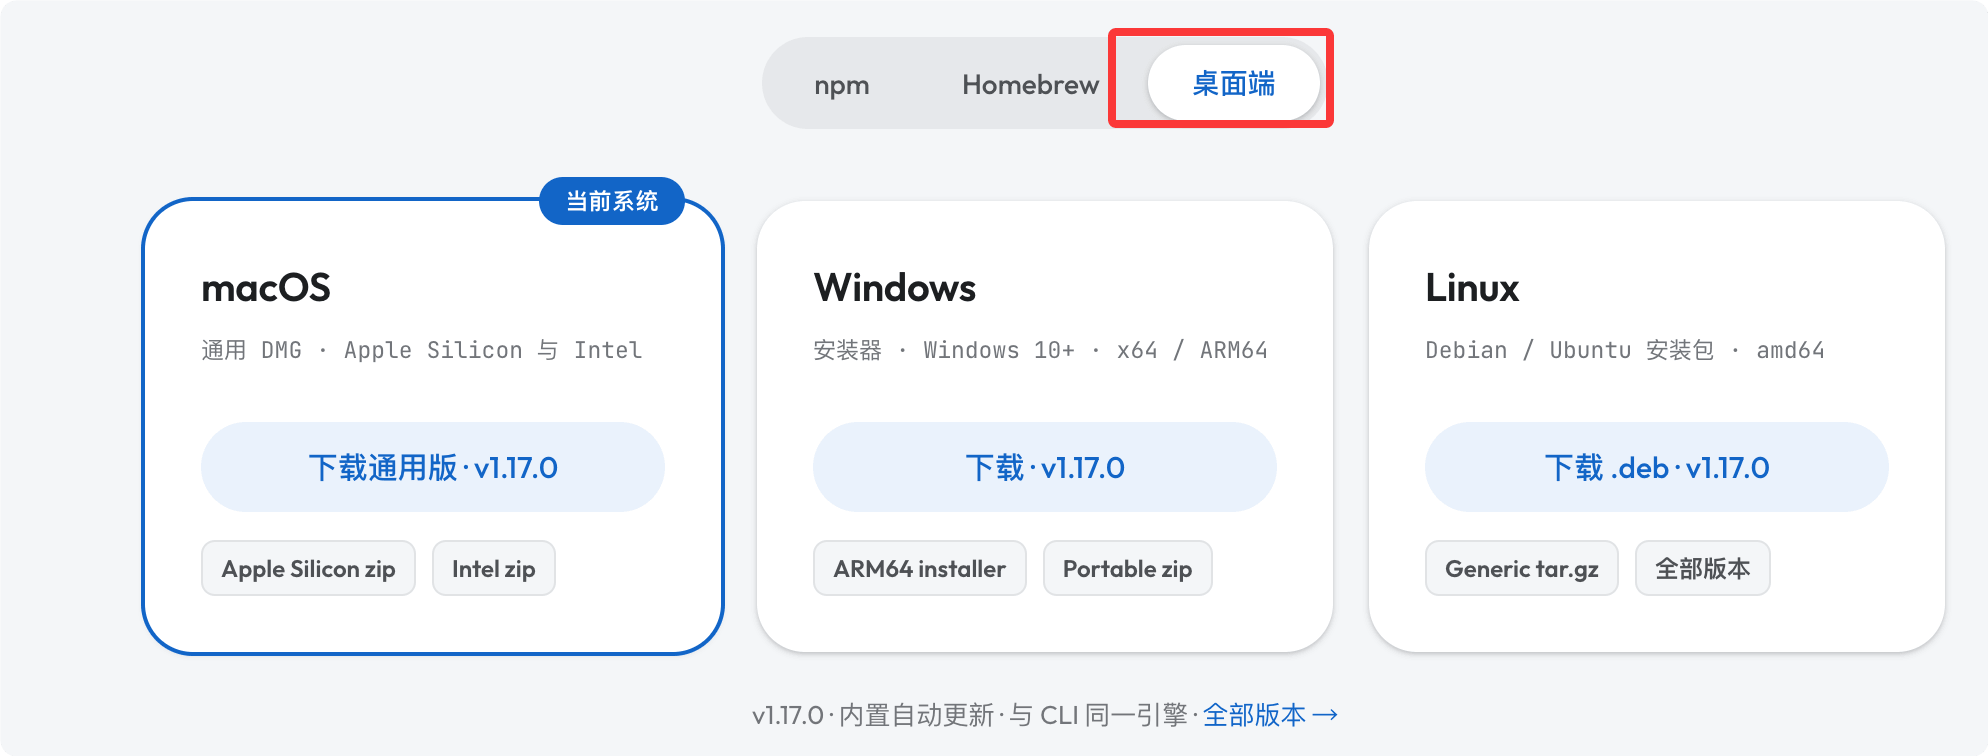
| Platform | File format |
|---|---|
| macOS | Reasonix_x.x.x_universal.dmg |
| Windows | Reasonix_x.x.x_x64-setup.exe |
| Linux | Reasonix_x.x.x_amd64.AppImage or .deb |
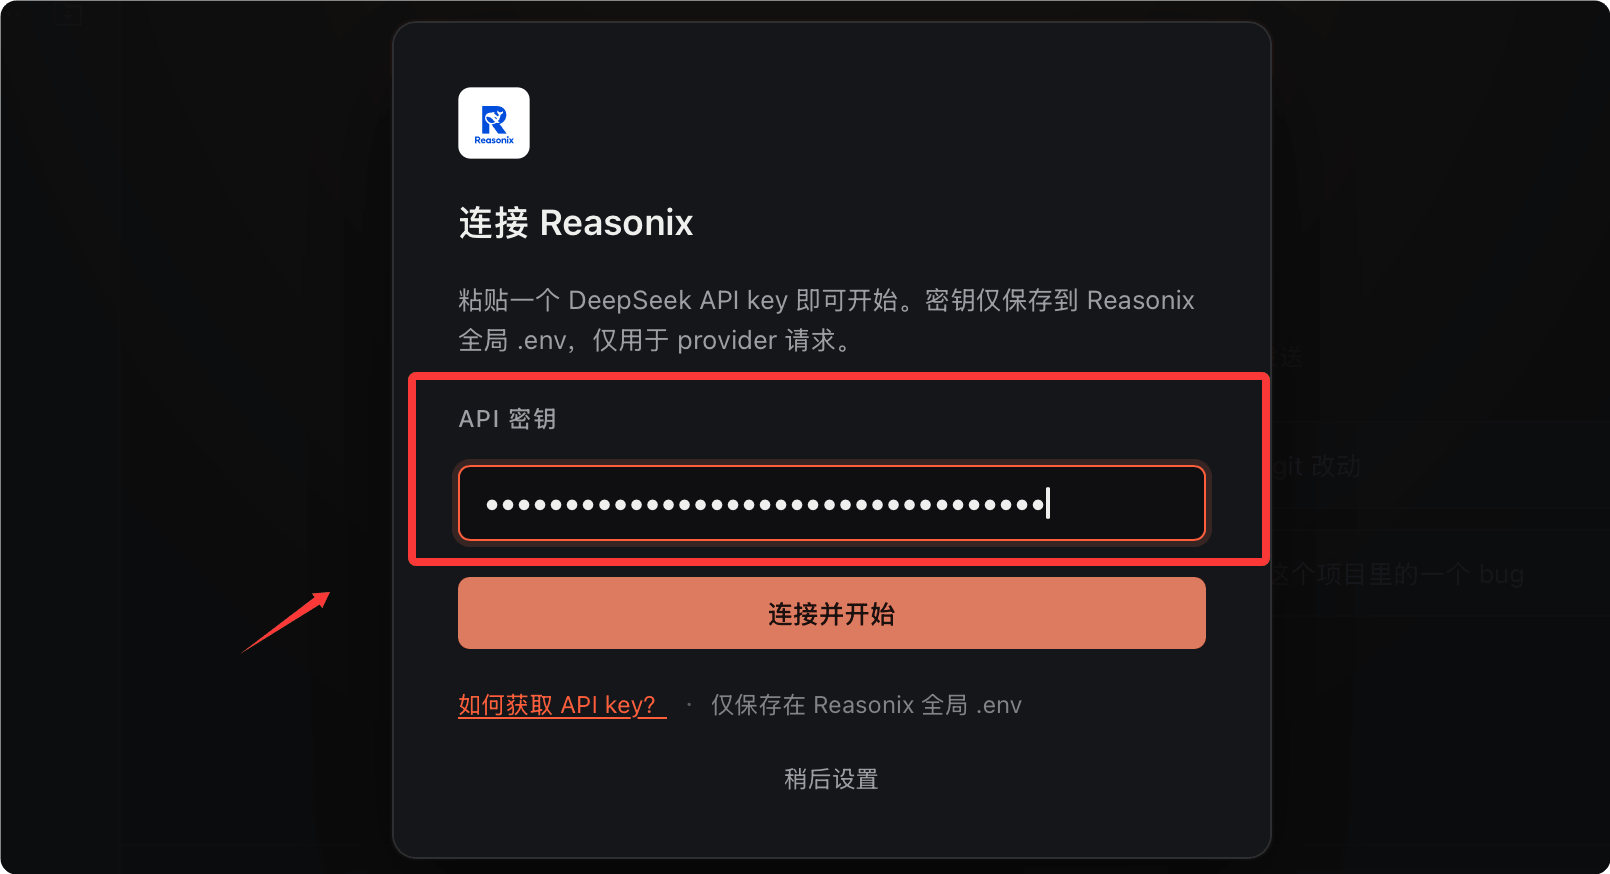
After downloading, double-click to install, then enter your API key:
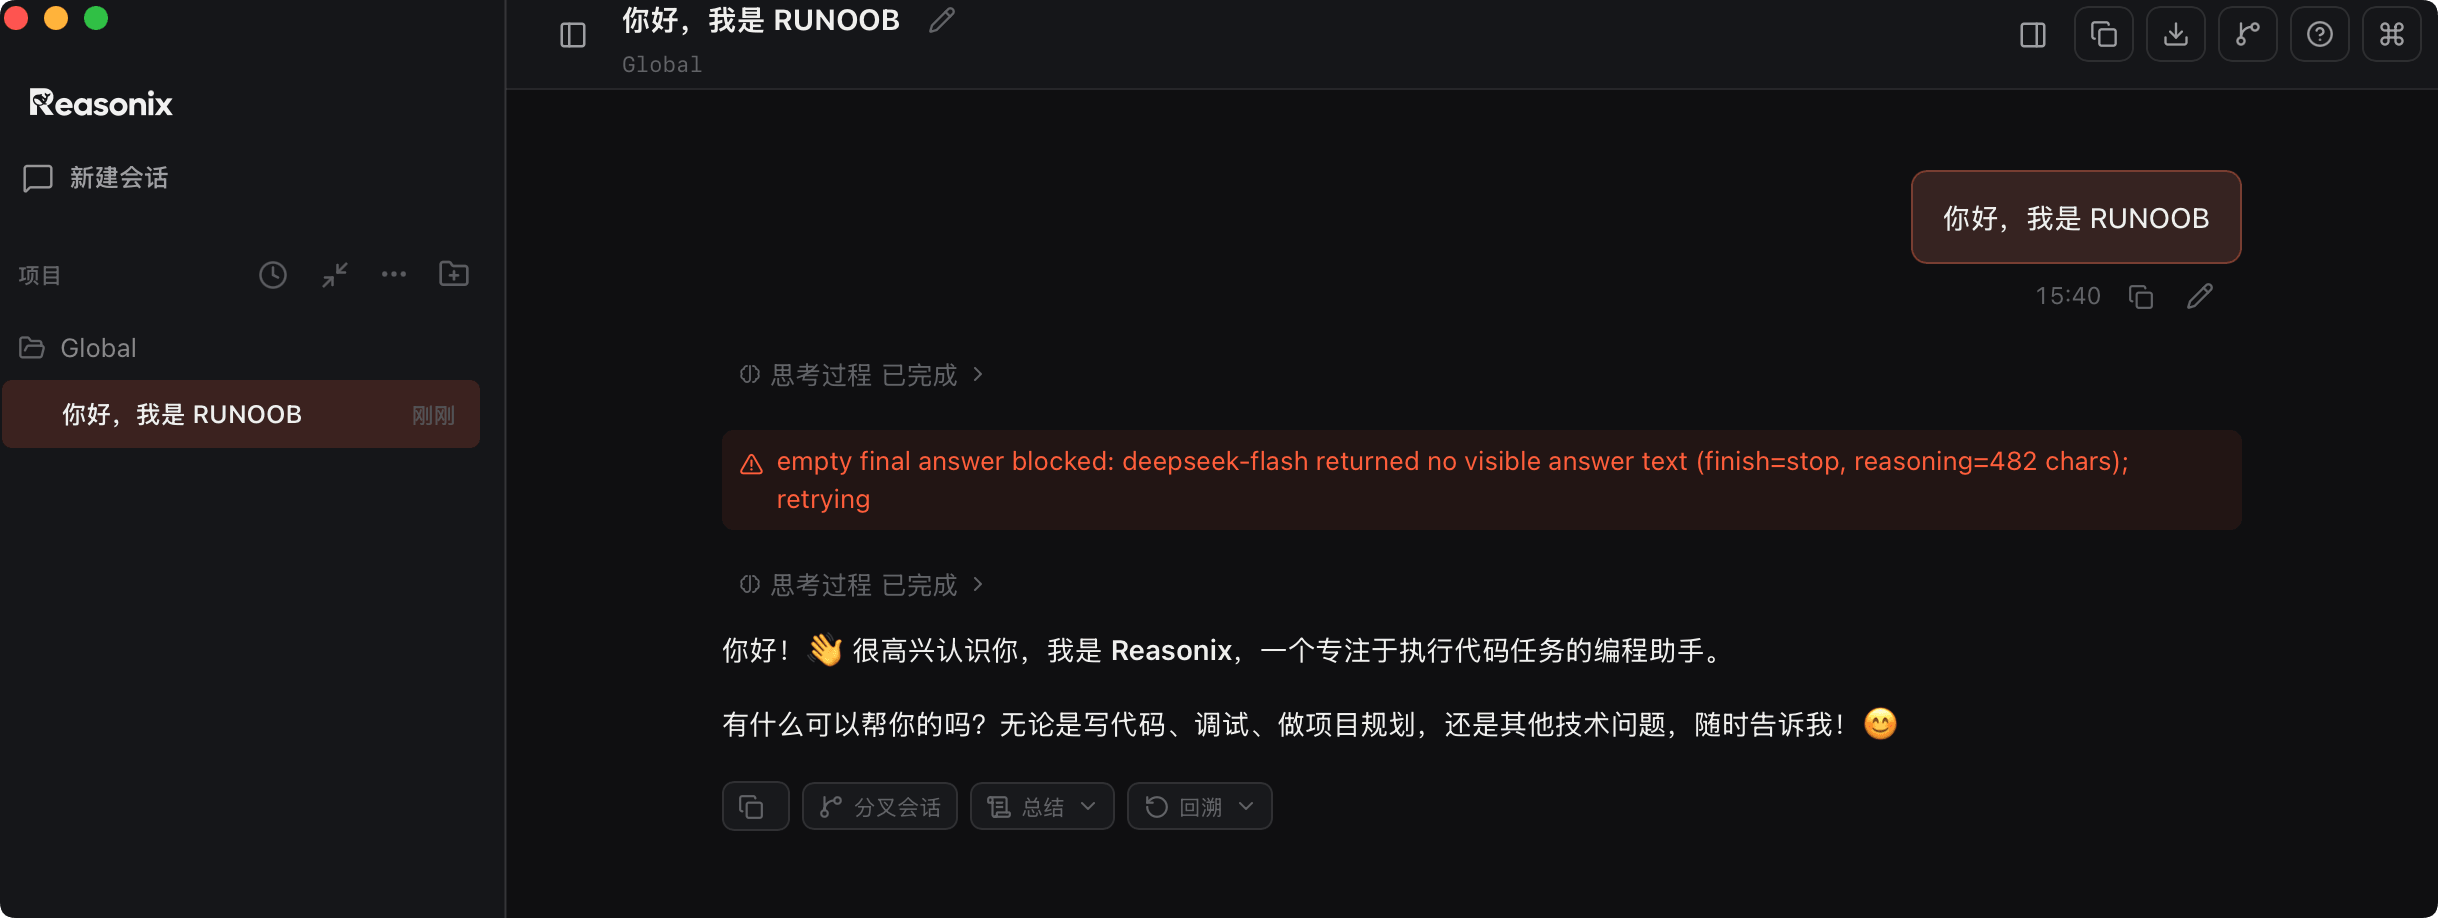
After launching, the desktop also has the classic left-right layout:

Type a message in the input box to start chatting:
Click the icon in the top-right corner to open a three-column layout:

Three collaboration modes:

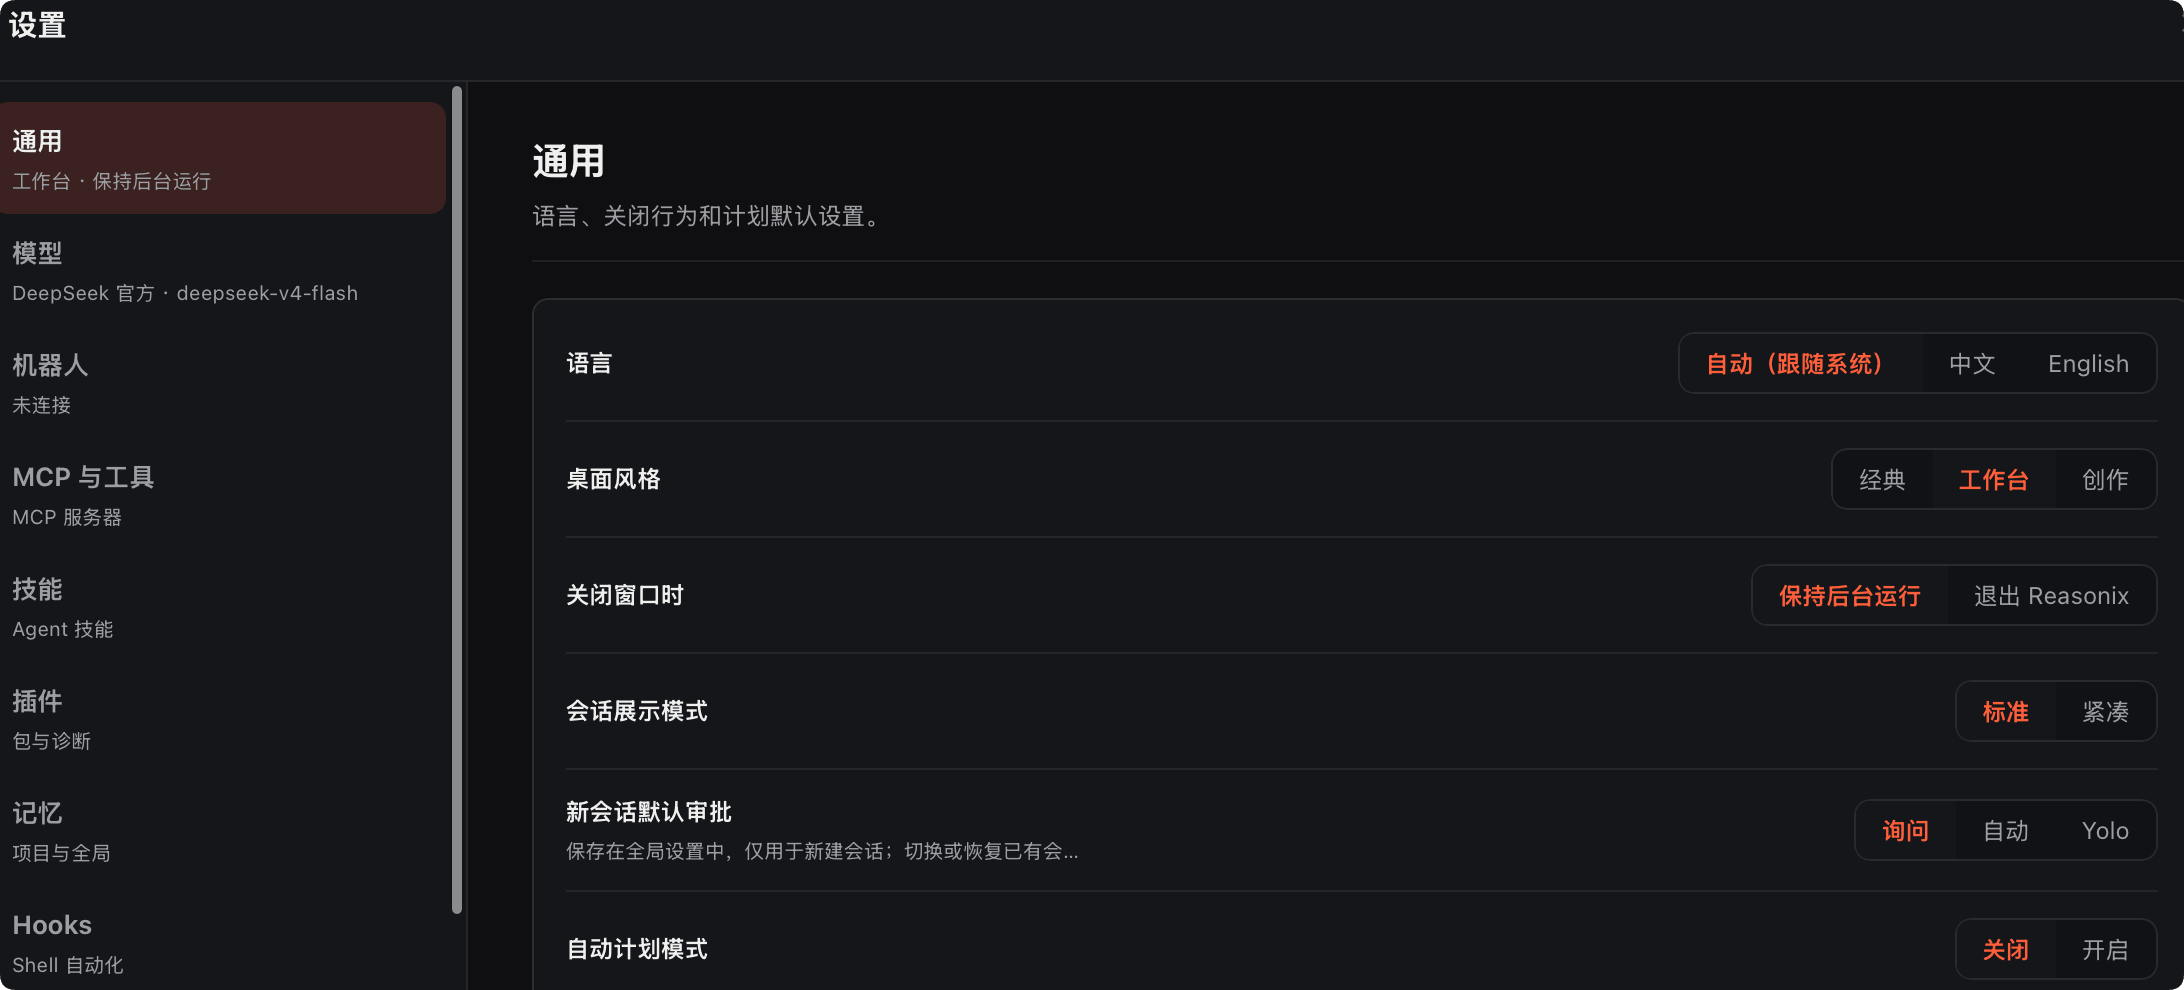
Common settings, including theme, appearance, language, plugins, MCP, etc.:
Notes for first launch:
macOS's Gatekeeper will block the first launch. To bypass once: run xattr -dr com.apple.quarantine /Applications/Reasonix.app in the terminal, or right-click → Open → Confirm.
Windows: SmartScreen shows "Unknown Publisher"; click "More info → Run anyway". Linux: .deb and .AppImage run directly, no extra steps needed.
The Desktop version is currently in Prerelease status; the loop and protocol are exactly the same as the CLI, but the UI is still being polished, and the installer is not yet code-signed. The CLI is the primary development interface; any feature available in the CLI can be used in the Desktop version's input box.
First Run
Enter the project directory and start Reasonix coding mode.
cd your-project

# 启动编程模式(以下两种方式等价)
reasonix code
# 或者直接
reasonix
Try sending the first message:
Analyze the directory structure of this project, and tell me the responsibilities of the main modules.
Reasonix will call tools such as list_directory and read_file to scan the project and output a structured analysis.
Headless Run (Pipe-friendly)
# 单次执行,结果流式输出到 stdout
reasonix run "统计 src 目录中每个 .ts 文件的行数,按从多到少排序"

# 结合 git diff 使用
git diff HEAD~1 | reasonix run "给这段 diff 写一个 Conventional Commits 格式的 commit message"
Two Modes: code and chat
Reasonix provides two operating modes for different use cases.
| Capabilities | code | chat |
|---|---|---|
| File system tools + edit_file | ✓ | — |
| SEARCH/REPLACE → /apply review | ✓ | — |
| Shell tool (controlled by permissions) | ✓ | — |
| Plan mode, /todo, /skill new, /mcp add | ✓ | — |
| Memory (remember / recall_memory) | Project-level + global | Global only |
| MCP servers, web search, ask_choice | ✓ | ✓ |
| Session scope | Isolated by directory | Shared default |
code is the default mode and the only mode with file system and shell tools — start here.
chat is a lighter-weight mode without disk access — use it when you need a thinking partner but don't want the AI to touch files, or when mounting MCP for information retrieval.
The chat mode system prompt is shorter, with lower token cost.
Reasonix scopes file system tools to the startup directory, redirected via --dir. Switching directories midway is not supported (memory paths will get tangled with the old root path) — exit and restart.
# 在指定目录下启动 code 模式
reasonix code --dir /path/to/other-project
Edit Gating: SEARCH/REPLACE Preview Flow
This is Reasonix's most important safety mechanism — the AI never modifies files without your knowledge.
Three Edit Gating Modes
Switch via /mode or Shift+Tab:
| Mode | Behavior |
|---|---|
| review | Show a preview for every edit, y/n confirmation per hunk |
| auto(AUTO) | Applied automatically, but press u within 5 seconds to undo |
| yolo | Write directly to disk with no confirmation |
Typical Edit Flow (review mode)
1. 你:帮我把 getUserById 函数加上错误处理

2. Reasonix 分析代码,提出 SEARCH/REPLACE 修改方案:

   ─── src/services/user.ts ───
   - async function getUserById(id: string) {
   -   const user = await db.users.findOne({ id });
   -   return user;
   - }
   + async function getUserById(id: string): Promise<User | null> {
   +   try {
   +     const user = await db.users.findOne({ id });
   +     return user ?? null;
   +   } catch (error) {
   +     logger.error({ id, error }, 'getUserById failed');
   +     throw new AppError('USER_FETCH_FAILED', 500);
   +   }
   + }

3. 你:/apply        ← 确认应用,文件写盘
        /discard      ← 丢弃不应用
        /walk         ← 逐块 git-add-p 风格审查
Edit History
# 列出本次会话的所有编辑批次
/history

# 查看某次编辑的 diff
/show <id>

# 回滚最近一次 /apply
/undo
Plan Mode: Read-Only Analysis Gate
Plan mode puts Reasonix into a read-only state — the AI can only read files, analyze code, and propose plans; it cannot write files or execute commands until you explicitly approve the plan.
Enabling and Workflow
/plan                ← 切换 Plan 模式(顶栏出现 PLAN MODE 标记)

你:我想把这个 Express 应用迁移到 Fastify,先给我分析影响范围

AI 分析后提交计划:
  ✓ 需要替换 5 个路由文件
  ✓ 3 个中间件需要适配
  ✓ 12 个测试需要更新
  预计改动:43 个文件,约 800 行

plan-confirm 模态框出现
  → Ctrl+P 展开/折叠完整计划详情
  → 批准后 AI 进入执行模式
  → 执行过程中每次修改仍走编辑门控
When to Use Plan Mode
| Scenario | Description |
|---|---|
| Large changes | Tasks affecting more than 5 files |
| Architecture changes | Framework migration, database switching, API redesign |
| Team collaboration | Scenarios where the approach needs alignment |
| Uncertain scope | When you want to preview which places the AI will touch |
Models and Cost Control
Reasonix provides flexible model switching and cost control mechanisms.
Switching Presets
# 默认 smart(v4-flash + max 推理)
reasonix code

# 快速任务,v4-flash + high 推理,成本最低
reasonix code --preset fast

# 复杂任务,v4-pro + max 推理
reasonix code --preset max
Switching within a session:
/preset auto         # 开启自动升级逻辑(flash 优先,失败升级 pro)
/preset flash        # 锁定 flash
/preset pro          # 锁定 pro
/pro One-time Upgrade
The user types /pro, the next turn uses v4-pro, then it automatically deactivates. No preset switching, no forgetting to revert.
The active status is shown as a yellow "pro armed" indicator in the top bar.
> /pro
> 解释这段 Rust 异步代码里的生命周期标注为什么必须这样写
# 回答完成后自动恢复 v4-flash
Automatic Upgrade on Failure
Per-turn visible "flash not up to the task" events: SEARCH-not-found errors in edit_file/write_file, and ToolCallRepair triggers.
Once the count reaches 3, the rest of the current turn automatically switches to v4-pro, announced via a yellow warning line — no silent costs.
Setting Session Budget Cap
# 本次会话上限 $0.50
reasonix code --budget 0.50
/budget 0.20                     # 会话中设置 $0.20 上限
/budget off                      # 取消上限
Warn at 80%, refuse the next turn at 100%.
Context Compression and Cost Query
/compact         # 手动将旧轮次折叠为摘要(缓存安全)
                 # 上下文达到 50% 时自动触发,这是手动触发

/cost            # 上一轮花费
/cost 这段文字   # 预估发送这段文字的成本
/stats           # 跨会话成本仪表板(今天/本周/本月/所有时间)
Skills: Reusable Markdown Playbooks
Skills are Markdown playbooks the AI can invoke on demand, with no remote registry — write them directly and they take effect immediately.
Creating Skills
# 项目级技能:<project>/.reasonix/skills/code-review.md
/skill new code-review

# 全局技能:~/.reasonix/skills/deploy-check.md
/skill new deploy-check --global
Skill File Format
File path: .reasonix/skills/code-review.md
---
description: 对当前改动做系统性代码审查,按 P0-P3 优先级分级
runAs: subagent
tools: [read_file, list_directory, search_content]
---

分析 `git diff HEAD` 中的所有改动。

对每个发现的问题,按如下格式输出:

**[P0]** 严重(阻止合并):安全漏洞、逻辑错误、数据丢失风险
**[P1]** 重要(强烈建议修复):性能问题、错误处理缺失
**[P2]** 一般(建议修复):代码质量、可读性
**[P3]** 改进(可选):最佳实践、未来优化

每条包含:文件名和行号 · 问题描述(一句话)· 修复建议。

最后给出总体评估:是否可以合并,以及最重要的三个改进点。
runAs: subagent executes the skill in an isolated sub-agent loop, so the main session's context doesn't bloat.
Invoking and Managing
/skill code-review        # 调用技能
/skill list               # 列出所有可用技能
/skill show code-review   # 查看技能内容
Skills Compatible with Claude Format
<project>/.claude/skills/<name>/SKILL.md and ~/.claude/skills/ are also read automatically.
They coexist with Reasonix's native paths, so tools that output Claude-format skills can be used directly.
# 写入 .claude/skills/openspec-*/SKILL.md
npx openspec init --tools claude

# 在 Reasonix 中直接调用
/skill openspec-propose <task>
Memory: Cross-Session Context Persistence
Reasonix has four memory types for preserving context across sessions.
| Type | Scope | Purpose |
|---|---|---|
| user | Global | Your preferences, work habits |
| feedback | Global | AI's mistakes or success experiences |
| project | Project-level | Project conventions, architecture decisions |
| reference | Configurable | Fixed reference materials |
Manual Writing
/remember 这个项目用 pnpm 而不是 npm
/remember 所有 API 错误统一走 AppError 类,不要 throw 原生 Error
/remember Turso 批量写入并发时需要加锁,见 src/db/mutex.ts
Managing Memory
/memory list              # 查看所有记忆
/memory show <id>         # 查看某条记忆详情
/memory forget <id>       # 删除某条记忆
/memory clear             # 清空所有记忆
Project Memory File (REASONIX.md)
Create REASONIX.md in the project root; it is automatically loaded at the start of every session.
# 扫描项目,自动生成 REASONIX.md 基线
/init

# 强制重新生成(覆盖已有文件)
/init force
Or create manually:
# 项目:example-backend

## 技术栈
- Runtime:Bun 1.2(禁止使用 Node.js 专属 API)
- 框架:Hono
- 数据库:Turso(libSQL)

## 编码规范
- 所有函数必须有 JSDoc 类型注解
- 错误统一用 AppError 类
- 禁止 any 类型

## 已知陷阱
- Turso 并发写入需要互斥锁,见 src/db/mutex.ts
MCP Integration: Connecting External Tools
MCP servers support three transports: stdio, SSE, and Streamable HTTP.
The same configuration format applies to both config.json and the --mcp command-line argument.
Dynamically Adding in Session
/mcp                      # 打开 MCP 中心(在线 + 市场标签页)
/mcp add stdio:npx,-y,@modelcontextprotocol/server-github
Command Line Mounting
# 通过命令行参数挂载 MCP 服务器
reasonix code --mcp stdio:npx,-y,@modelcontextprotocol/server-github
Config File Presets (Recommended)
File path: ~/.reasonix/config.json
Examples
"mcp": {
"servers": {
"github": {
"transport": "stdio",
"command": "npx",
"args": ["-y", "@modelcontextprotocol/server-github"],
"env": {
"GITHUB_PERSONAL_ACCESS_TOKEN": "${GITHUB_TOKEN}"
}
},
"postgres": {
"transport": "stdio",
"command": "npx",
"args": ["-y", "@modelcontextprotocol/server-postgres"],
"env": {
"POSTGRES_CONNECTION_STRING": "postgresql://localhost/mydb"
}
},
"searxng": {
"transport": "sse",
"url": "http://localhost:8080/mcp/sse"
}
}
}
}
Browsing MCP Tools
/mcp list                 # 列出已连接的服务器
/resource                 # 浏览 MCP 资源
/prompt                   # 浏览 MCP 提示词模板
Hooks: Lifecycle Automation
Hooks support four lifecycle events; PreToolUse can block tool calls with a non-zero exit code.
Supported Events
| Hook | Trigger timing | Special capability |
|---|---|---|
| PreToolUse | Before tool calls | Non-zero exit = reject the call |
| PostToolUse | After tool calls | Logging/formatting |
| UserPromptSubmit | When the user submits a message | Inject extra context |
| Stop | When the session ends | Summary/cleanup |
Configuration Example
File path: ~/.reasonix/config.json
Examples
"hooks": {
"PostToolUse": [
{
"matcher": { "tool": "edit_file" },
"command": "npx biome format --write {{file}} 2>/dev/null || true",
"description": "Auto-format after editing files"
}
],
"PreToolUse": [
{
"matcher": { "tool": "run_command" },
"command": "echo '$(date): {{command}}' >> ~/.reasonix/audit.log",
"description": "Log all Shell commands to an audit log"
}
],
"Stop": [
{
"command": "reasonix stats --session last >> ~/.reasonix/sessions-log.txt",
"description": "Save stats after a session ends"
}
]
}
}
Viewing and Reloading
/hooks                    # 列出所有已配置的 hooks
/hooks reload             # 热重载 hooks 配置(无需重启)
Session Management and Checkpoint
Reasonix provides complete session management and file snapshot features.
Session Management
Examples
reasonix sessions
# Open the specified session
reasonix sessions my-project
# Delete sessions older than 30 days
reasonix prune-sessions --days 30
Commands within a session:
/sessions                 # 列出已保存会话(当前标记 ▸)
--session <name>          # 启动时绑定到具名会话
--continue                # 恢复该工作区最近一次会话
--new                     # 强制新建会话(即使已有现成的)
--no-session              # 临时运行,不持久化任何内容
Checkpoint (File Snapshot)
/checkpoint               # 为本次会话碰过的所有文件创建快照
/checkpoint my-snapshot   # 创建具名快照
/checkpoint list          # 列出所有快照
/checkpoint forget <id>   # 删除快照

/restore my-snapshot      # 恢复到指定快照
Session Replay (for Debugging)
# 重新渲染 JSONL 会话记录,不调用模型
reasonix replay <transcript>

# 对比两个会话的成本/缓存/Token 差异
reasonix diff <a> <b>

# 跟踪某个会话的事件日志
reasonix events <name>
Semantic Indexing and Web Search
Reasonix supports building a local vector index for projects and configuring a web search engine.
Semantic Indexing
Build a local vector index for the project, supporting semantic search without needing exact keyword matches.
# 构建索引(需要 Ollama 或 OpenAI 兼容 Embedding 端点)
reasonix index
Configuration (~/.reasonix/config.json):
Examples
"index": {
"endpoint": "http://localhost:11434/api/embeddings",
"model": "nomic-embed-text"
}
}
After building, use it in a session:
> 找出所有和用户认证相关的代码
# 触发 semantic_search 工具,基于语义而非关键词检索
Web Search
Mojeek is the default; switch via /search-engine (or /se).
/search-engine mojeek     # 默认,隐私友好
/search-engine searxng    # 自托管 SearXNG 实例
/search-engine metaso     # 秘塔搜索(中文内容优化)
Configure self-hosted SearXNG:
Examples
"search": {
"engine": "searxng",
"searxngUrl": "http://localhost:8888"
}
}
QQ Channel Remote Control
Reasonix can use QQ as a remote communication channel for existing chat and code sessions; it is not a standalone running mode.
Start a session first, then connect to QQ.
# 1. 先启动会话
reasonix code

# 2. 会话中连接 QQ
/qq connect          # 首次使用引导输入 App ID 和 App Secret
/qq status           # 查看连接状态
/qq disconnect       # 断开连接
Once connected, slash commands, confirmation prompts, and AI replies can all go through QQ without typing in the terminal. Subsequent chat / code sessions will automatically start the QQ channel. Desktop version users can configure it in Settings → General → QQ Channel.
Desktop Deep Dive Guide
The desktop version adds more visualization features on top of the CLI TUI.
Interface Layout
The desktop version adds three main panels on top of the CLI TUI:
| Panel | Function |
|---|---|
| Right-side file panel | Displays in real time the list of files the Agent has read or edited in the current session; click to view contents directly. |
| Bottom status bar | Fully corresponds to the CLI top bar—cost counter, cache hit rate, current model, token consumption |
| Multiple tabs | Can open multiple project sessions simultaneously, switch independently between tabs |
Relationship with CLI
The desktop version and CLI share the same configuration (~/.reasonix/config.json) and API Key.
Skills, memories, and MCP configurations saved in the CLI are immediately available in the desktop version, and vice versa.
All slash commands available in the CLI are fully supported in the desktop version's input box, including /plan, /skill, /mcp, /apply, /pro, etc.
Desktop-Specific Capabilities
| Capability | Description |
|---|---|
| Graphical file tree browsing | Visually browse project files in the right panel |
| Multi-tab workspace management | More user-friendly multi-project switching experience |
| Graphical QQ configuration | Settings → General → QQ Channel |
| Built-in Node runtime | Users don't need to install Node.js separately |
Case 1: New Project Exploration and Code Reading
Scenario: Taking over an unfamiliar TypeScript backend repository, needing to quickly understand the architecture and find key modules.
Use chat mode (doesn't touch files, saves cost):
# 进入项目目录,使用 chat 模式并挂载 MCP
cd unknown-project
reasonix chat --mcp stdio:npx,-y,@modelcontextprotocol/server-github
Conversation process demo:
你:用 100 字以内描述这个项目是做什么的

AI:[调用 read_file 读 README.md 和 package.json]
    这是一个多租户 SaaS 订阅管理服务,基于 Node.js + PostgreSQL,
    处理订阅计划创建、支付 Webhook 和使用量追踪。

你:找出最核心的 3 个业务逻辑文件,各用一句话说明职责

AI:[调用 list_directory、search_content 扫描 src/]
    1. src/billing/subscription.ts — 订阅生命周期管理(创建/升级/取消)
    2. src/webhooks/stripe.ts — Stripe 事件处理和订阅状态同步
    3. src/usage/tracker.ts — API 调用量统计和超限检测

你:src/billing/subscription.ts 里的 cancelSubscription 函数,
    它做了什么,有没有可能的竞态条件?

AI:[调用 read_file 精确读取该函数]
    该函数...
    潜在竞态:如果同时收到两次取消请求,
    第 47 行的状态检查和第 52 行的数据库更新之间存在时间窗口...
Generate project memory:
你:把刚才了解的内容写成 REASONIX.md,我切到 code 模式后继续工作

AI:[生成 REASONIX.md 草稿]

你:/apply
Case 2: Multi-File Refactoring (with Plan Mode)
Scenario: Migrate the error handling of the existing REST API from throw new Error() to a custom AppError class.
Launch and enter Plan mode:
# 启动 code 模式
reasonix code
你:/plan

你:我要把所有 throw new Error() 改成 throw new AppError()。
    AppError 类在 src/errors.ts,接受 code、message、statusCode 三个参数。
    先分析影响范围,不要做任何修改。

AI:[调用 search_content 搜索 "throw new Error"]

    找到 23 处需要迁移的调用,分布在 8 个文件:
    - src/routes/users.ts (5 处)
    - src/routes/billing.ts (4 处)
    - src/services/auth.ts (7 处)
    ...

    建议迁移顺序:先处理 services 层(无 HTTP 依赖),
    再处理 routes 层,最后更新测试。

    预计改动:23 处调用,约 150 行代码变更。

    [plan-confirm 弹出]
    → Ctrl+P 展开完整文件清单

你:批准

AI:[进入执行模式,依次修改文件]
    每次改动都会弹出 SEARCH/REPLACE 预览

你:/apply     ← 每批次确认
After execution completes:
你:/commit
AI:[分析所有改动,生成 commit message]
    "refactor: migrate error handling to AppError class

    Replace 23 bare Error throws with typed AppError instances
    across 8 files, improving error observability and HTTP status
    code consistency."

你:确认提交
Case 3: Bug Localization and Fixing
Scenario: An intermittent "Cannot read properties of undefined" error appears in the production environment, and the logs only contain a stack trace.
Examples
"env": {
"GITHUB_PERSONAL_ACCESS_TOKEN": "${GITHUB_TOKEN}"
}
}
}
},
"permissions": {
"shell": {
"allow": [
"npm test",
"npm run ",
"git ",
"pnpm ",
"cat ",
"ls ",
"grep "
]
}
},
"hooks": {
"PostToolUse": [
{
"matcher": { "tool": "edit_file" },
"command": "npx biome format --write {{file}} 2>/dev/null || true"
}
]
},
"search": {
"engine": "searxng",
"searxngUrl": "http://localhost:8888"
},
"index": {
"endpoint": "http://localhost:11434/api/embeddings",
"model": "nomic-embed-text"
},
"parallelMax": 4
}
Permission Whitelist Rules
Uses exact prefix matching: allowing "git " means allowing all commands starting with "git " (note the trailing space). Commands not in the whitelist require manual confirmation each time.
Comparison with Other Tools
The following is a comparison between Reasonix and other mainstream AI programming tools:
| Dimension | Reasonix | Claude Code | Cursor | Aider |
|---|---|---|---|---|
| Backend | DeepSeek (exclusive) | Anthropic | OpenAI/Anthropic | Any (OpenRouter) |
| License | MIT | Closed source | Closed source | Apache 2 |
| Cost characteristics | Low cost per task | Premium pricing | Subscription + usage | Depends on the model |
| DeepSeek prefix-cache | Specially designed | Not applicable | Not applicable | Occasional hit |
| Built-in Web Dashboard | Yes | — | In IDE | — |
| Configurable web search engine | /search-engine | — | — | — |
| Persistent per-workspace sessions | Yes | Partial | Not applicable | — |
| Plan mode · MCP · Hooks · Skills | All available | All available | Yes | Partial |
Resources and Community
The following are Reasonix's official resources and community links.
Official Resources
| Resource | Link |
|---|---|
| GitHub | esengine/DeepSeek-Reasonix |
| Official website | https://reasonix.io/ |
| Documentation | https://reasonix.io/docs/ |