Linux Installation
In this chapter, we will introduce the installation of Linux. The installation steps are rather complicated. In fact, cloud servers are quite common now and cheap in price. If you don't want to build one yourself, you can also configure one. SeeLinux Cloud Server。
This chapter uses centos6.4 as an example.
centos download address:
You can download the latest version from the official website:https://www.centos.org/download/
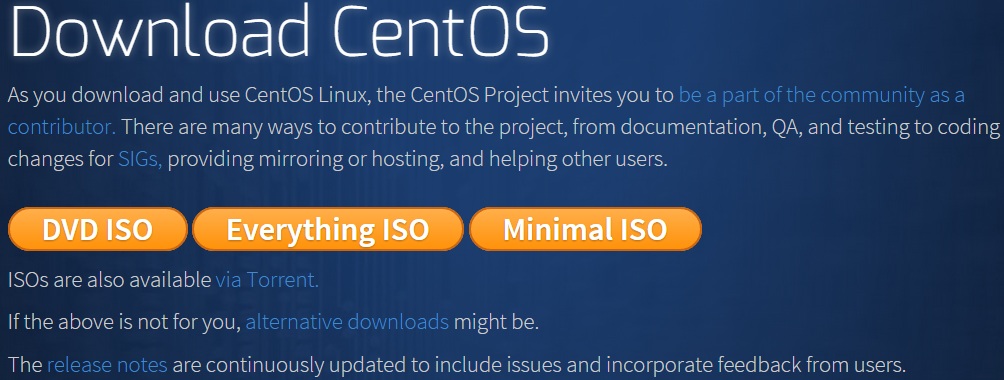
The following explains the ISO image files of each version one by one:
- CentOS-7.0-x86_64-DVD-1503-01.iso : Standard installation version. Generally just download this one (recommended)
- CentOS-7.0-x86_64-NetInstall-1503-01.iso : Network installation image (install from network or rescue system)
- CentOS-7.0-x86_64-Everything-1503-01.iso: Supplements the software of the full installation disc and integrates all software. (Includes a complete set of software packages for centos7, which can be used to install the system or fill a local image)
- CentOS-7.0-x86_64-GnomeLive-1503-01.iso: GNOME desktop version
- CentOS-7.0-x86_64-KdeLive-1503-01.iso: KDE desktop version
- CentOS-7.0-x86_64-livecd-1503-01.iso : System that runs on a disc, similar to winpe
- CentOS-7.0-x86_64-minimal-1503-01.iso : Lite version, comes with the least software
Note:It is recommended to install a 64-bit Linux system.
Old version download address:https://wiki.centos.org/Download
Next you need to burn the downloaded Linux system to a CD or USB drive.
Note:You can also install the Linux system by installing a VMware virtual machine on Windows.
Linux Installation Steps
1. First, use the CD drive, USB drive, or your downloaded Linux ISO file to install.
Interface description:

Install or upgrade an existing system
install system with basic video driver - Use the basic graphics driver during installation
Rescue installed system - Enter system repair mode
Boot from local drive - Exit installation and boot from hard disk
Memory test
Note: When installing with a Lenovo E49, selecting the first option caused abnormal screen display issues; later switching to the second option for installation had no problems.
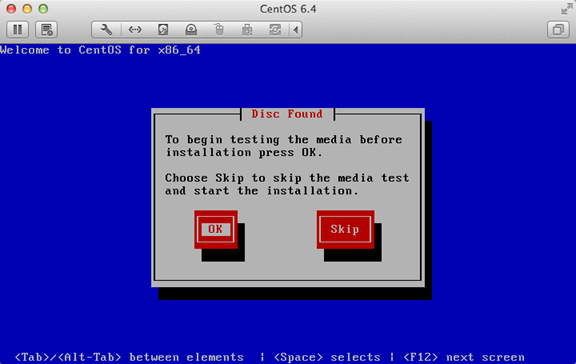
2. At this point, just click "skip".
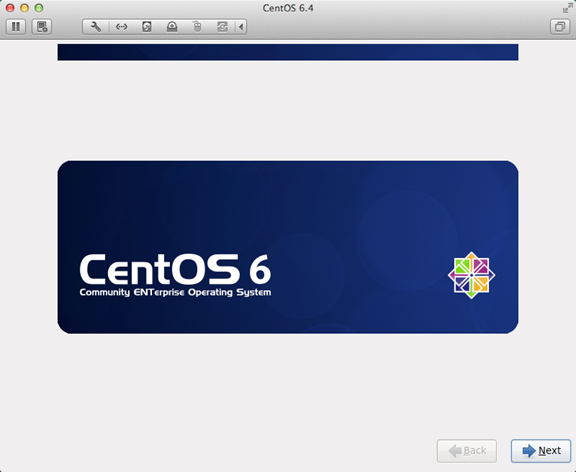
3. When the boot screen appears, click "next".
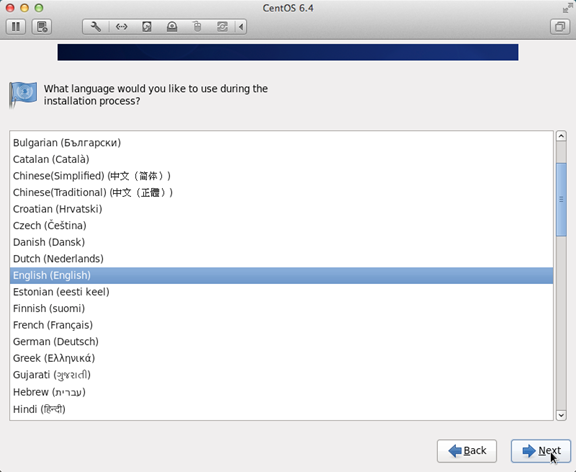
4. Select "English (English)" otherwise there may be some garbled text issues.
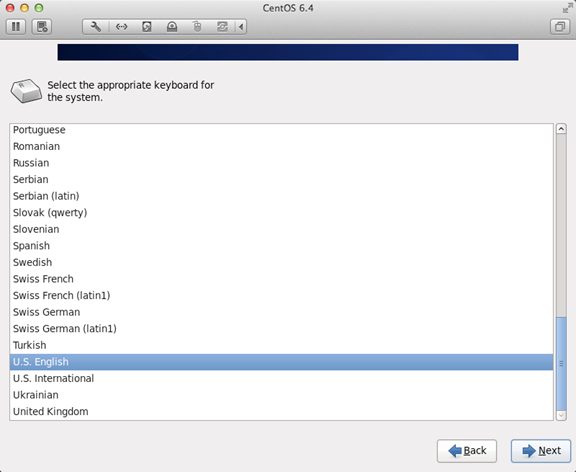
5. Choose "U.S.English" for the keyboard layout.
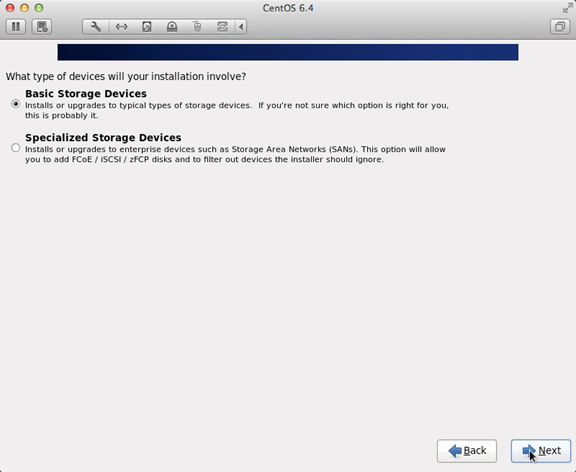
6. Select "Basic Storage Devices" and click "Next".
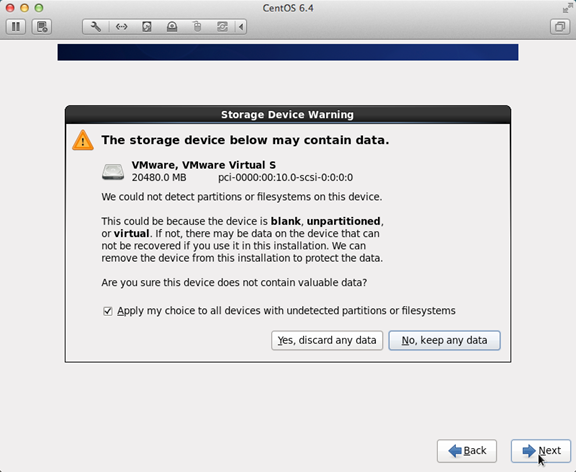
7. It asks whether to ignore all data. For installing a system on a new computer, select "Yes, discard any data".
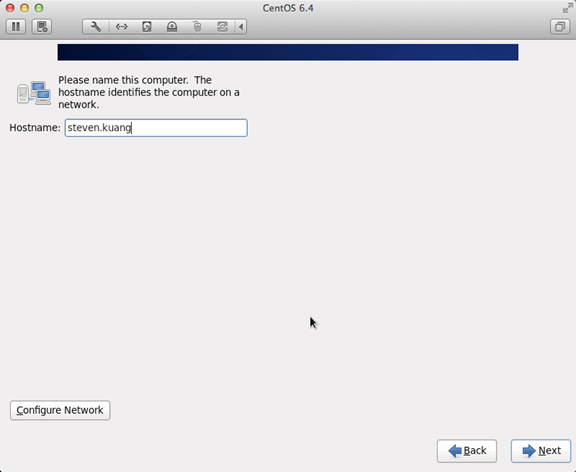
8. Fill in the Hostname in the format "English first name.surname".
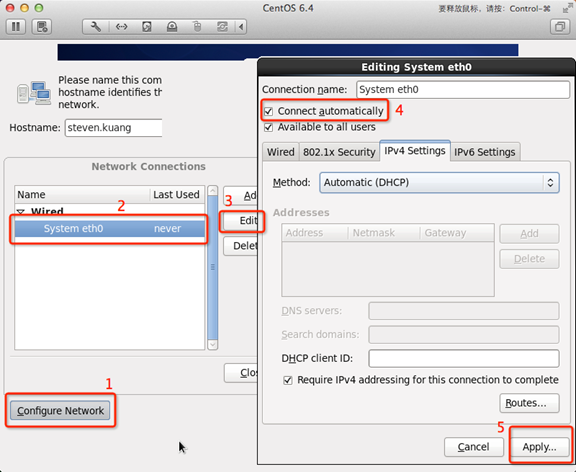
9. For network settings, just click in the order shown in the diagram.
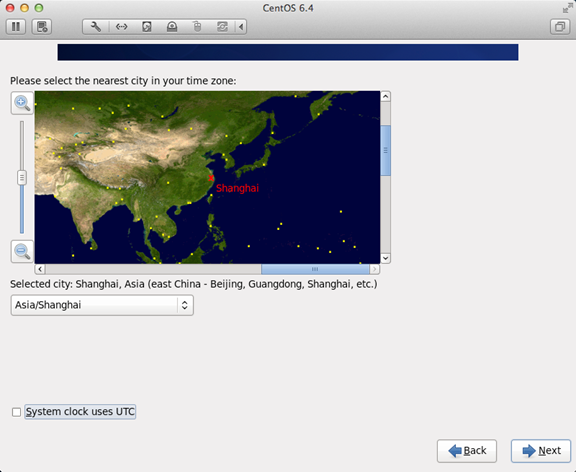
10. For time zone, you can click on the map, select "shanghai", and uncheck the "System clock uses UTC" checkbox.
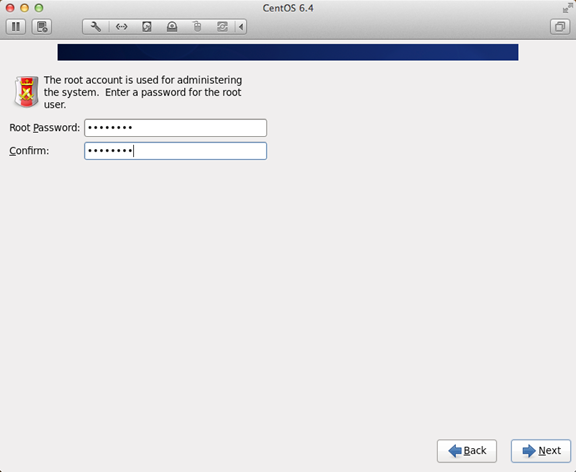
11. Set the root password.
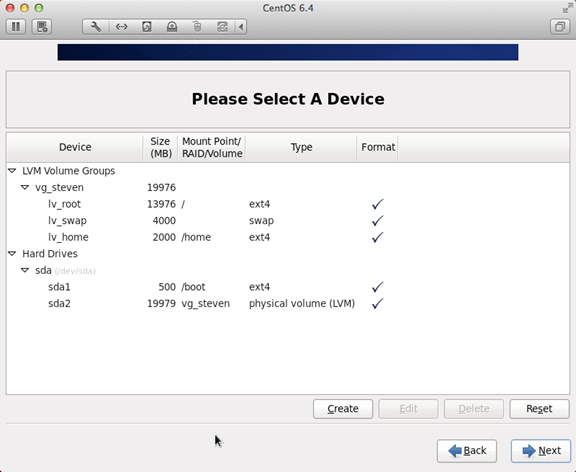
12. For disk partitioning, be sure to select according to the diagram.

13. Adjust partitions. There must be a /home partition. If there is no such partition, some software may fail to install.
14. It asks whether to format the partition.
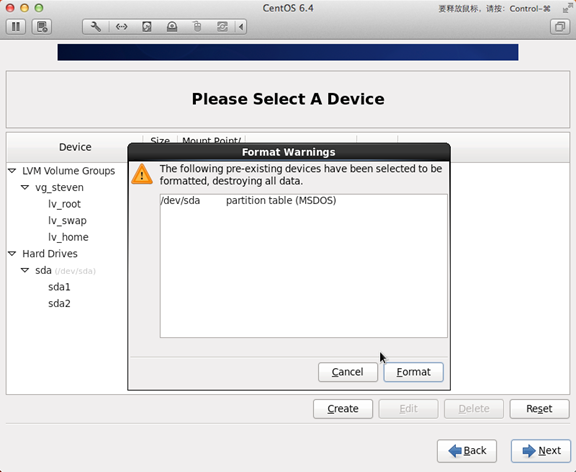
15. Write changes to disk.
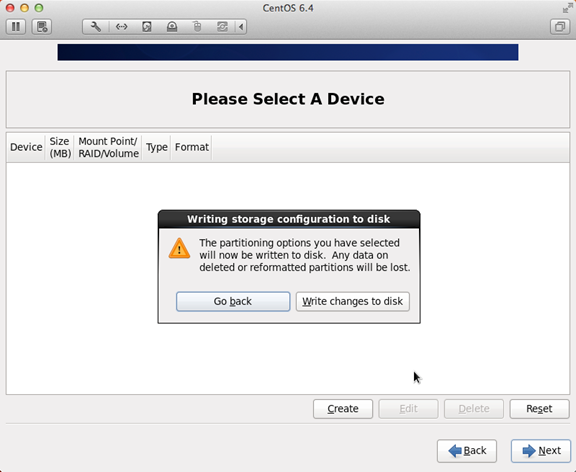
16. Bootloader installation location.
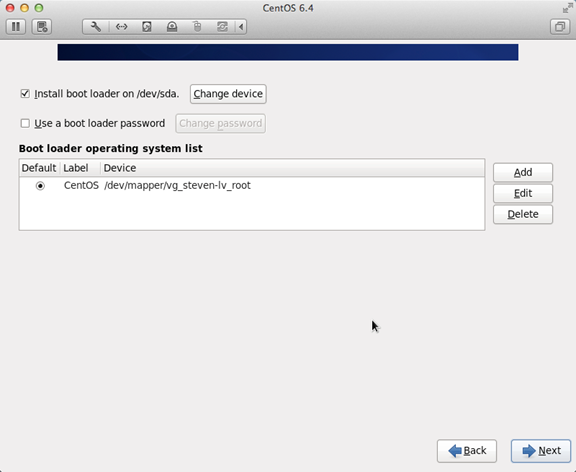
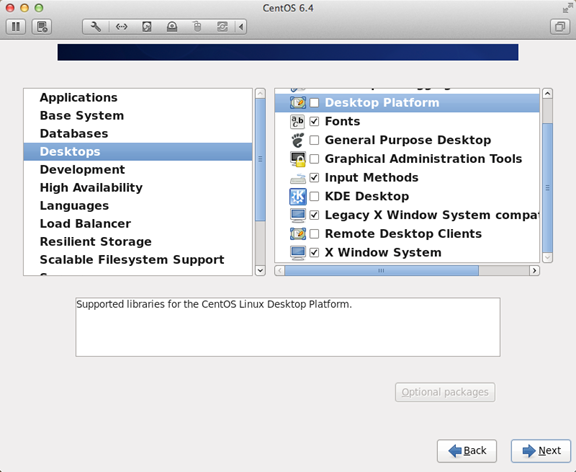
17. The most important step, also the most critical step in this tutorial, and a step not mentioned in other tutorials. Click in the order shown in the diagram.
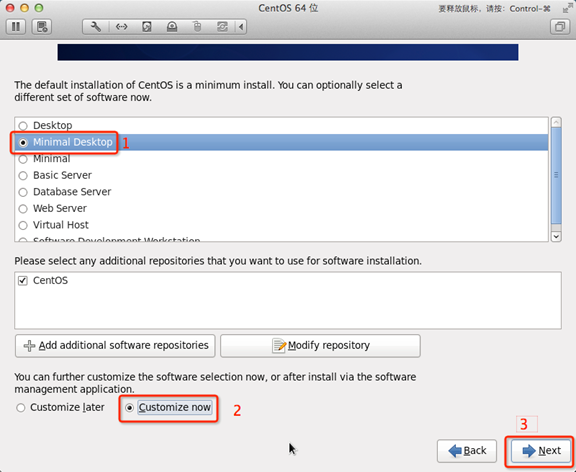
18. Cancel all options for the following content.
Applications
Base System
Servers
And make the following settings for Desktops:
That is, uncheck the following options:
Desktop Debugging and Performance Tools
Desktop Platform
Remote Desktop Clients
Input MethodsAmong them, keep only ibus-pinyin-1.3.8-1.el6.x86_64, and uncheck all the others.

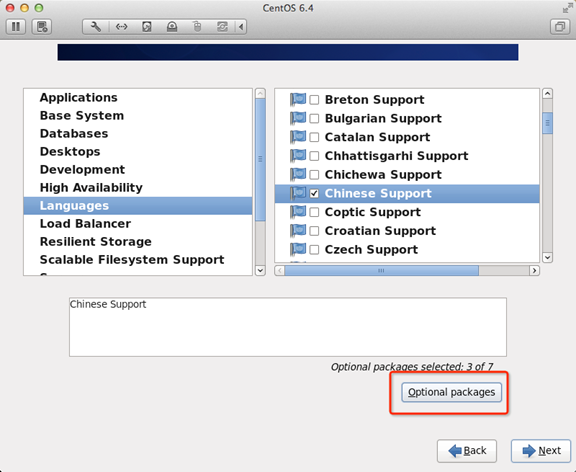
19. Select Languages, then select Chinese Support on the right, and then click the red area.
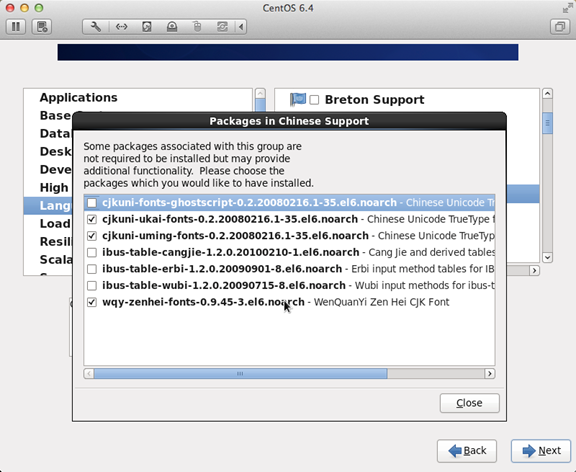
20. After adjustment, it will look like the following figure.
21. At this point, a minimal desktop environment has been set up.
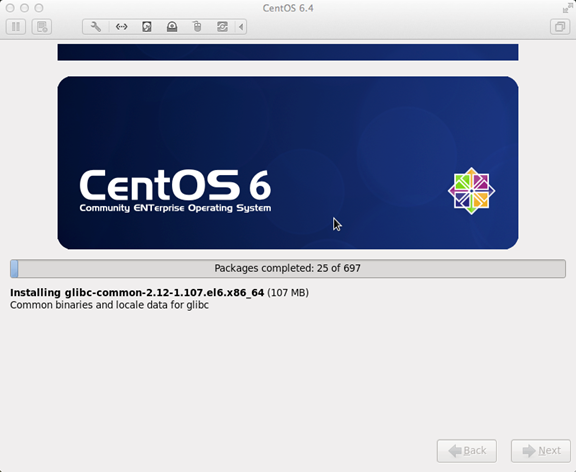
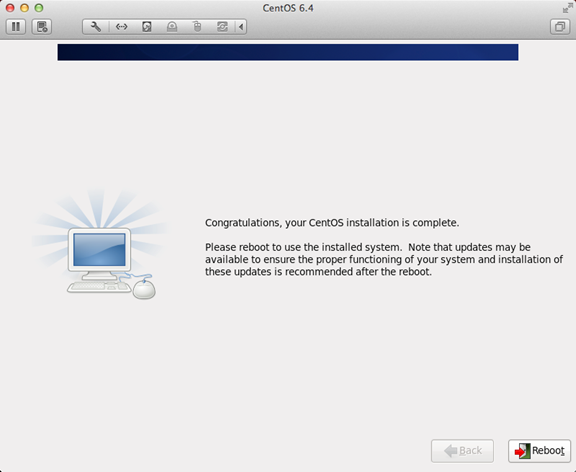
22. Installation complete, reboot.
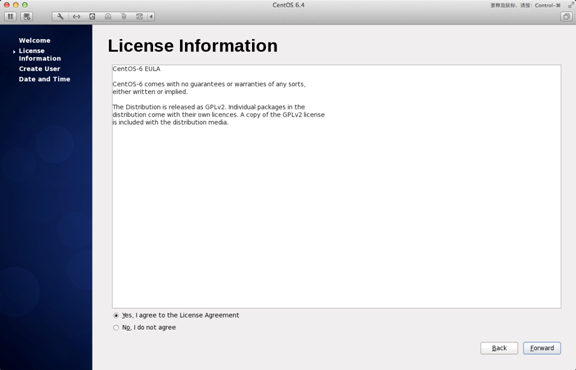
23. After reboot, the License Information
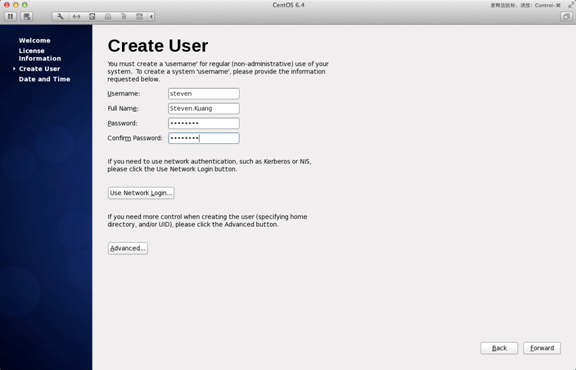
24、Create User
Username: Fill in your English name (without .surname)
Full Name: Fill in your English name.surname (with the first letter capitalized)
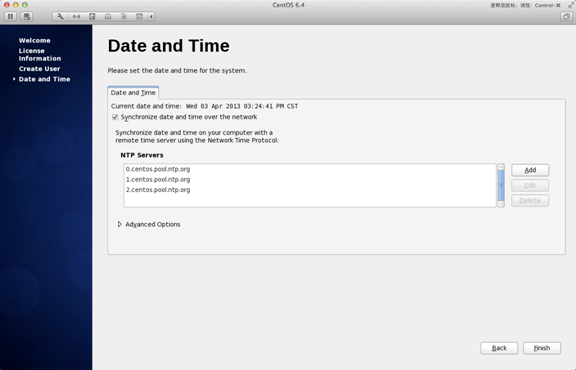
25. In "Date and Time", select "Synchronize data and time over the network".
After clicking Finish, the system will reboot.
26. First login: do not make any changes before logging in. This is very important!!! After logging in, immediately log out.
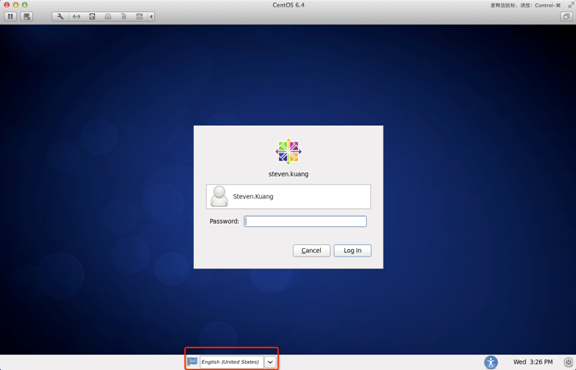
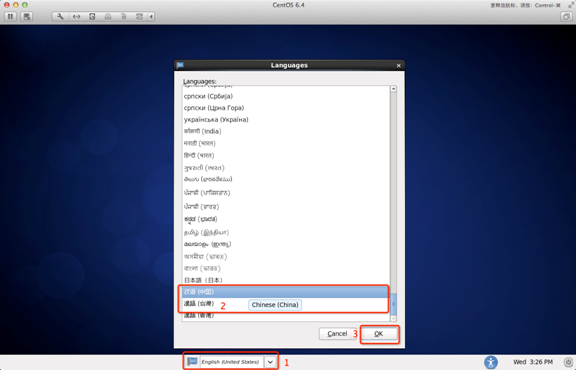
Second login, choose the language. In the red area, click the small drop-down triangle, select "other", then select "Chinese (China)".
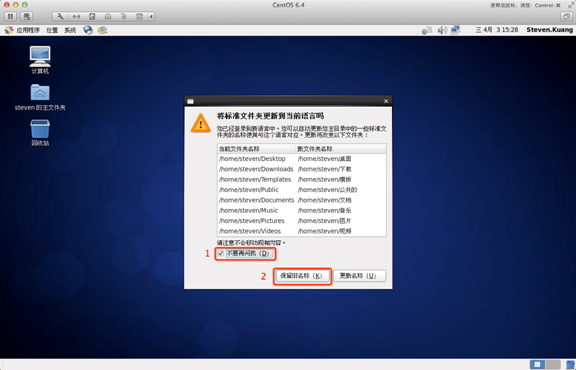
27. After logging in, be sure to click in the following order!
At this point, CentOS installation is complete. If you have any other questions, please feel free to contact me!!
Other ExtensionsIf you are using VMware, you can refer to:VMware Installation of Centos7