Swift Environment Setup
Swift is an open-source programming language used for developing OS X and iOS applications.
Before formally developing applications, we need to set up the Swift development environment in order to better and more conveniently use various development tools and languages for rapid application development. Since the Swift development environment needs to run on the OS X system, its setup is different from that on Windows. Now let's learn how to set up the Swift development environment.
Prerequisites for successfully setting up the Swift development environment:
- You must own an Apple computer, because the integrated development environment Xcode can only run on the OS X system.
- The computer system must be OS 10.9.3 or above.
- The computer must have the Xcode integrated development environment installed.
Swift Development Tool Xcode Download
Official website address for Swift development tools:https://developer.apple.com/xcode/download/。
Swift source code download:https://swift.org/download/#latest-development-snapshots
After downloading, double-click the downloaded dmg file to install. After installation, move the Xcode icon to the Applications folder.
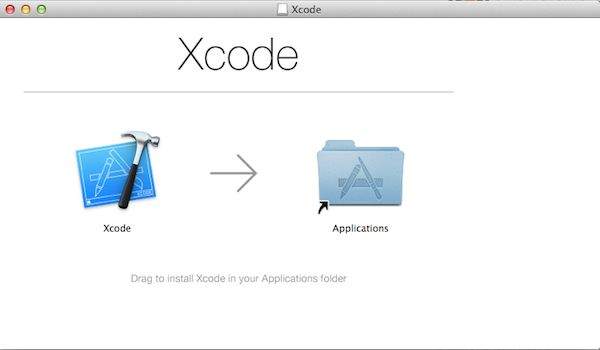
You can also search for Xcode in the App Store and install it, as shown in the figure below:
The First Swift Program
After Xcode is installed, we can start writing Swift code.
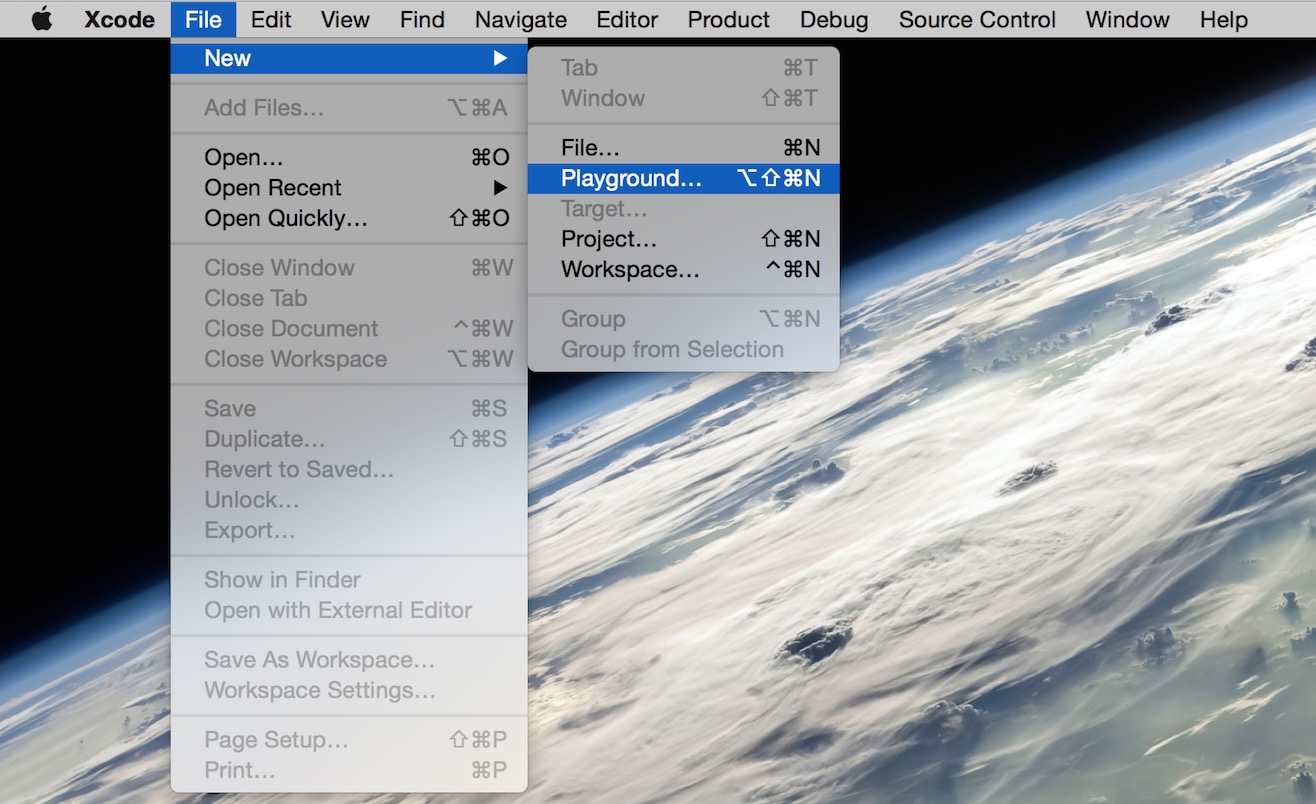
Next, open Xcode from the Applications folder. After opening, select File => New => Playground at the top of the screen.
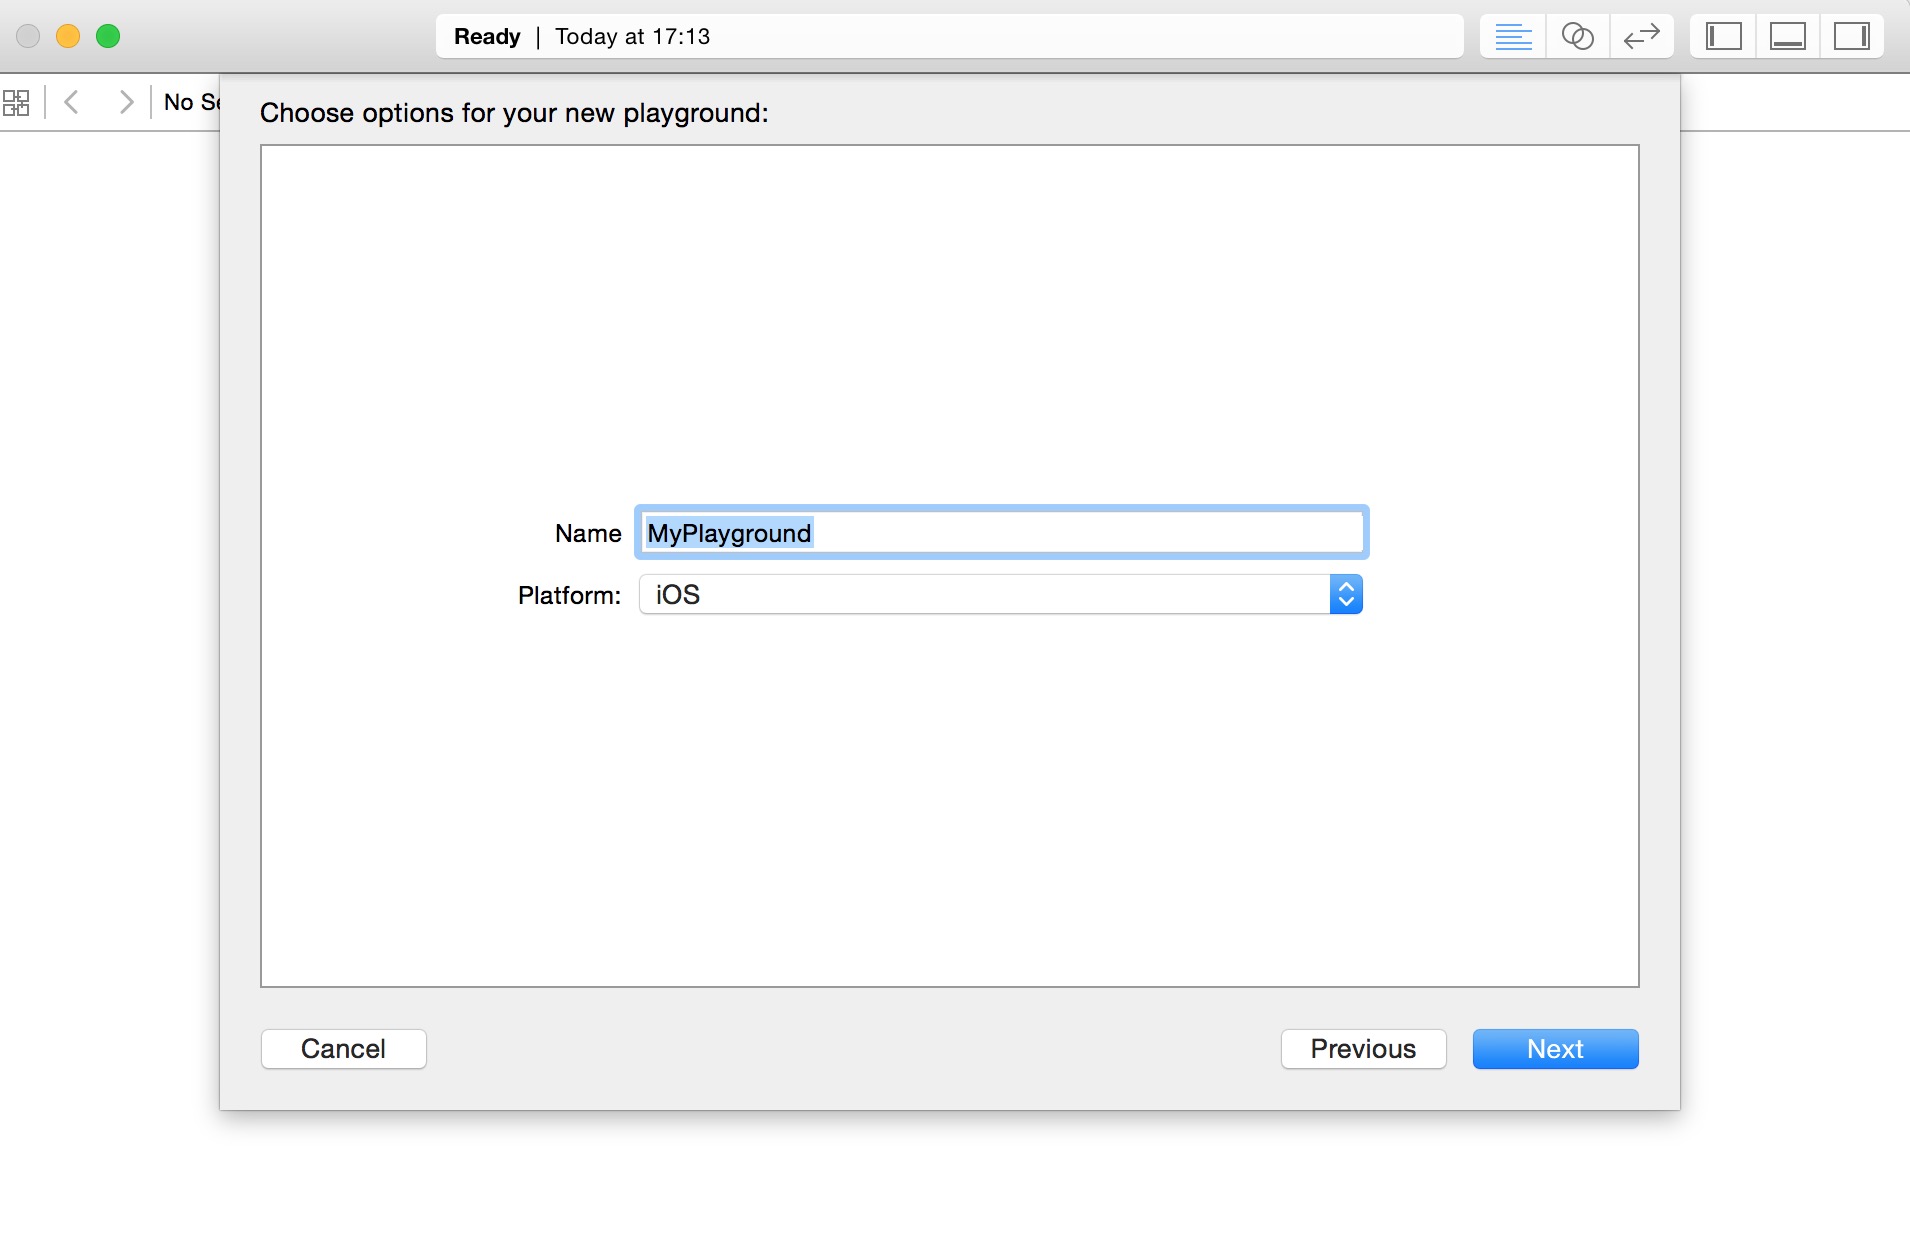
Then set a name for the playground and select the iOS platform.
Swift playground is like an interactive document. It is used for practicing Swift. Write a line of code and get a line of result (on the right). You can view the code result in real time. It is a powerful tool for learning the Swift language!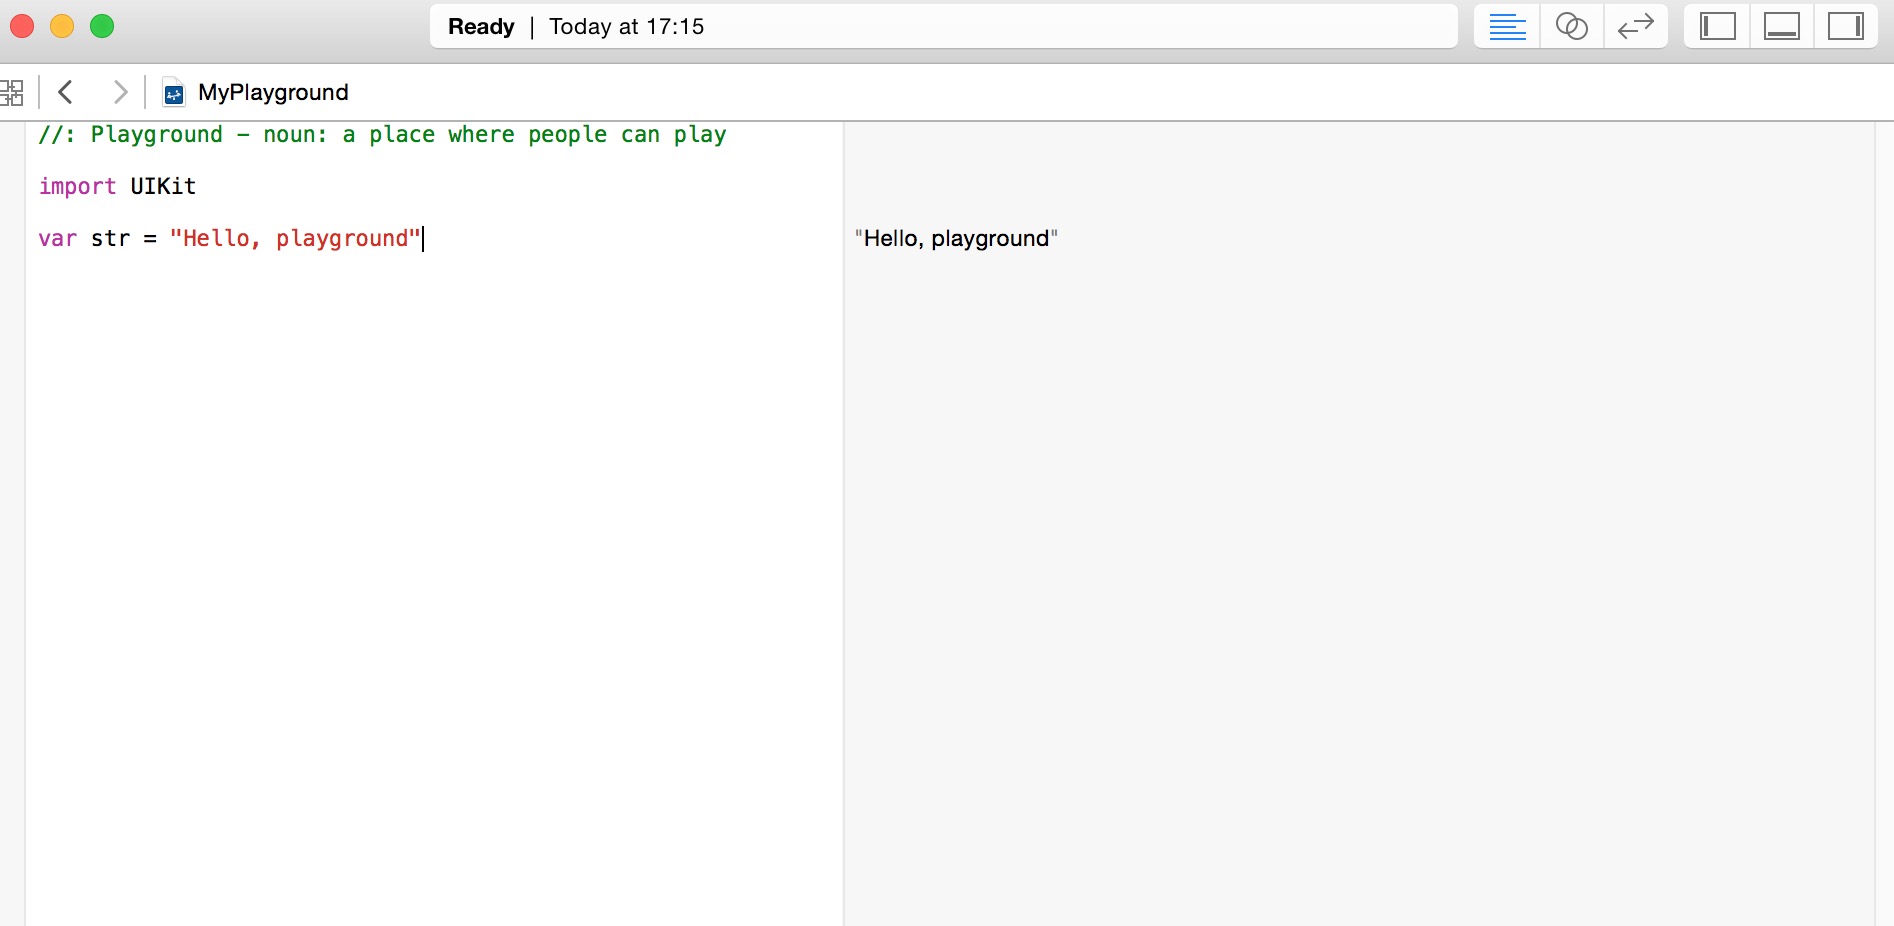
The following is the default code in the Swift Playground window:
import UIKit

var str = "Hello, playground"
If you want to create an OS X program, you need to import the Cocoa package.import Cocoa The code is as follows:
import Cocoa

var str = "Hello, playground"
After the above program is loaded, the program execution result will be displayed on the right side of the Playground window:
Hello, playground
At this point, you have completed learning the first Swift program. Congratulations, you have gotten started.
Create the First Project
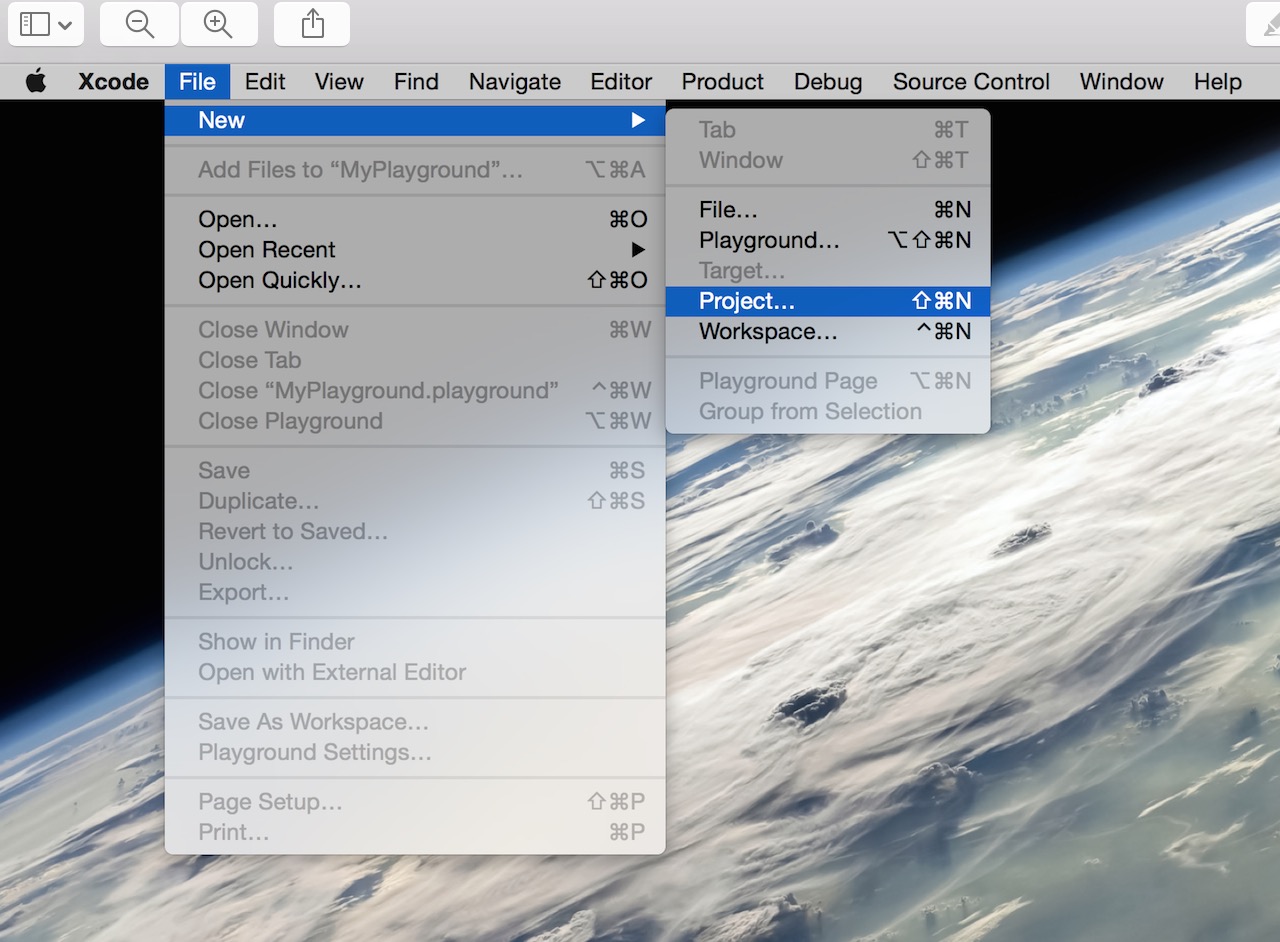
1. Open the Xcode tool, select File => New => Project
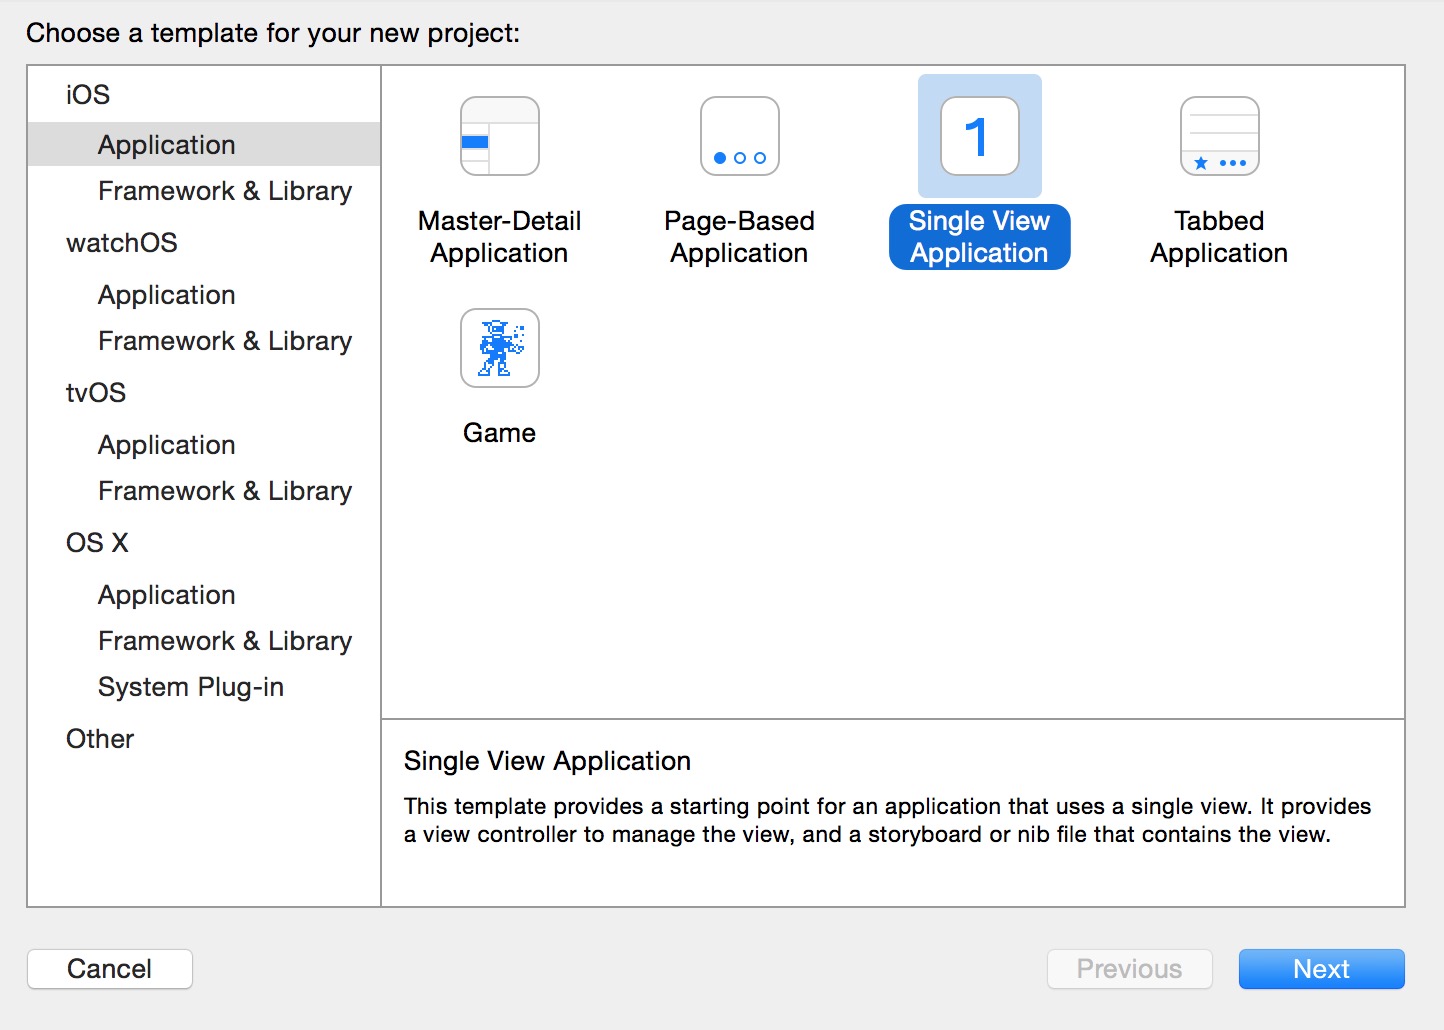
2. Select a "Single View Application" and click "Next" to create a simple sample app.
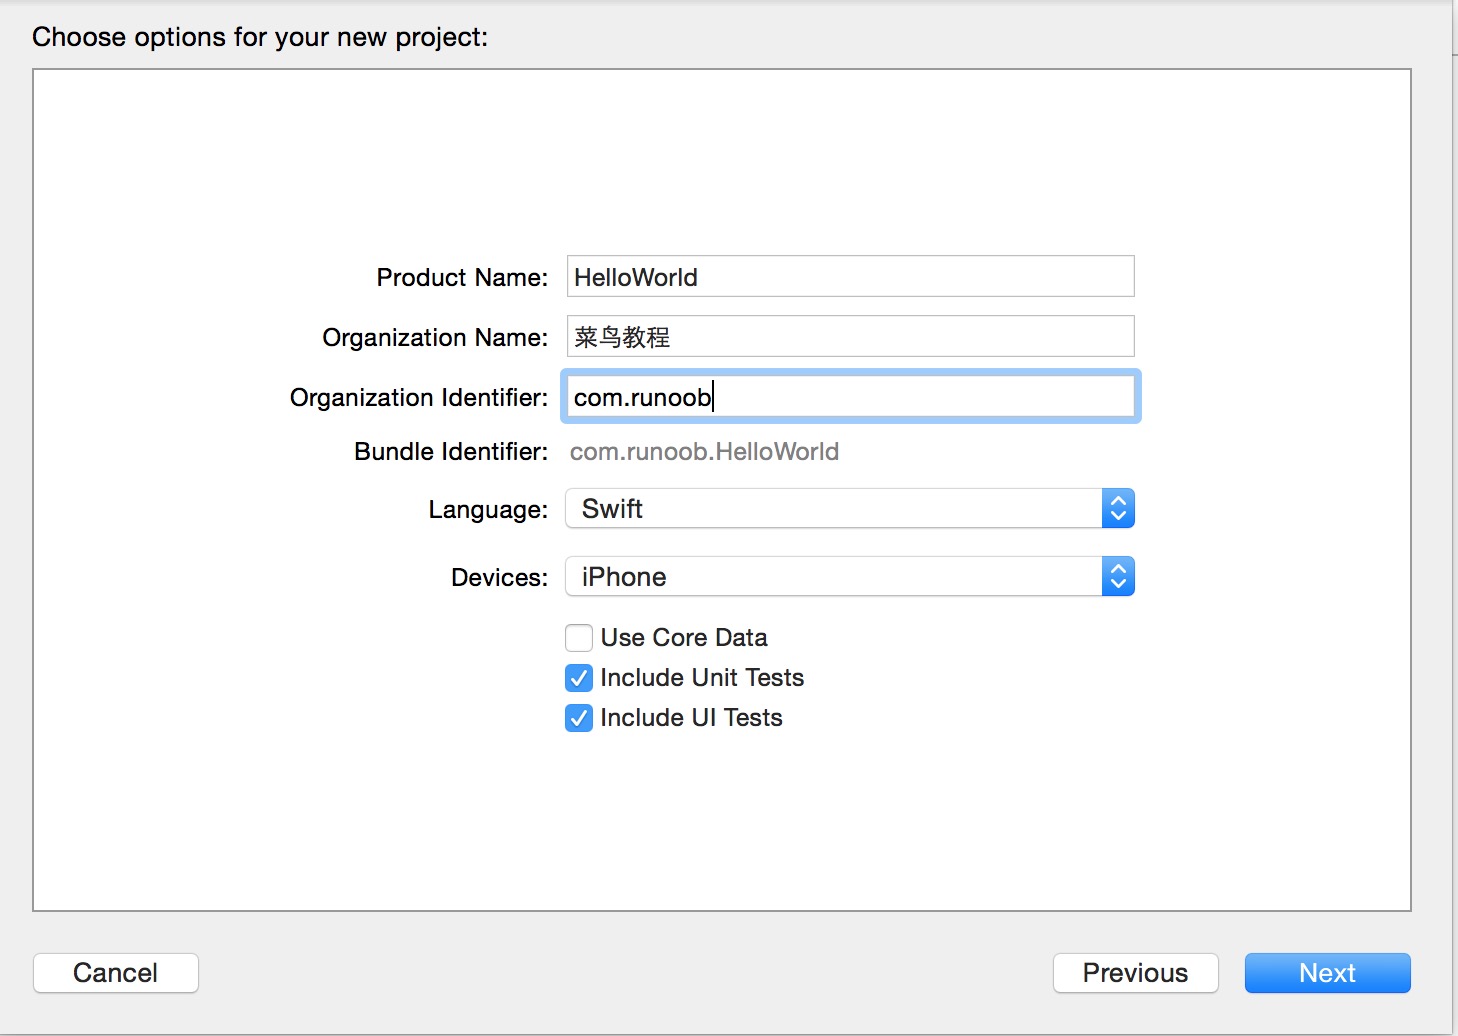
3. Then enter the project name (Product Name), company name (Organization Name), and organization identifier prefix (Organization Identifier). Also select the development language (Language) and choose the Devices.
Language has two options: Objective-C and Swift. Since we are learning Swift, of course we choose the Swift option. Click "Next" to proceed.
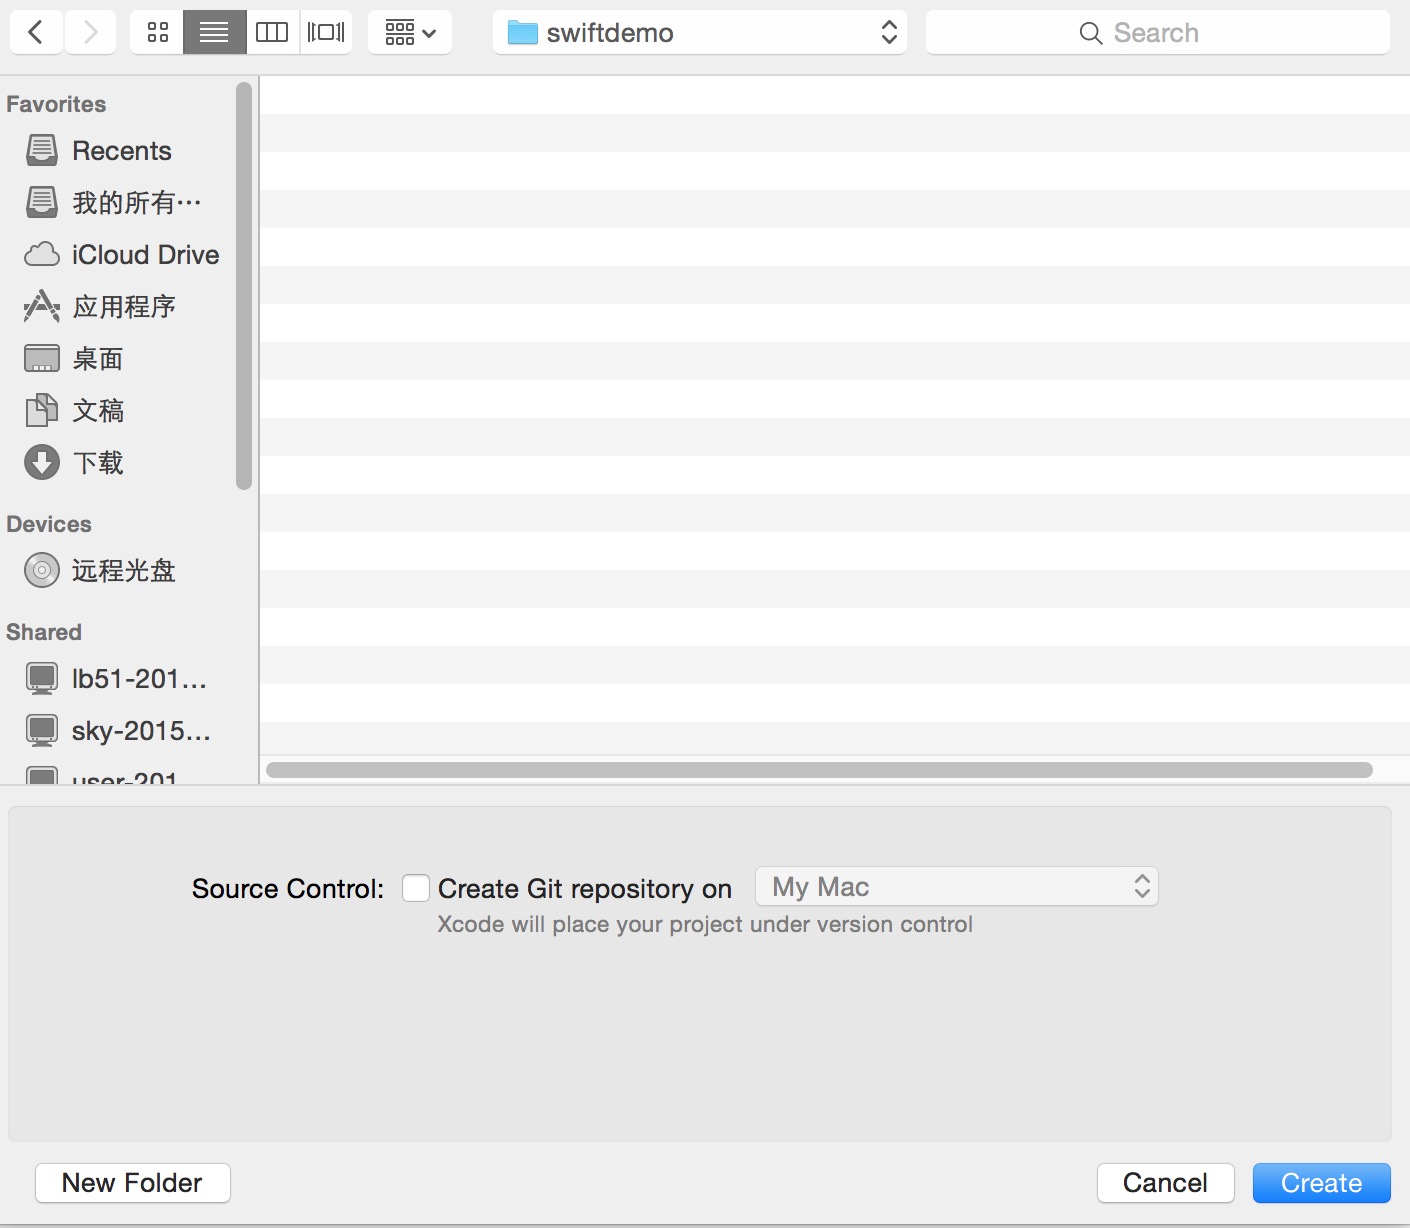
4. Choose the directory to save the project. If you want to use Git source code management, check "Create Git repository on My Mac" under Source Control. Click "Create" to create the project.
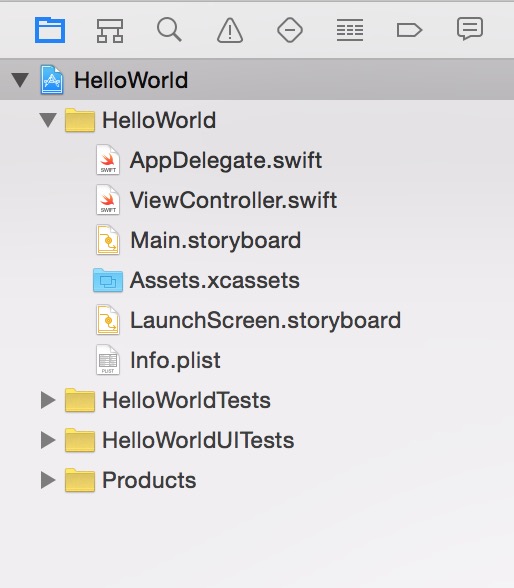
5. After the project is created, a sample file is generated by default. You can see that Swift merges the .h and .m files in Objective-C into one file (that is, the file with the .swift extension). Main.storyboard is equivalent to the xib file, and has more features than xib.
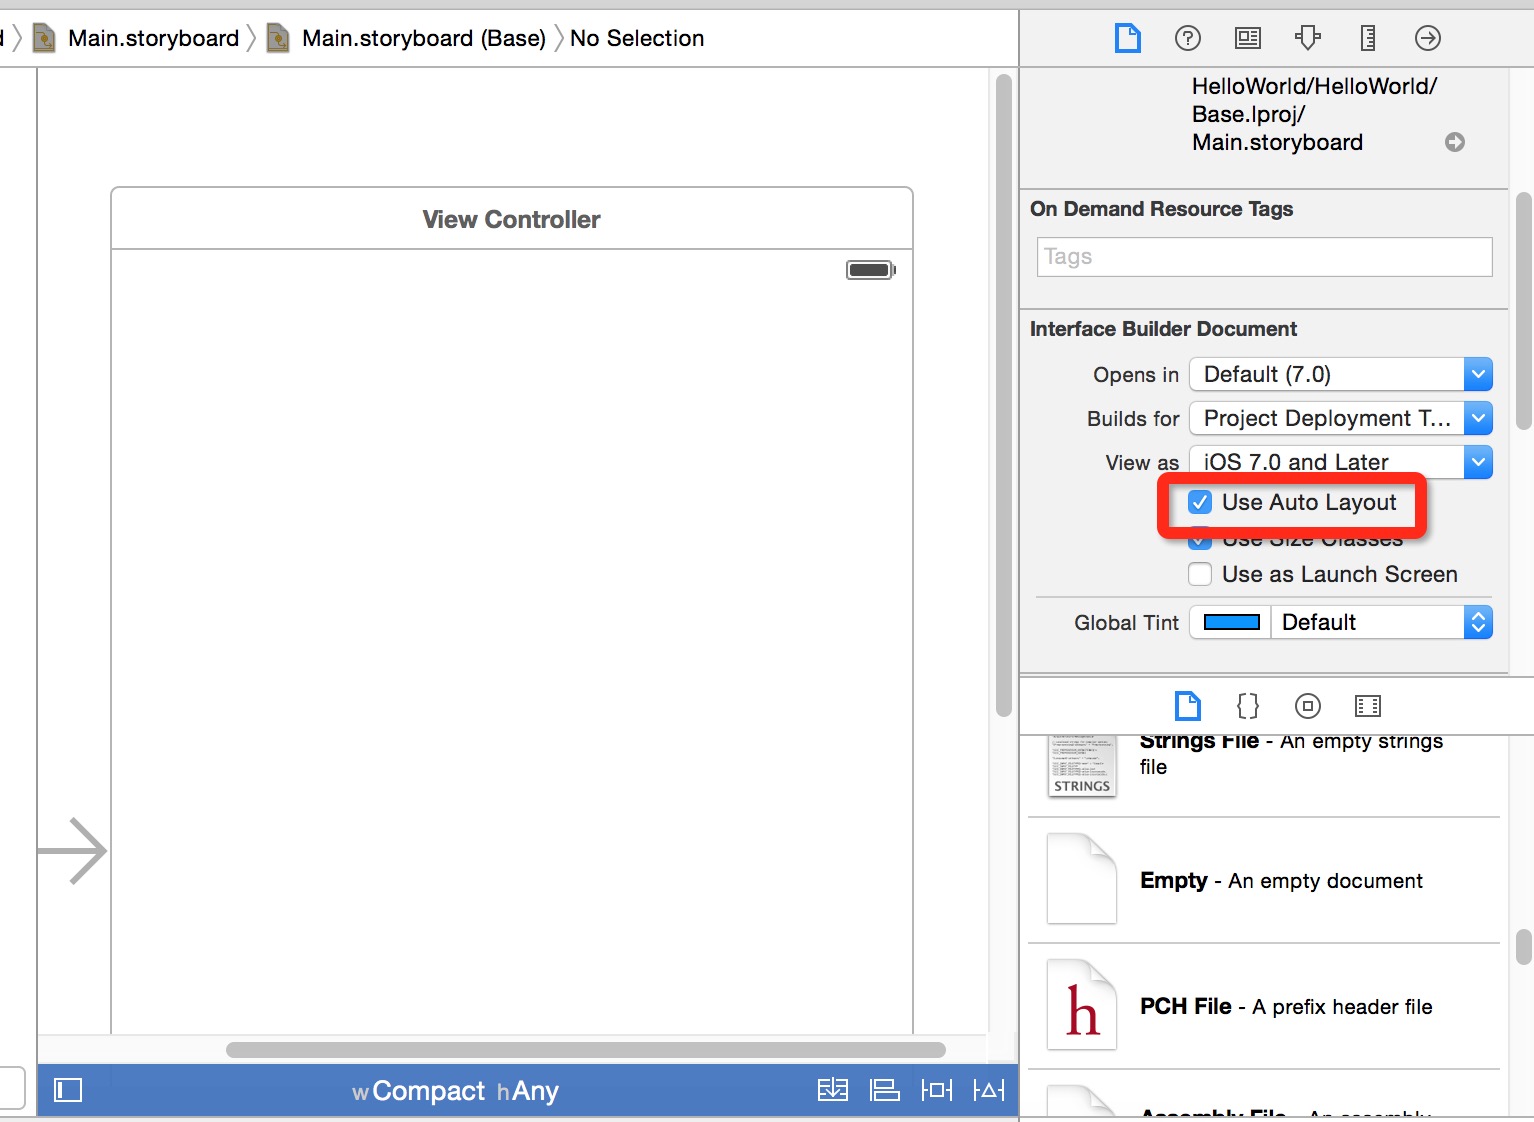
6. Open main.storyboard. By default you see a simple blank application interface, sized as a tablet interface. If you only need to develop apps compatible with iPhone, you can uncheck "Use Auto Layout" (it is checked by default).
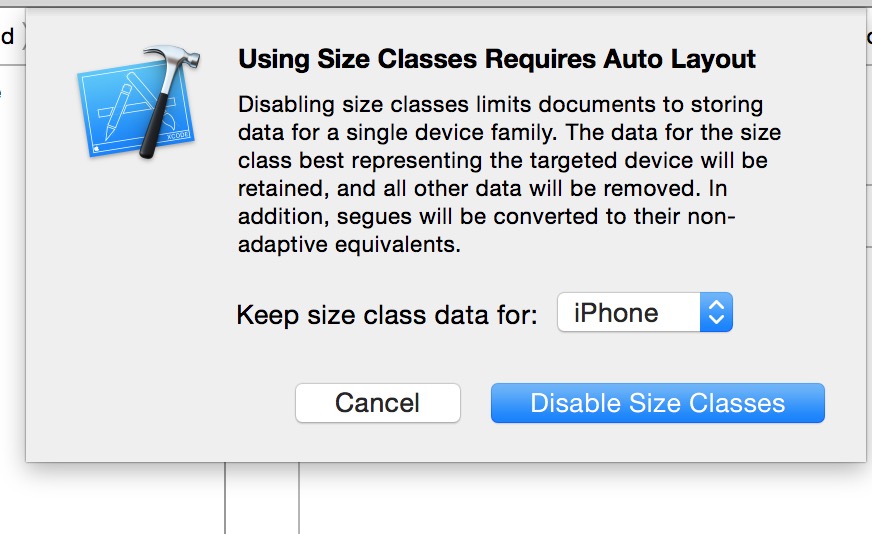
7. A dialog box pops up for us to choose the interface size, iPhone or iPad. We choose the iPhone size.
8. You can see the interface size has changed to the width and height of an iPhone.
You can remember the interface-related dimensions to make it easier to calculate positions in layout later:

9. Let's add some content to the interface. Find the Text control in the lower right, drag it onto the storyboard, and double-click to type the text "Hello World!".
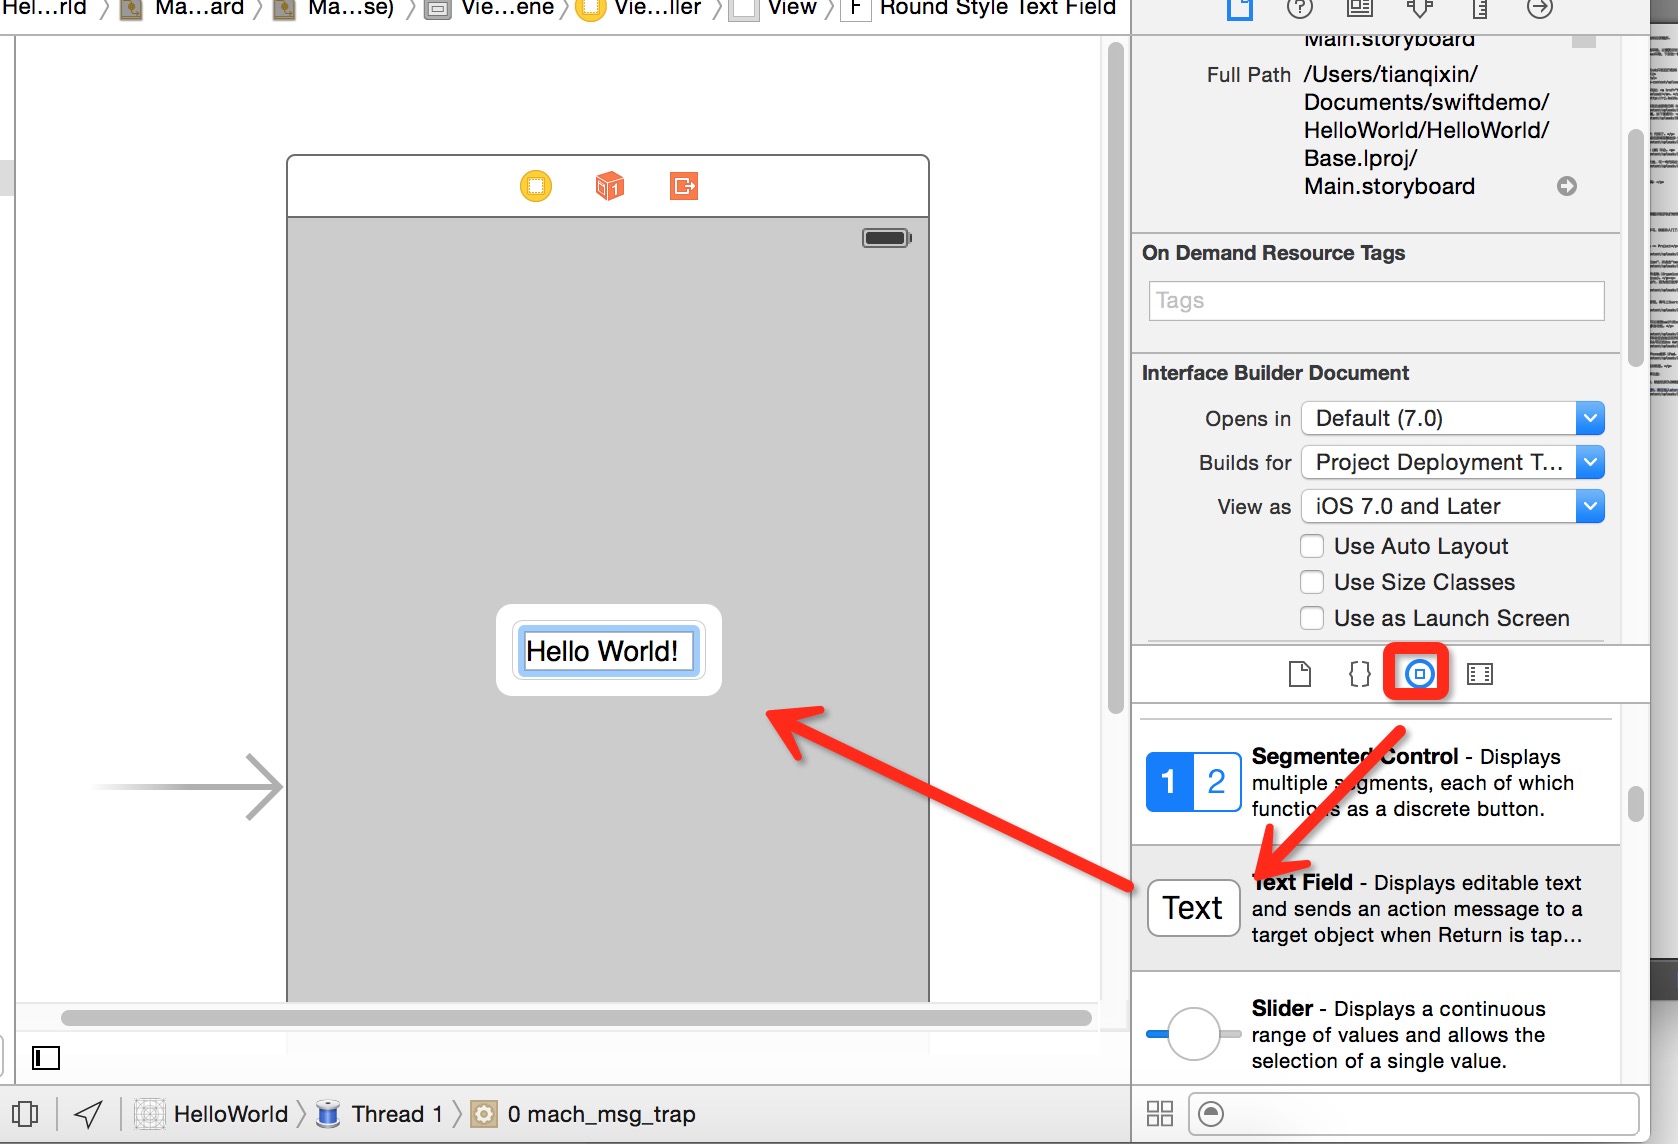
Run the simulator (Command+R shortcut, or choose Product => Run in the menu bar).
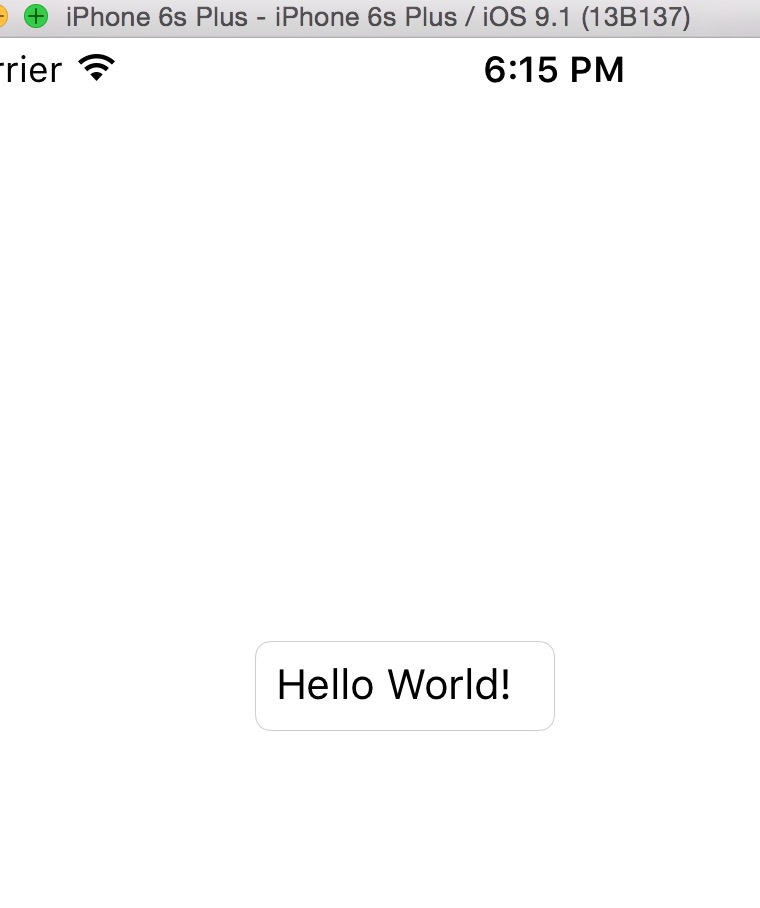
At this point, our first Swift project is complete.
Other Extensions