Android Single Frame Fragment
Single Frame Fragment: Single Frame Fragment ist für Geräte mit kleinem Bildschirm gedacht, wie Handheld-Geräte (Mobiltelefone), und wird ab Android 3.0 unterstützt.
Beispiel
Dieses Beispiel erklärt, wie Sie Ihre eigenen Fragmente erstellen. Hier erstellen wir zwei Fragmente, eines wird verwendet, wenn sich das Gerät im Querformat befindet, und das andere, wenn sich das Gerät im Hochformat befindet. Beginnen wir mit den folgenden Schritten.
| Schritte | Beschreibung |
|---|---|
| 1 | Verwenden Sie die Android Studio IDE, um eine Android-Anwendung mit dem Namen Single Fragments und dem Paketnamen cn.uprogrammer.singlefragments zu erstellen. |
| 2 | Ändern Sie die Haupt-Activity-Datei MainActivity.java wie unten gezeigt. Hier prüfen wir die Geräteausrichtung und wechseln abhängig davon zwischen verschiedenen Fragmenten. |
| 3 | Erstellen Sie zwei Dateien, PortraitFragment.java und LandscapeFragment.java, unter dem Paket cn.uprogrammer.singlefragments, und verknüpfen Sie Methoden. |
| 4 | Erstellen Sie die Layoutdateien res/layout/landscape_fragment.xml und res/layout/portrait_fragment.xml, um die Layouts der beiden Fragmente zu definieren. |
| 5 | Ändern Sie res/layout/activity_main.xml, um die beiden Fragmente einzubinden. |
| 6 | Definieren Sie die erforderlichen Konstanten in res/values/strings.xml. |
| 7 | Starten Sie den Android-Emulator, um die Anwendung auszuführen und die Ergebnisse der an der Anwendung vorgenommenen Änderungen zu überprüfen. |
Unten ist der Inhalt der Haupt-Activity-Datei src/cn.uprogrammer.singlefragments/MainActivity.java:
package cn.uprogrammer.singlefragment;

import android.os.Bundle;
import android.app.Activity;
import android.app.FragmentManager;
import android.app.FragmentTransaction;
import android.content.res.Configuration;

public class MainActivity extends Activity {

    @Override
    protected void onCreate(Bundle savedInstanceState) {
        super.onCreate(savedInstanceState);

        Configuration config = getResources().getConfiguration();

        FragmentManager fragmentManager = getFragmentManager();
        FragmentTransaction fragmentTransaction =
                fragmentManager.beginTransaction();

        /**
         * 检测设备方向,并做相应地操作。
         */
        if (config.orientation == Configuration.ORIENTATION_LANDSCAPE) {
            /**
             * 设备的横屏模式。
             */
            LandscapeFragment ls_fragment = new LandscapeFragment();
            fragmentTransaction.replace(android.R.id.content, ls_fragment);
        }else{
            /**
             * 设备的竖屏模式。
             */
            PortraitFragment pm_fragment = new PortraitFragment();
            fragmentTransaction.replace(android.R.id.content, pm_fragment);
        }
        fragmentTransaction.commit();
    }
}
Erstellen Sie zwei Fragmentdateien, LandscapeFragment.java und PortraitFragment.java, unter dem Paket cn.uprogrammer.singlefragments.
Das Folgende ist der Inhalt der Datei LandscapeFragment.java:
package cn.uprogrammer.singlefragment;

import android.app.Fragment;
import android.os.Bundle;
import android.view.LayoutInflater;
import android.view.View;
import android.view.ViewGroup;


public class LandscapeFragment extends Fragment {

    @Override
    public View onCreateView(LayoutInflater inflater,
                             ViewGroup container, Bundle savedInstanceState) {
        /**
         * Inflate the layout for this fragment
         */
        return inflater.inflate(
                R.layout.landscape_fragment, container, false);
    }

}
Das Folgende ist der Inhalt der Datei PortraitFragment.java:
package cn.uprogrammer.singlefragment;

import android.app.Fragment;
import android.os.Bundle;
import android.view.LayoutInflater;
import android.view.View;
import android.view.ViewGroup;

public class PortraitFragment extends Fragment {

    @Override
    public View onCreateView(LayoutInflater inflater,
                             ViewGroup container, Bundle savedInstanceState) {
        /**
         * Inflate the layout for this fragment
         */
        return inflater.inflate(
                R.layout.portrait_fragment, container, false);
    }
}
Erstellen Sie zwei Layoutdateien, landscape_fragment.xml und portrait_fragment.xml, im Verzeichnis res/layout.
Das Folgende ist der Inhalt der Datei landscape_fragment.xml:
<?xml version="1.0" encoding="utf-8"?>
<LinearLayout
    xmlns:android="http://schemas.android.com/apk/res/android"
    android:orientation="vertical"
    android:layout_width="fill_parent"
    android:layout_height="fill_parent"
    android:background="#1662AE">

    <TextView
        android:layout_width="fill_parent"
        android:layout_height="wrap_content"
        android:text="@string/landscape_message"
        android:textColor="#000000"
        android:textSize="28sp" />

    <!-- More GUI components go here  -->

</LinearLayout>
Das Folgende ist der Inhalt der Datei portrait_fragment.xml:
<?xml version="1.0" encoding="utf-8"?>
<LinearLayout
    xmlns:android="http://schemas.android.com/apk/res/android"
    android:orientation="horizontal"
    android:layout_width="fill_parent"
    android:layout_height="fill_parent"
    android:background="#666666">

    <TextView
        android:layout_width="fill_parent"
        android:layout_height="wrap_content"
        android:text="@string/portrait_message"
        android:textColor="#000000"
        android:textSize="28sp" />

    <!-- More GUI components go here  -->

</LinearLayout>
Das Folgende ist der Inhalt der Datei res/layout/activity_main.xml, die zwei Fragmente enthält:
<?xml version="1.0" encoding="utf-8"?>
<LinearLayout xmlns:android="http://schemas.android.com/apk/res/android"
    xmlns:tools="http://schemas.android.com/tools"
    android:layout_width="fill_parent"
    android:layout_height="fill_parent"
    android:orientation="horizontal">

    <fragment
        android:id="@+id/landscape_fragment"
        android:layout_weight="1"
        android:layout_width="0dp"
        android:layout_height="match_parent" />

    <fragment
        android:id="@+id/portrait_fragment"
        android:layout_weight="2"
        android:layout_width="0dp"
        android:layout_height="match_parent" />

</LinearLayout>
Stellen Sie sicher, dass die Datei res/values/strings.xml den folgenden Inhalt enthält:
<?xml version="1.0" encoding="utf-8"?>
<resources>

    <string name="app_name">Single Fragment</string>
    <string name="hello_world">Hello world!</string>
    <string name="action_settings">Settings</string>
    <string name="landscape_message">这是横屏模式碎片</string>
    <string name="portrait_message">这是竖屏模式碎片</string>
</resources>
Führen wir die soeben geänderte Single-Fragments-Anwendung aus. Ich gehe davon aus, dass Sie während der Umgebungseinrichtung bereits ein AVD erstellt haben. Öffnen Sie die Activity-Datei in Ihrem Projekt und klicken Sie auf Symbol in der Symbolleiste, um die Anwendung in Android Studio auszuführen. Android Studio installiert die Anwendung auf dem AVD und startet sie. Wenn alles reibungslos verläuft, wird Folgendes im Emulatorfenster angezeigt:
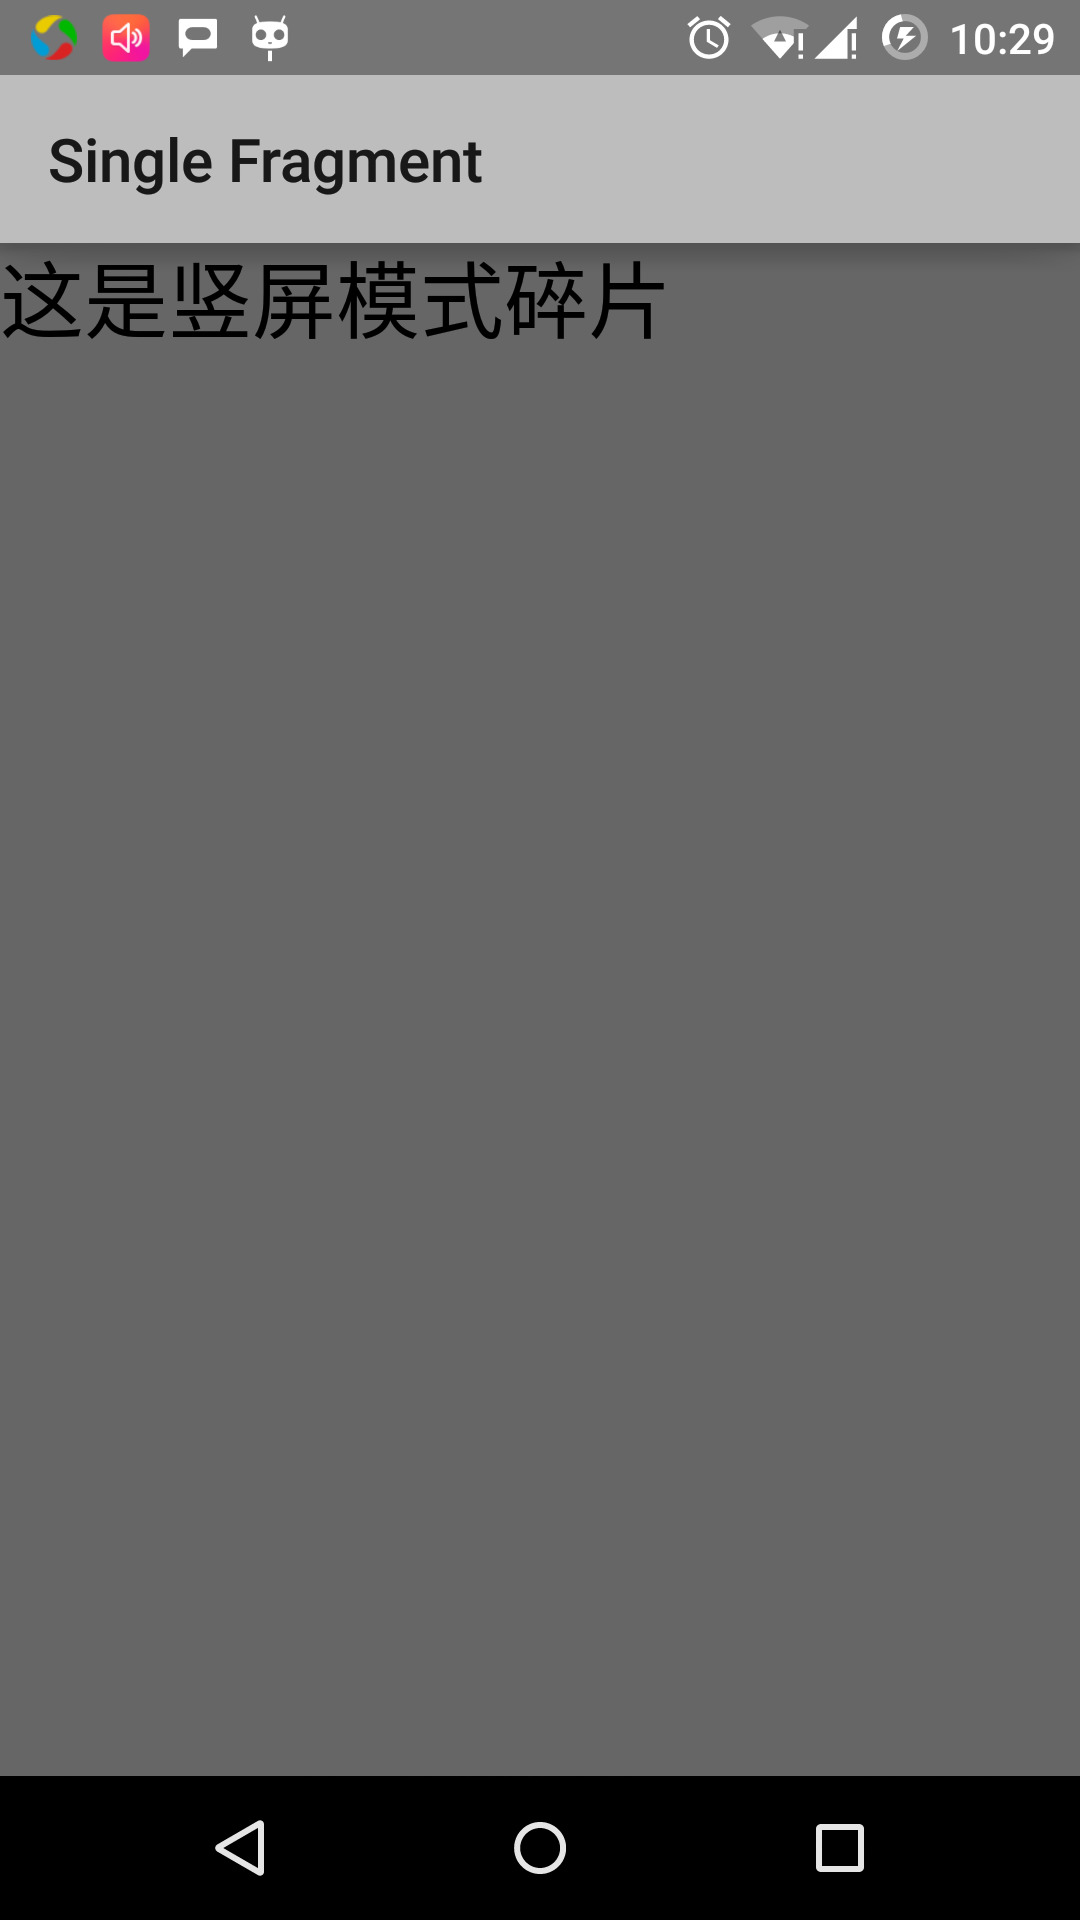
Befolgen Sie die folgenden Vorgänge, um den Ausrichtungsmodus des Emulatorbildschirms zu ändern:
- fn+control+F11 unter Mac, um vom Querformat zum Hochformat zu wechseln und umgekehrt
- ctrl+F11 unter Windows
- ctrl+F11 unter Linux
Wenn Sie den Modus ändern, sehen Sie die Implementierung der Oberfläche für den Querformatmodus:
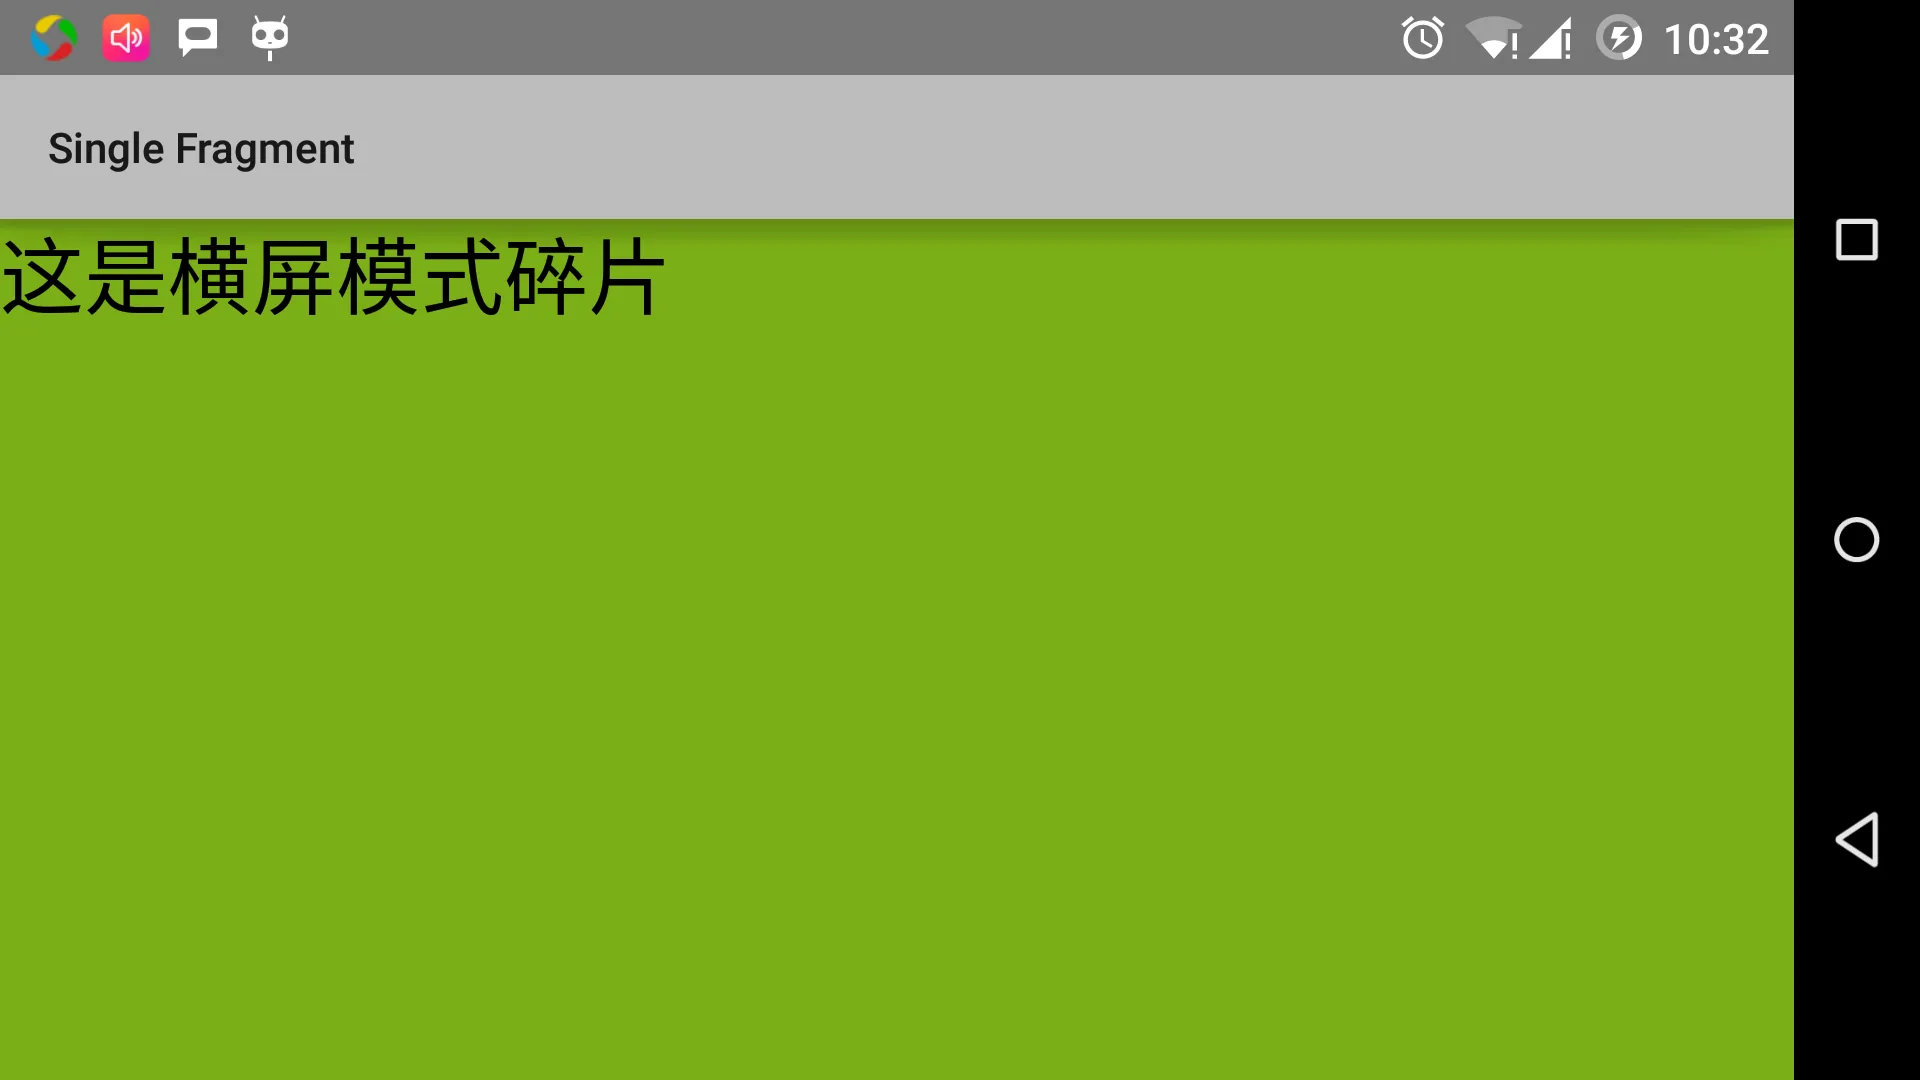
Mit dieser Methode können Sie verschiedene Fragmente in derselben Activity verwenden, um verschiedene Oberflächen zu implementieren. Sie können die Oberfläche je nach Ihren Anforderungen mit verschiedenen Arten von UI-Komponenten aufbauen.
Andere Erweiterungen