IOS ストーリーボード(Storyboards)
概要
Storyboards は iOS 5 で初めて導入されました。Storyboards を使う場合、デプロイメントターゲットは iOS 5.0 以降にする必要があります。
Storyboards は、視覚的な流れの画面を理解するのに役立ちます。インターフェイスでは、
MainStoryboard.storyboard の下にすべてのアプリケーション画面を作成します。実例手順
1. シングルビューアプリケーションを作成します。アプリケーション作成時に storyboard チェックボックスを選択します。
2. MainStoryboard.storyboard を選択します。ここでシングルビューコントローラーを見つけることができます。ビューコントローラーを追加し、次のようにビューコントローラーを更新します。
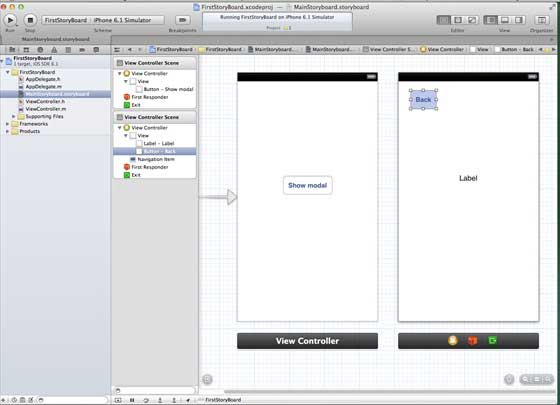
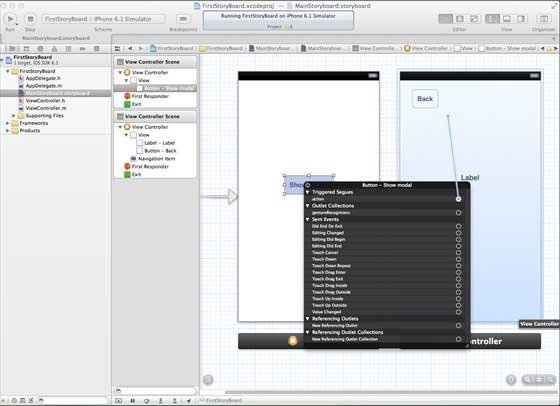
3. 2つのビューコントローラーを接続します。左側のビューコントローラーで「show modal(表示モード)」ボタンを右クリックし、右側のビューコントローラーにドラッグします。次の図のようになります。
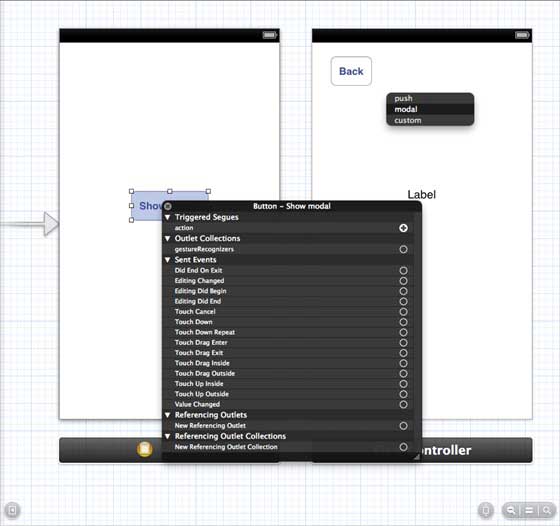
4. 下に示す3つの表示オプションから modal(モーダル)を選択します。
5. ViewController.h を次のように更新します。
#import <UIKit/UIKit.h>

@interface ViewController : UIViewController

-(IBAction)done:(UIStoryboardSegue *)seque;

@end
6. ViewController.m を次のように更新します。
#import "ViewController.h"

@interface ViewController ()

@end

@implementation ViewController

- (void)viewDidLoad
{
    [super viewDidLoad];
}

- (void)didReceiveMemoryWarning
{
    [super didReceiveMemoryWarning];
    // Dispose of any resources that can be recreated.
}
-(IBAction)done:(UIStoryboardSegue *)seque{
    [self.navigationController popViewControllerAnimated:YES];
}

@end
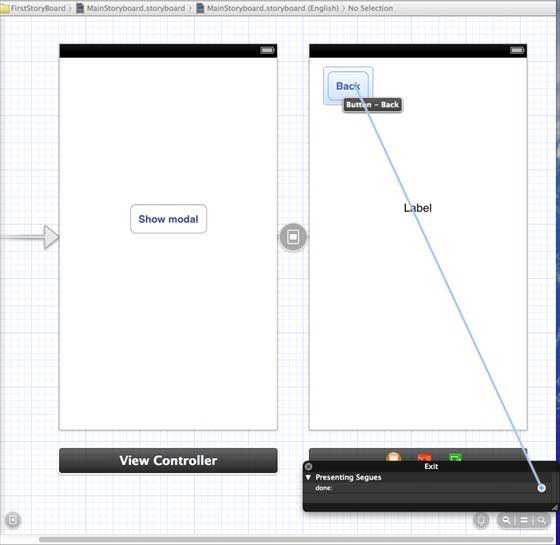
7. 「MainStoryboard.storyboard」を選択し、「Exit」ボタンを右クリックして、右側のビューコントローラーで戻るボタンを選択して接続します。次の図のようになります。
出力
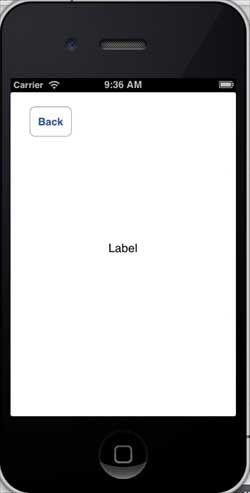
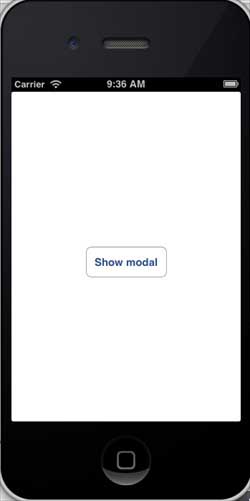
iPhoneデバイスでアプリケーションを実行すると、次の出力結果が得られます。
次に、表示モードを選択すると、次の出力結果が得られます。