Codex Basics
Launch Codex
Codex's interface is a standard three-column layout: the left side is the task list, the middle is the chat window, and the right side is a multifunctional area.

Launch the Codex app, add a project from the left menu, and enter your requirements in the input box in the middle column:

You can set the model or upload files, etc.:

Launch Codex CLI
After installing and configuring your account, open a terminal in the project directory and entercodexto launch the interactive interface:
# 进入你的项目目录
cd ~/my-project

# 启动 Codex 交互界面
codex

# 带初始提示词直接启动
codex "帮我分析这个项目的结构"

# 启动时指定模型
codex --model gpt-5
💡 It is recommended to launch Codex in the project root directory, so it can fully read the project file structure.
The Codex interface is very clean. The cursor is in the input box; just type your requirements directly.
For example, we enter the directorycodex-example-testThen usecodexStart with the command:
cd codex-example-test
# 启动 Codex 交互界面
codex
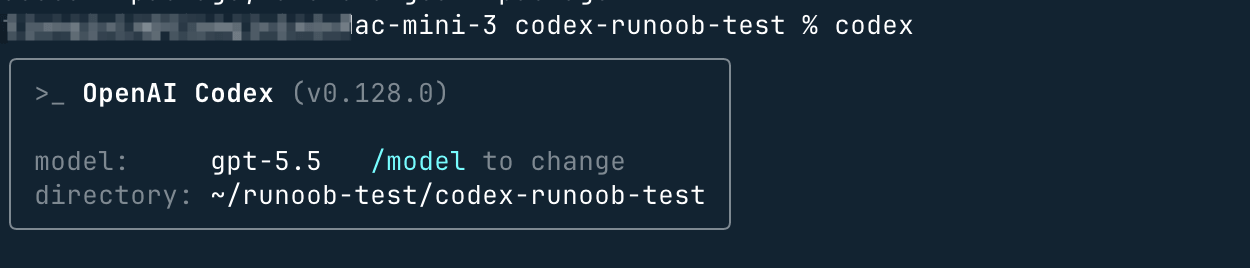
Then you can enter your requirements directly in the interactive interface, for example, ask it to explain the code in the test.py file. The result is as follows (these records will also appear in the Codex App):

Three approval modes (Approval Mode)
Codex CLI provides three modes of operation with different permission levels. You can choose the appropriate mode based on your task needs:
| Mode | Description | Applicable scenarios |
|---|---|---|
ask(Default) |
Read-only mode: You can read files and create plans, but you need to confirm before any operation is executed. | Unknown codebase exploration, risk assessment |
auto-edit |
Auto edit: can read and modify files in the current directory, but network operations still require confirmation | Daily code development, refactoring tasks |
full-auto |
Fully automatic: runs fully automatically in a network-disabled sandbox, no confirmation required | Batch tasks, CI/CD automation |
# 指定审批模式启动
codex --approval-mode ask        # 默认只读模式
codex --approval-mode auto-edit  # 自动编辑模式(缩写 -a auto-edit)
codex --approval-mode full-auto  # 完全自动模式

# 在交互界面中切换
/approvals  # 输入此命令切换审批模式
Your first conversation
Example 1: Analyze project structure
codex "分析这个项目的目录结构,告诉我主要文件的作用"

# Codex 会自动读取文件,输出类似:
# ✓ 读取 package.json
# ✓ 扫描 src/ 目录(23 个文件)
#   项目结构分析:
# - src/index.ts:应用入口,初始化 Express 服务器
# - src/routes/:API 路由定义(共 5 个端点)
# ...
Example 2: Fix bugs
codex "我的 login 函数有 bug,用户登录后 token 没有正确保存,帮我找出问题并修复"

# Codex 会:
# 1. 读取相关文件
# 2. 分析代码逻辑
# 3. 提出修改方案
# 4. 等待你确认后执行修改
Example 3: Generate new features
codex "给我的 Express 应用添加一个用户注册接口,需要验证邮箱格式,密码至少8位,并把用户信息存入数据库"

# 传入图片上下文
codex -i design.png "按照这个设计图,实现对应的 React 组件"
Image input
Codex CLI supports using images as context input, which is especially useful in the following scenarios:
- Analyze the error screenshot
- Generate frontend code from UI design mockups.
- Interpret the architecture diagram and implement features accordingly
# 方法一:命令行传入图片路径
codex -i screenshot.png "解释这个报错信息,并告诉我如何修复"

# 方法二:传入多张图片
codex --image img1.png,img2.jpg "对比这两个界面的区别,实现图一的设计"

# 方法三:在交互界面中粘贴图片(macOS)
# 复制图片后,在 Codex 输入框中直接按 Cmd+V 粘贴

# 方法四:Shift + 拖拽图片到终端窗口
other extensions