This article mainly introduces a beginner tutorial for Android APP development, explaining steps one by one from SDK download, development environment setup, code writing, APP packaging, etc. It is a very concise introductory tutorial for Android APP development. Friends in need can refer to it.
At work, I have been involved in mobile App projects, where front-end developers and Android or iOS programmers cooperated to complete the development of the entire project. During development, there were basically no problems cooperating with iOS programs, but Android had many issues with various devices and ROMs. This sparked my interest in learning Android and iOS program development. So, unable to sleep at 1 AM, I wrote my first Android program, HelloAndroid, and posted it to share with other friends who also want to learn Android development. Such a foolproof introductory Android development article should be understandable by anyone with a bit of development foundation.
1. Preparation
I mainly take my own development environment as an example. Download and install JDK and Android SDK. If you don't have an existing IDE, you can directly download the complete SDK package, which includes Eclipse. If you have an IDE, you can scroll down and choose 'USE AN EXISTING IDE', then install the SDK. If your SDK cannot find the JDK directory during installation, you can add a JAVA_HOME variable in the system environment variables, with the path set to your JDK directory. My IDE is IntelliJ IDEA. After everything is installed, configure the IDE to add SDK support.
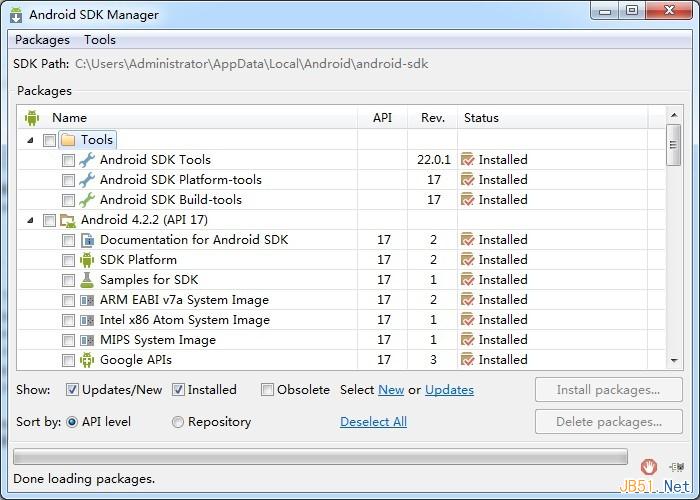
First, open the Android SDK Manager and check all uninstalled Android versions above 4.0. According to your actual situation, if you only plan to test on your own phone, install the SDK package matching your phone's system version. The download time is a bit long.
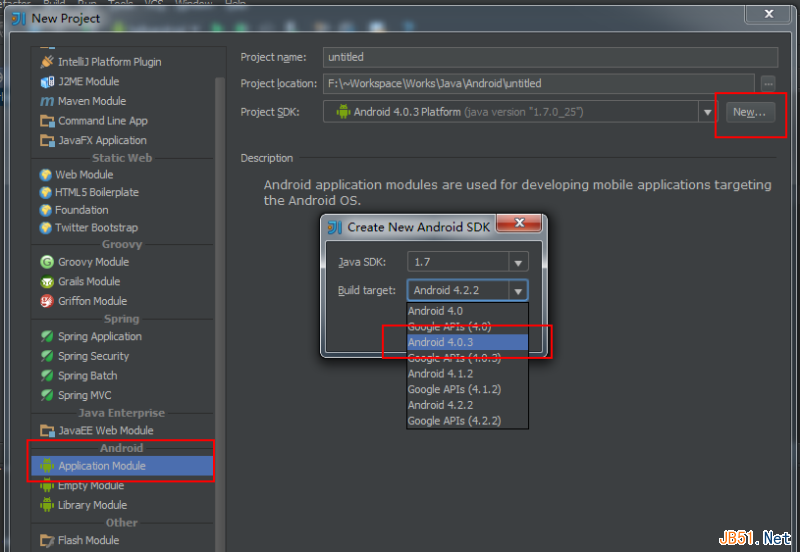
Then open the IDE and create a new project. IDEA is quite smart. If you have installed the SDK, the Android Application Module will appear in the new project dialog. After selecting it, the Project SDK on the right will be empty. Click the New button, locate the SDK directory, and confirm. The drop-down list will then show all installed SDK versions. Select the version you need. If it is the first time setting up, the IDE will remind you to configure the JDK first. Just follow the prompts to locate the JDK directory.
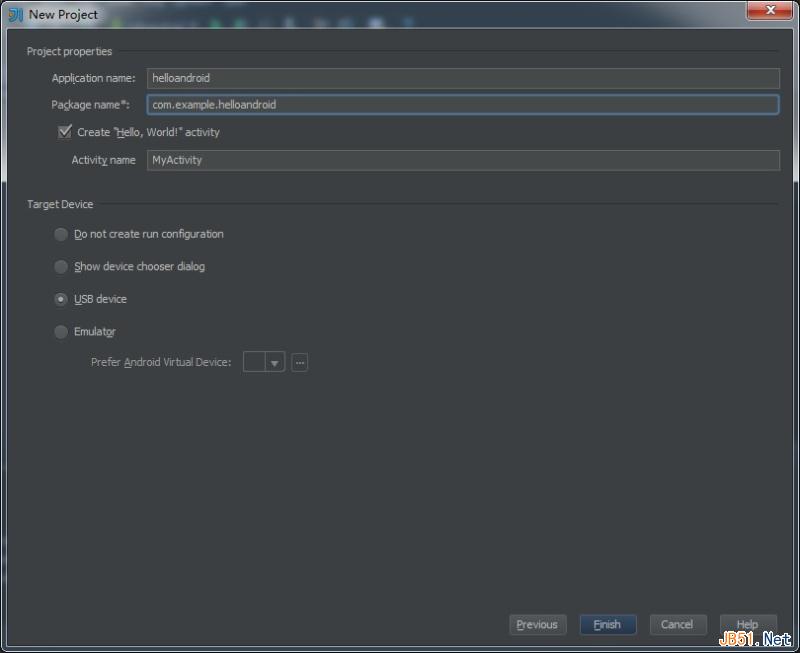
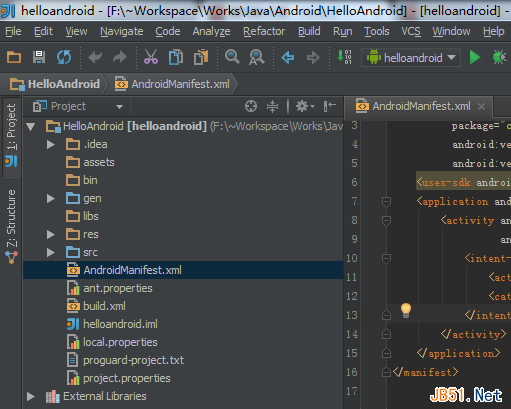
After filling in the project name, in the next step select USB Device, then complete the project build. The IDE will automatically generate the basic files and directories required for the project.
2. Writing Code
After completing the preparations, we can finally start writing our HelloAndroid. Before writing code, let's first understand a few files:
res/layout/main.xml - The main layout file for the App. How your application looks is defined here. It has two modes: Design and Text.
res/values/strings.xml - Can be understood as an i18n file. This file is used to store various strings called by the program.
src/com/example/helloandroid/MyActivity.java - This is our main program class. The functionality to be implemented later will be added in this file.
First, add a TextView with id hellotextView and a Button with id hellobutton for the app. The mail.xml code is as follows:
<?xml version="1.0" encoding="utf-8"?>
<LinearLayout xmlns:android="http://schemas.android.com/apk/res/android"
              android:orientation="vertical"
              android:layout_width="fill_parent"
              android:layout_height="fill_parent"
        >
    <TextView
            android:layout_width="fill_parent"
            android:layout_height="180dp"
            android:text="@string/default_message"
            android:id="@+id/hellotextView" android:textColor="#0080FF" android:gravity="center"/>
    <Button
            android:layout_width="wrap_content"
            android:layout_height="wrap_content"
            android:text="@string/button_send"
            android:id="@+id/hellobutton" android:layout_gravity="center"/>
</LinearLayout>
The strings used by the code and controls are defined as follows:
<?xml version="1.0" encoding="utf-8"?>
<resources>
    <string name="app_name">helloandroid by hiwanz</string>
    <string name="button_send">Say something</string>
    <string name="default_message">Click button below!</string>
    <string name="interact_message">You just clicked on the Button!</string>
</resources>
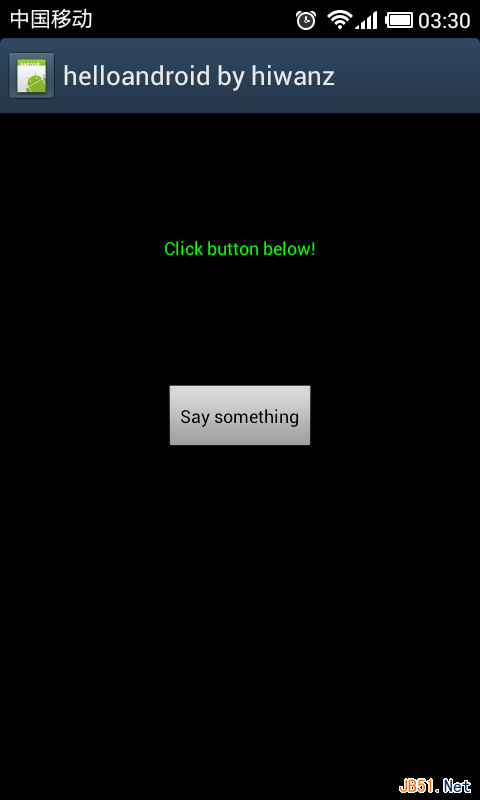
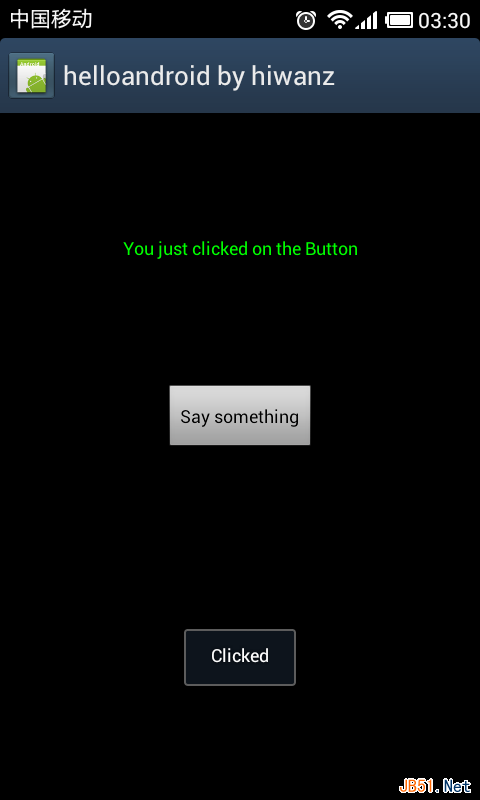
In the main program, define that clicking the button changes the text displayed by the TextView and pops up a Toast message. The code is as follows:
package com.example.helloandroid;

import android.app.Activity;
import android.os.Bundle;
import android.view.View;
import android.widget.Button;
import android.widget.TextView;
import android.widget.Toast;

public class MyActivity extends Activity {
    /**
     * Called when the activity is first created.
     */
    @Override
    public void onCreate(Bundle savedInstanceState) {
        super.onCreate(savedInstanceState);
        setContentView(R.layout.main);
        //得到按钮实例
        Button hellobtn = (Button)findViewById(R.id.hellobutton);
        //设置监听按钮点击事件
        hellobtn.setOnClickListener(new View.OnClickListener() {
            @Override
            public void onClick(View v) {
                //得到textview实例
                TextView hellotv = (TextView)findViewById(R.id.hellotextView);
                //弹出Toast提示按钮被点击了
                Toast.makeText(MyActivity.this,"Clicked",Toast.LENGTH_SHORT).show();
                //读取strings.xml定义的interact_message信息并写到textview上
                hellotv.setText(R.string.interact_message);
            }
        });
    }

}
After writing the code, connect the phone to the computer via a USB data cable. In the phone's system settings, open the Developer Options and enable USB debugging. Then simply click Run in the IDE, and you can see the running result on your phone.
App Packaging
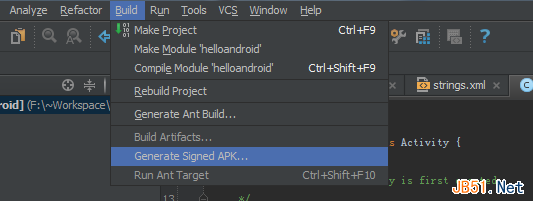
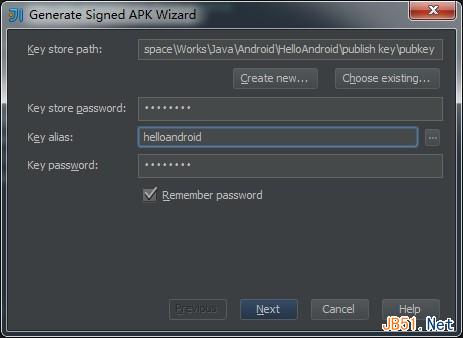
After the application is developed, it needs to be packaged and released. In the IDE's Build menu, select 'Generate Signed APK' to package the application.
In the Wizard dialog that pops up, you need to specify a signing Key. If you don't have a Key yet, you can click 'Create New' to create a new Key for signing. Fill in some fields required for signing to generate the Key file.
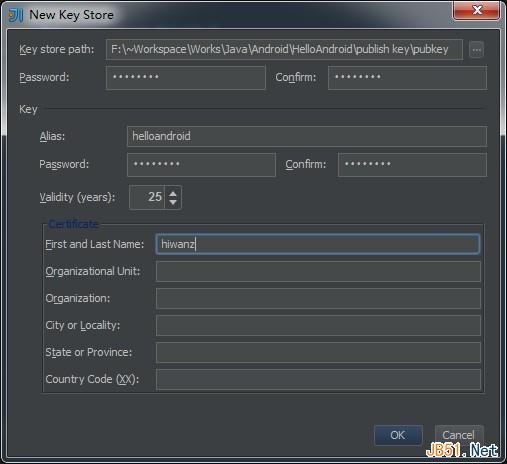
Use the generated Key to sign the application package.
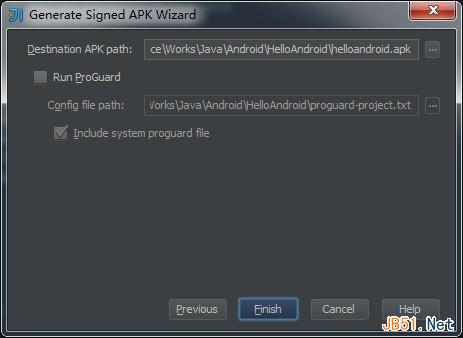
After compilation, the helloandroid.apk application package will be generated in the Designation APK path we set earlier. No need to explain how to install the app next, right? Our first Android App has thus been born.
Source: http://www.jb51.net/article/50395.htm