Cargo Tutorial
In Rust development, almost all projects are managed and built using Cargo, because it provides a convenient workflow and powerful features, making Rust development more efficient and reliable.
What is Cargo
Cargo is Rust's official build system and package manager. It mainly serves two purposes:
It mainly serves two purposes:
Project management: Cargo is used to create, build, and manage Rust projects. With Cargo, you can easily create new projects, manage project dependencies, and perform operations such as building, running, and testing the project.
Package manager: Cargo also acts as Rust's package manager. It allows developers to introduce and manage dependencies (such as third-party libraries) in their projects, ensuring version management and compatibility of these dependencies.
Cargo's main features and functions:
-
Dependency management: Cargo uses the
Cargo.tomlfile to manage project dependencies. This file lists all the external libraries required by the project and their versions. -
Build system: Cargo uses the Rust compiler (rustc) to build projects, automatically handling the compilation and linking of dependencies.
-
Package registry: Cargo interacts withcrates.io, the Rust community's package registry, allowing developers to search for, add, and manage third-party libraries.
-
Build configuration: Through the
Cargo.tomlandCargo.lockfile, Cargo allows developers to configure build options such as compiler options, features, and target platforms. -
Project templates: Cargo provides templates for creating new projects. You can quickly start a new project with the
cargo newcommand. -
Testing: Cargo provides a simple command,
cargo testto run the project's unit tests. -
Benchmarking: Cargo supports using the
cargo benchcommand for benchmarking. -
Publishing: Through the
cargo publishcommand, developers can publish their libraries to crates.io for other developers to use. -
Custom build scripts: Cargo allows the use of custom build scripts to handle more complex build requirements.
-
Multi-target projects: Cargo supports defining multiple targets in one project, such as executables, libraries, tests, and benchmarks.
-
Cross-platform builds: Cargo supports building Rust programs across multiple platforms, including Windows, macOS, Linux, and various embedded systems.
-
Build cache: To speed up builds, Cargo uses a build cache to store compiled dependencies.
-
Offline work: Cargo supports working without an internet connection, automatically using locally cached dependencies.
-
Plugin system: Cargo allows developers to write plugins to extend its functionality.
-
Environment variables: Cargo supports overriding the default build and run behavior through environment variables.
Cargo Features
Besides creating projects, Cargo also has a series of functions such as building projects and running projects. Building and running correspond to the following commands:
cargo new <project-name>: Create a new Rust project.cargo build: Compile the current project.cargo run: Compile and run the current project.cargo check: Check the current project for syntax and type errors.cargo test: Run the current project's unit tests.cargo update: Update the dependencies specified in Cargo.toml to their latest versions.cargo --help: View Cargo's help information.cargo publish: Publish the Rust project to crates.io.cargo clean: Clean up temporary files and directories generated during the build process.
Configuring a Rust Project in VSCode
Cargo is a great build tool. If you pair VSCode with it, VSCode will become a very convenient development environment.
In the previous chapter, we created the greeting project. Now let's open the greeting folder with VSCode (Note: not example-greeting)。
After opening greeting, create a new folder inside it.vscode(Note the dot before vscode; if this folder already exists, you don't need to create it). In the newly created .vscode folder, create two files, tasks.json and launch.json, with the following contents:
tasks.json file
launch.json file (applicable to Windows systems)
launch.json file (applicable to Linux systems)
launch.json file (applicable to Mac OS systems)
Then click "Run" in the left sidebar of VSCode.
If you are using MSVC, select "(Windows) Launch".
If you are using MinGW and have GDB installed, select "(gdb) Launch". Before launching with gdb, be sure to fill in "miDebuggerPath" in launch.json.
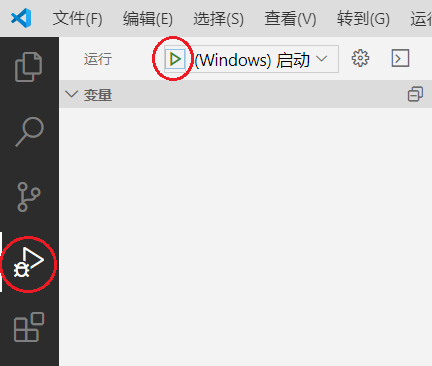
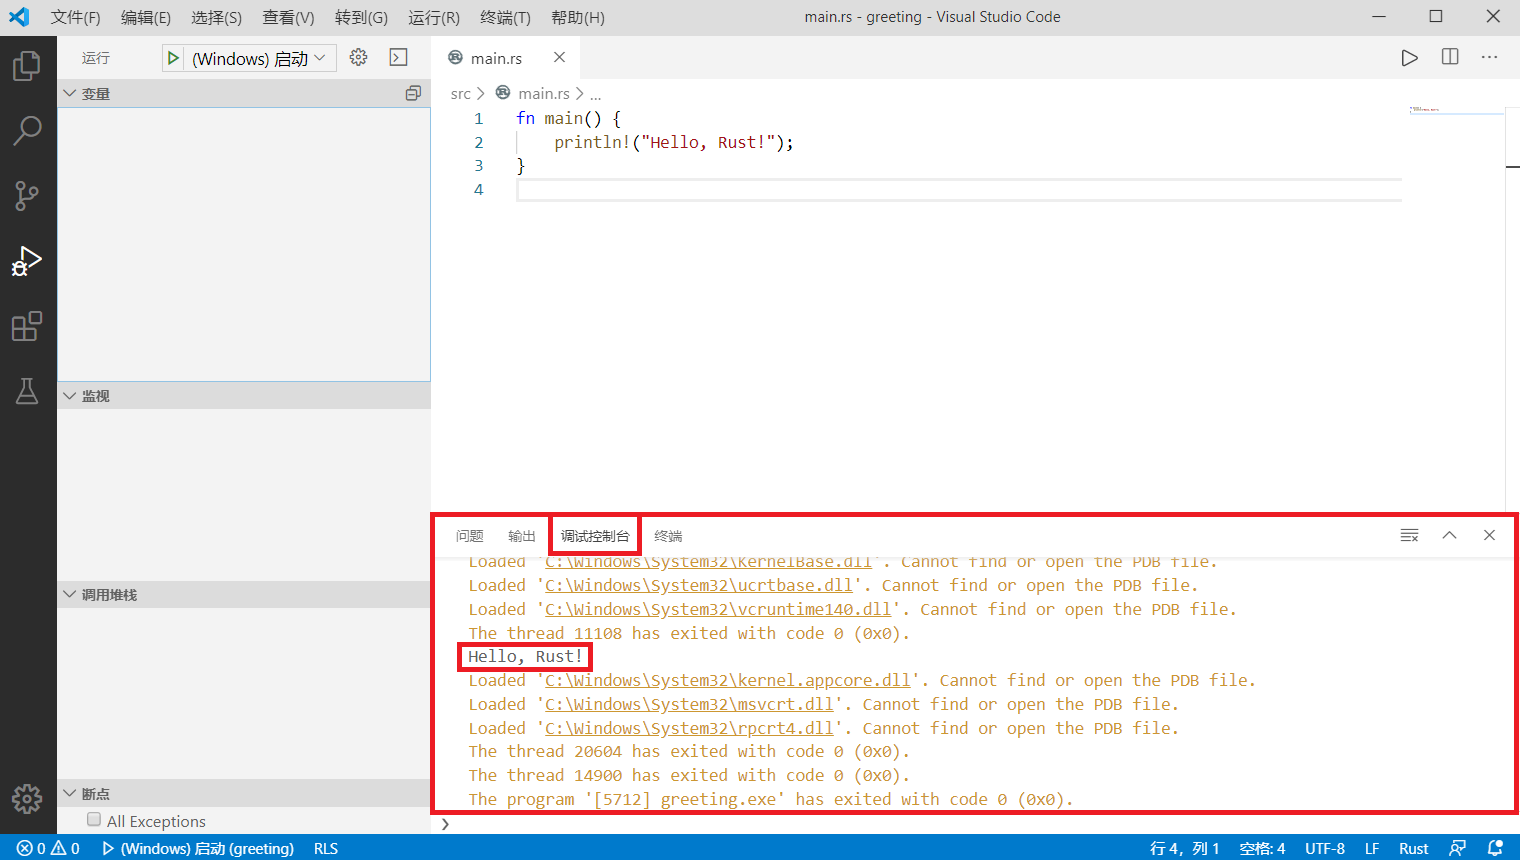
The program will then begin debugging. The run output will appear in the "Debug Console":
Debugging Rust in VSCode
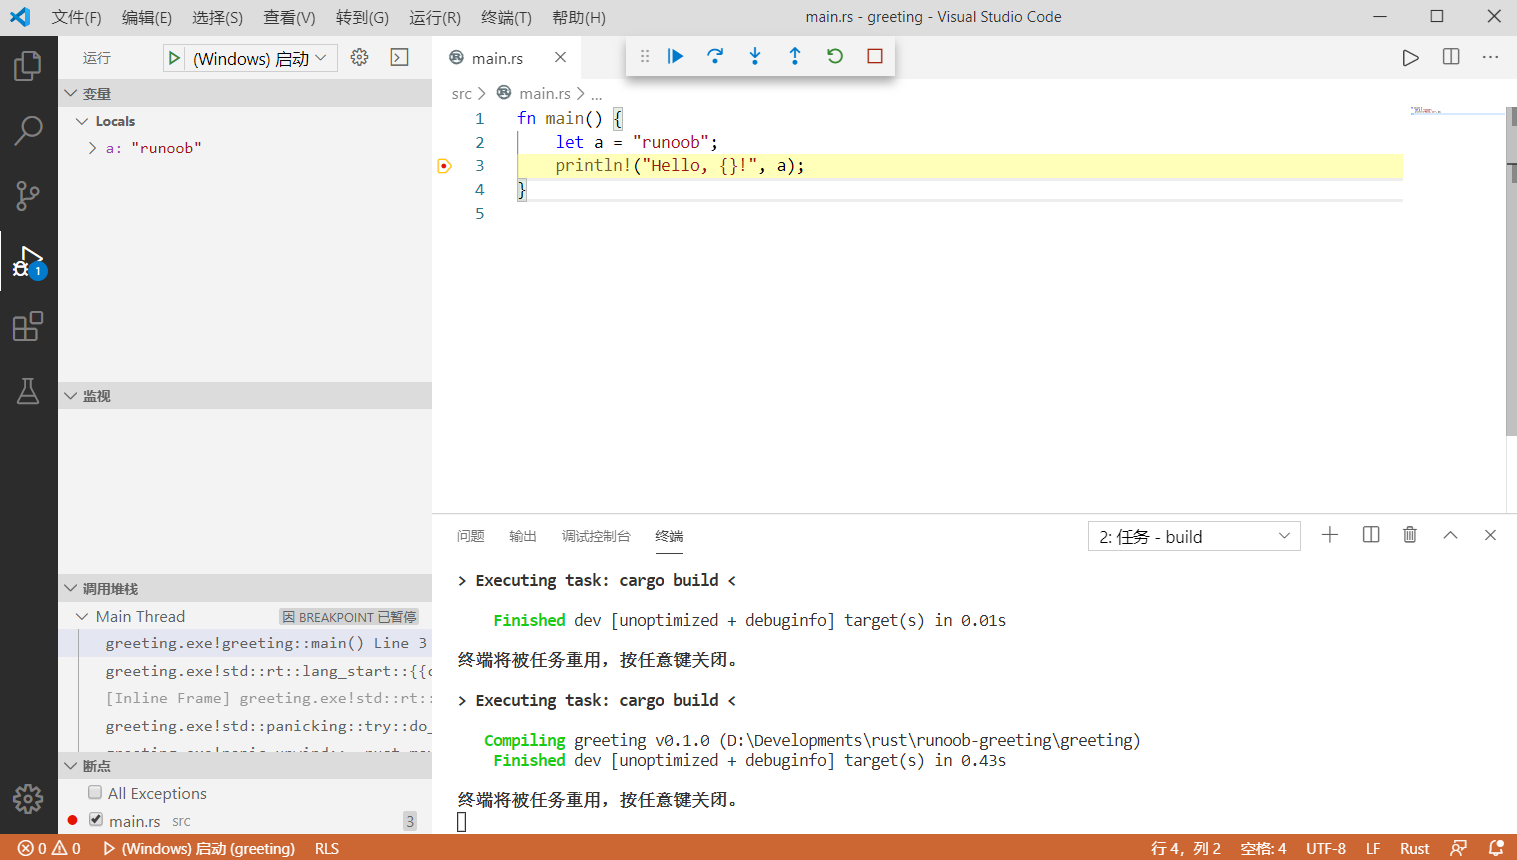
The method for debugging programs is similar to other environments. Simply click the red dot to the left of the line number to set a breakpoint. When a breakpoint is encountered during execution, the program pauses, allowing developers to monitor the live values of variables.