Bootstrap4 Installation und Verwendung
Wir können Bootstrap4 auf die folgenden zwei Arten installieren:
Bootstrap 4 CDN
Inländischen Nutzern wird empfohlen, die öffentliche Bibliothek für statische Ressourcen von ByteDance zu verwenden:
Bootstrap4 CDN
<link rel="stylesheet" href="https://cdnjs.cloudflare.com/ajax/libs/twitter-bootstrap/4.6.1/css/bootstrap.min.css">
<script src="https://cdnjs.cloudflare.com/ajax/libs/jquery/3.6.0/jquery.min.js"></script>
<script src="https://cdnjs.cloudflare.com/ajax/libs/popper.js/2.11.2/umd/popper.min.js"></script>
<script src="https://cdnjs.cloudflare.com/ajax/libs/twitter-bootstrap/4.6.1/js/bootstrap.min.js"></script>
Inländischen Nutzern wird empfohlen, die Bibliotheken auf Staticfile CDN zu verwenden:
Bootstrap4 CDN
<link rel="stylesheet" href="https://cdn.staticfile.net/twitter-bootstrap/4.3.1/css/bootstrap.min.css">
<script src="https://cdn.staticfile.net/jquery/3.2.1/jquery.min.js"></script>
<script src="https://cdn.staticfile.net/popper.js/1.15.0/umd/popper.min.js"></script>
<script src="https://cdn.staticfile.net/twitter-bootstrap/4.3.1/js/bootstrap.min.js"></script>
Hinweis:popper.min.js wird für Popups, Tooltips und Dropdown-Menüs verwendet. Derzeit enthält bootstrap.bundle.min.js es bereits.popper.min.js。
Zusätzlich können Sie auch die folgenden CDN-Dienste verwenden:
Bootstrap 4 herunterladen
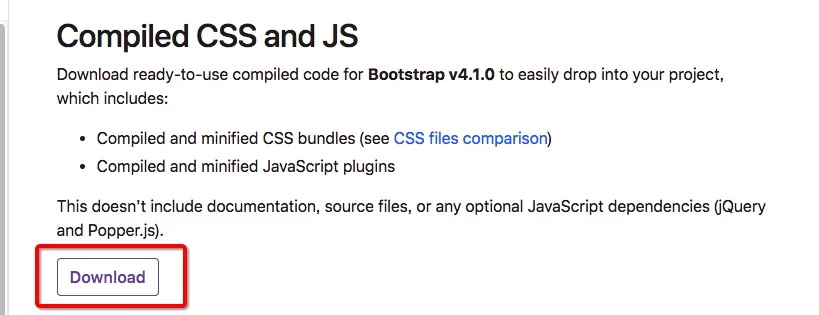
Sie können die offizielle Websitehttps://getbootstrap.com/besuchen, um die Bootstrap-4-Ressourcenbibliothek herunterzuladen.
Hinweis:Darüber hinaus können Sie es auch mit Paketverwaltungswerkzeugen wie npm, gem, composer usw. installieren:
npm install bootstrap@4.0.0-beta.2
gem 'bootstrap', '~> 4.0.0.beta2'
composer require twbs/bootstrap:4.0.0-beta.2
Erstellen Sie Ihre erste Bootstrap-4-Seite
1. HTML5-Doctype hinzufügen
Bootstrap erfordert die Verwendung eines HTML5-Dokumenttyps, daher müssen Sie die HTML5-Doctype-Deklaration hinzufügen.
Der HTML5-Doctype wird im Head des Dokuments deklariert, und die entsprechende Kodierung wird festgelegt:
<!DOCTYPE html>
<html>
<head>
<meta charset="utf-8">
</head>
</html>
Mobile First
Um mit Bootstrap entwickelte Websites mobilfreundlich zu machen und eine ordnungsgemäße Darstellung sowie Touch-Zooming sicherzustellen, müssen Sie ein Viewport-Meta-Tag im Head der Webseite hinzufügen, wie unten gezeigt:
<meta name="viewport" content="width=device-width, initial-scale=1, shrink-to-fit=no">
width=device-widthGibt an, dass die Breite der Breite des Gerätebildschirms entspricht.
initial-scale=1Gibt den anfänglichen Zoomfaktor an.
shrink-to-fit=no passt sich automatisch an die Breite des Telefonbildschirms an.
Container-Klassen
Bootstrap 4 erfordert ein Container-Element, um den Inhalt der Website zu umschließen.
Wir können die folgenden beiden Container-Klassen verwenden:
- Die Klasse .container wird für einen Container mit fester Breite verwendet, der responsive Layouts unterstützt.
- Die Klasse .container-fluid wird für einen Container mit 100% Breite verwendet, der den gesamten Viewport einnimmt.

Zwei Bootstrap 4 Seiten
Bootstrap4 .container Beispiel
<div class="container">
<h1>Meine erste Bootstrap-Seite</h1>
<p>Dies ist etwas Text.</p>
</div>
Ausprobieren »
Das folgende Beispiel zeigt einen Container, der den gesamten Viewport einnimmt.
Bootstrap4 .container-fluid Beispiel
<div class="container-fluid">
<h1>Meine erste Bootstrap-Seite</h1>
<p>Verwendet .container-fluid, 100% Breite, einen Container, der den gesamten Viewport einnimmt.</p>
</div>
Ausprobieren »
Using Bootstrap in Cloud Studio
Below we will show you how to install and use Bootstrap4 in Cloud Studio:
step1: Visit Tencent Cloud Developer Platform and register/log in to your account.
step2: In the runtime environment menu on the right, select: "ubuntu"

step3: In the code directory on the left, create an html directory and write your HTML code, such as index.html
step4: Paste the following code into the index.html file to import Bootstrap4 (you can also download the Bootstrap4 resource library from the official website https://getbootstrap.com/):
<!-- New Bootstrap4 cores心 CSS File -->
<link rel="stylesheet" href="https://cdn.staticfile.net/twitter-bootstrap/4.1.0/css/bootstrap.min.css">

<!-- jQueryFile.affairmustInbootstrap.min.js before引入 -->
<script src="https://cdn.staticfile.net/jquery/3.2.1/jquery.min.js"></script>

<!-- popper.min.js used for弹窗、Hint、dropdown menu -->
<script src="https://cdn.staticfile.net/popper.js/1.12.5/umd/popper.min.js"></script>

<!-- 最New Bootstrap4 cores心 JavaScript File -->
<script src="https://cdn.staticfile.net/twitter-bootstrap/4.1.0/js/bootstrap.min.js"></script>
step5: Enter the command sudo vim /etc/nginx/sites-enabled/default in the terminal. Modify the red boxed part of the configuration file as shown in the figure below, then enter the command: sudo nginx restart to restart the nginx service (after nginx is installed and started, it listens on port 80 by default. We need to change the nginx site directory and listening port to what we need).

step6: Click the [Access Link] tab on the far right. In the access link panel, enter port number: 8080 (consistent with the port number in the nginx configuration file just now), click Create Link, and then you can click the generated link to access the code we just wrote and view the effect of Bootstrap4 components.


CODING is currently holding a [My Favorite Cloud Studio Plugin Contest] based on Cloud Studio workspaces. Visit the official event website: https://studio.qcloud.coding.net/campaign/favorite-plugins/index to learn more about the event.
Other Extensions