C++ Environment Setup
If you want to set up a C++ language environment, you need to make sure you have the following two software programs available on your computer: a text editor and a C++ compiler.
Text Editor
Files created through an editor are usually called source files, and source files contain the program's source code.
Source files for C++ programs usually use the extension.cpp、.cpor.c。
Before you start programming, make sure you have a text editor and enough experience to write a computer program, then save it in a file, compile it, and execute it.
Visual Studio Code: Although it is a general-purpose text editor, it has many plugins that support C/C++ development, making it a popular choice. By installing C/C++ plugins and adjusting settings, you can turn it into a great C language development environment.
Installation Guide:https://www.example.com/w3cnote/vscode-tutorial.html
Download URL:https://code.visualstudio.com/
Visual Studio: A comprehensive Windows IDE for .NET and C++ developers, which can be used to build web, cloud, desktop, mobile apps, services, and games.
Download URL:https://visualstudio.microsoft.com/zh-hans/downloads/。
VimandEmacs: These are two traditional text editors. They have powerful editing features and a high degree of customizability. They are very powerful for skilled users, and there are many plugins and configurations that can support C language development.
Eclipse: Eclipse is another powerful integrated development environment. Although it was originally designed for Java development, it can support C language development by installing C/C++ plugins.
More related tools
C++ compiler
The source code written in a source file is human-readable source. It needs to be "compiled" into machine language so that the CPU can execute the program according to the given instructions.
The C++ compiler is used to compile source code into a final executable program.
Most C++ compilers do not care about the extension of the source file, but if you do not specify an extension, the default is used.cpp。
The most commonly used freely available compiler is the GNU C/C++ compiler. If you are using HP or Solaris, you can use the compiler on your respective operating system.
The following sections will guide you on how to install the GNU C/C++ compiler on different operating systems. C/C++ is mentioned together here mainly because the GNU gcc compiler is suitable for both C and C++ programming languages.
Installation on UNIX/Linux
If you are usingLinux or UNIX, please use the following command on the command line to check whether GCC is installed on your system:
$ g++ -v
If the GNU compiler is already installed on your computer, a message like the following will be displayed:
Using built-in specs.
Target: i386-redhat-linux
Configured with: ../configure --prefix=/usr .......
Thread model: posix
gcc version 4.1.2 20080704 (Red Hat 4.1.2-46)
If GCC is not installed, then please follow the instructions inhttps://gcc.gnu.org/install/Detailed instructions for installing GCC on
Installation on Mac OS X
If you are using Mac OS X, the quickest way to get GCC is to download the Xcode development environment from Apple's website and install it according to the installation instructions. Once Xcode is installed, you can use the GNU compiler.
Xcode is currently available fromhttps://developer.apple.com/downloadDownload from, requires Apple ID login.
Installation on Windows
Cygwin
Cygwin is a software package that emulates a Unix/Linux environment on the Windows operating system, allowing users to use Unix-like tools and applications on Windows.
Cygwin provides a set of DLLs (Dynamic Link Libraries) that act as a bridge between the Unix system call layer and the Windows kernel, allowing Unix programs to run on Windows systems.
Cygwin Official Website: https://www.cygwin.com/。
Download the installer from the official website:

After downloading, double-click the downloaded file:
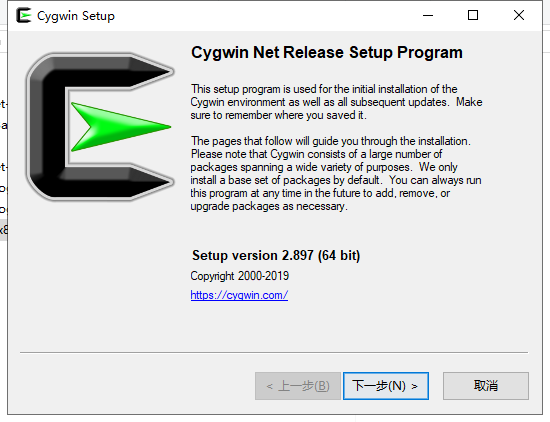
Next, you can keep clicking Next:
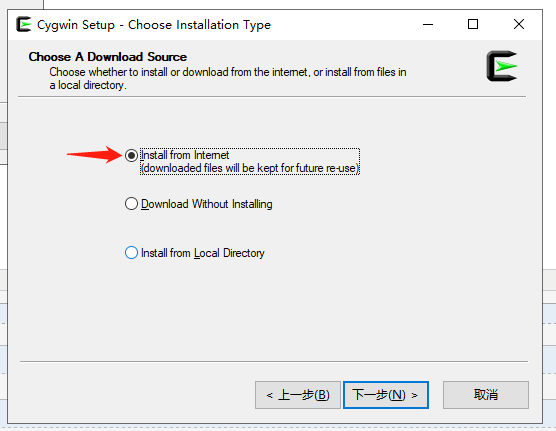
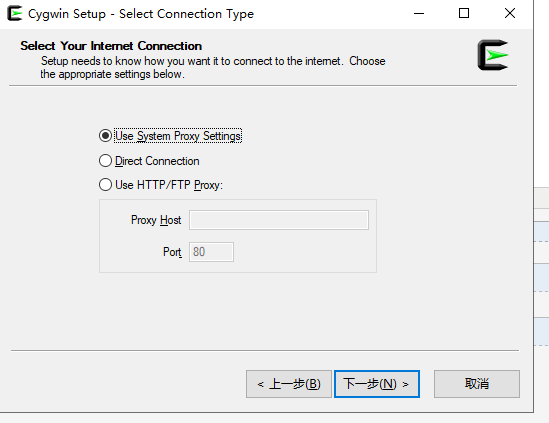
Here we can add the NetEase open-source mirror and Alibaba Cloud mirrorhttps://mirrors.aliyun.com/cygwin/:
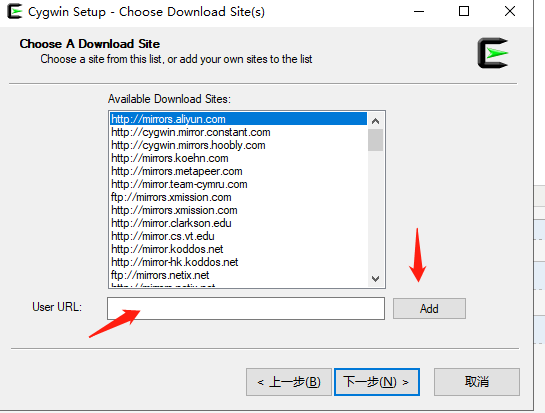
After the installation is complete, an icon will be generated on the desktop:
Double-click the icon to enter the command line interface and entercygcheck -c cygwinThe command can view the current Cygwin version information:
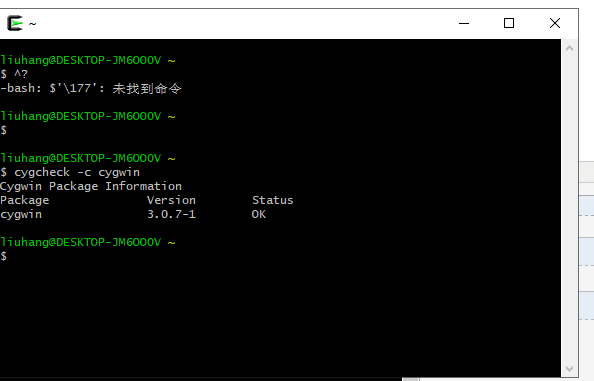
Next, we install the gcc/g++ compilation environment. In the command line, enter the directory of setup-x86_64.exe and execute:
setup-x86_64.exe -q -P wget -P gcc-g++ -P make -P diffutils -P libmpfr-devel -P libgmp-devel -P libmpc-devel
After the installation is complete, enter the Cygwin64 terminal and entergcc --versionYou can view the version information with the command.
MinGW-w64
To install GCC on Windows, you need to install MinGW-w64.
MinGW-w64 is an open-source project that provides a complete GCC toolchain for Windows systems, supporting the compilation of 32-bit and 64-bit Windows applications.
Visit the MinGW-w64 homepagemingw-w64.orgGo to the MinGW download pagehttps://www.mingw-w64.org/downloads/Download the latest version of the MinGW-w64 installer.
You can also download it from Github:https://github.com/niXman/mingw-builds-binaries/releases
The MinGW-w64 download details page contains many integrated packages of MinGW-w64 and specific tools:
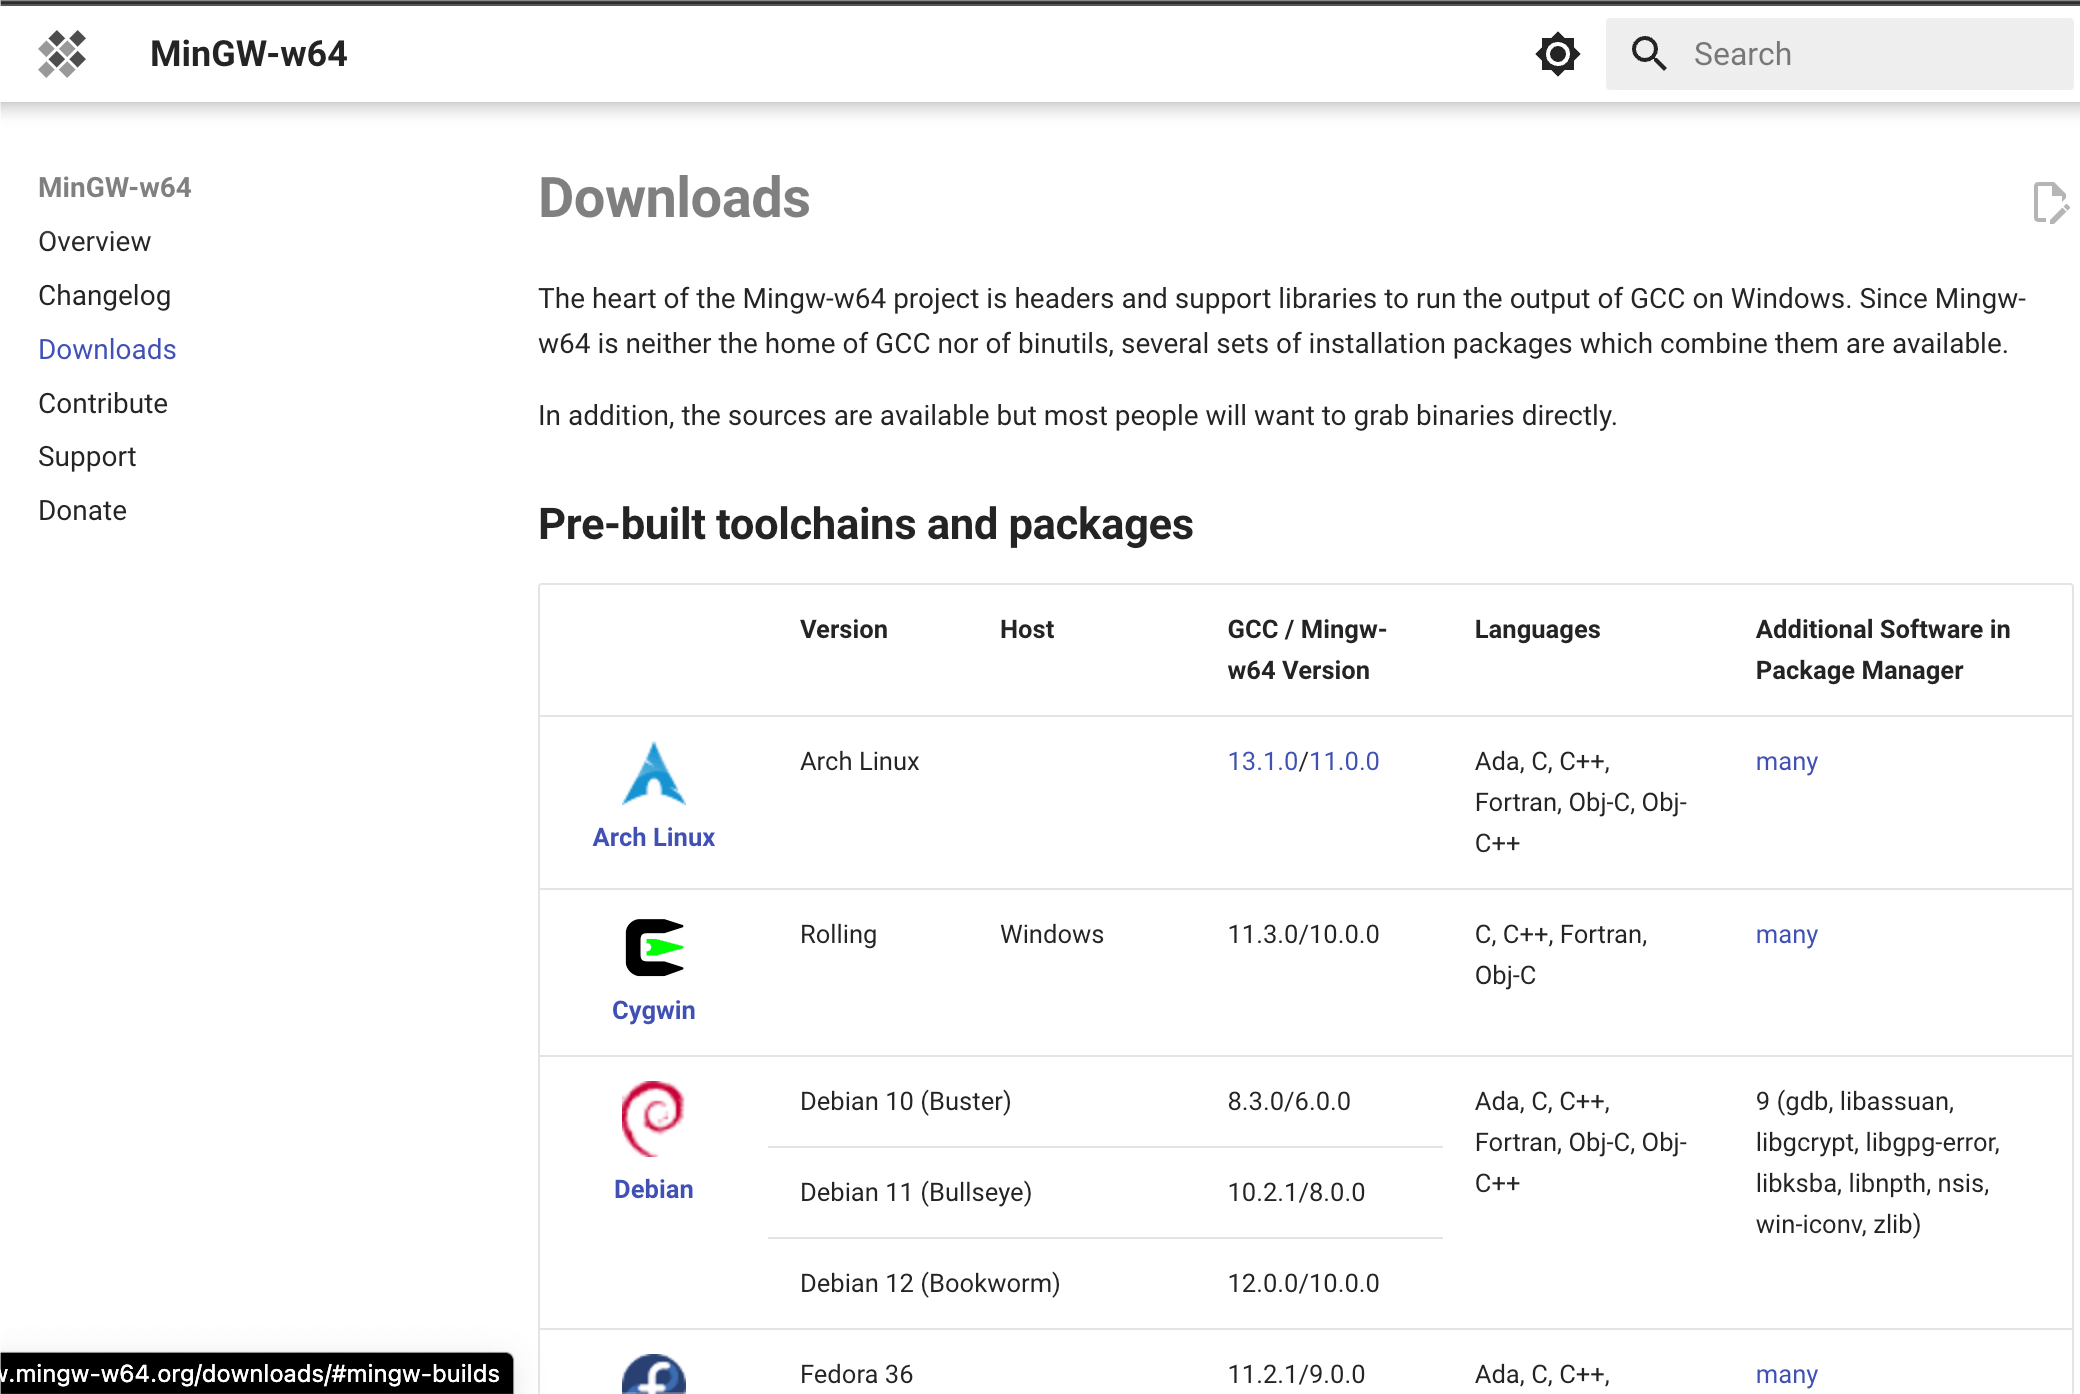
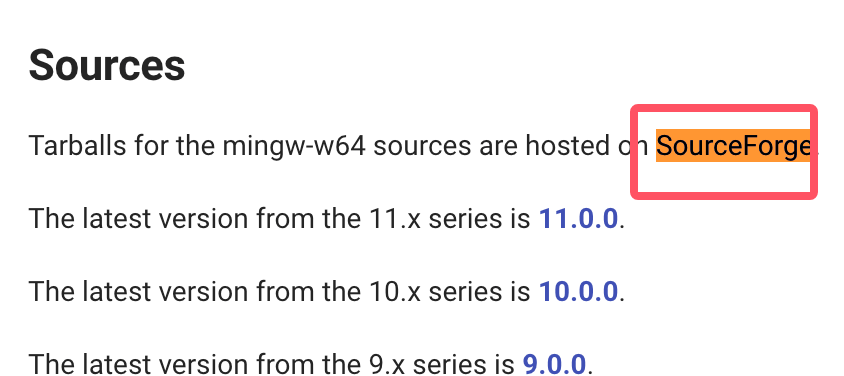
We are only installing MinGW-w64, so you just need to download MinGW-w64. Click the "SourceForge" hyperlink in the red box to go to the MinGW-w64 download page on SourceForge.
Download MinGW-w64 from SourceForge:https://sourceforge.net/projects/mingw-w64/files/
Scroll down the page and download the installer:
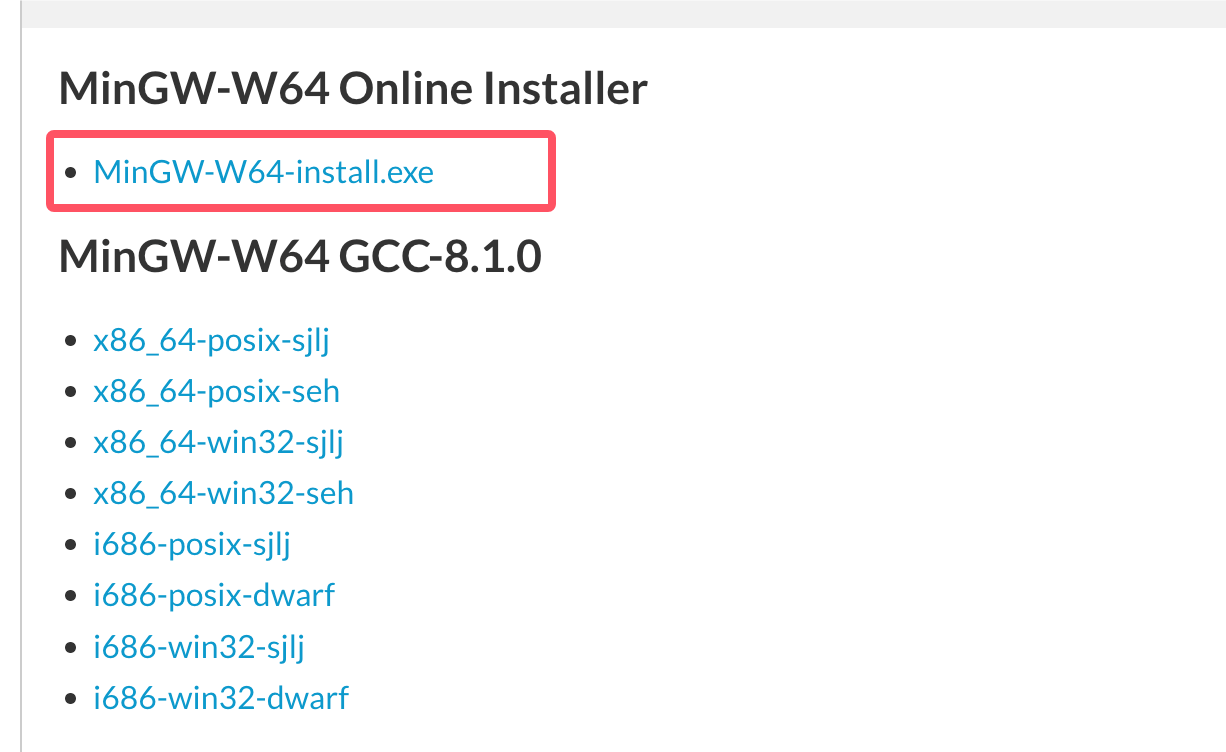
This kind of installation may encounter network connection errors, so we can directly download sjlj (stable, supporting both 64-bit and 32-bit):
After downloading, extract it, and you can find g++.exe or gcc.exe in the bin directory:
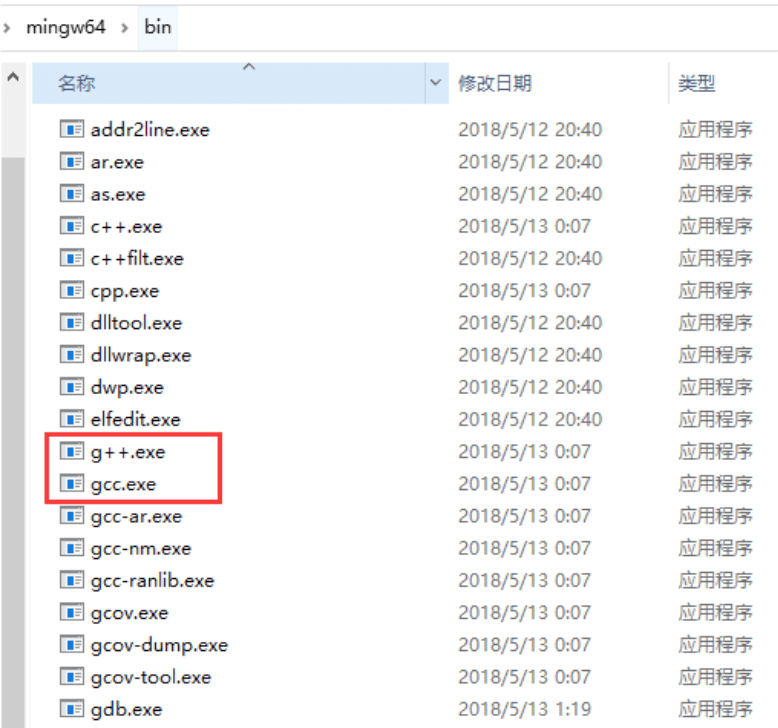
When installing MinGW, you should at least install gcc-core, gcc-g++, binutils, and MinGW runtime, but in general, more other items are installed.
Add the bin subdirectory of your installed MinGW to yourPATHIn the environment variables, this way you can specify these tools by simple names on the command line.
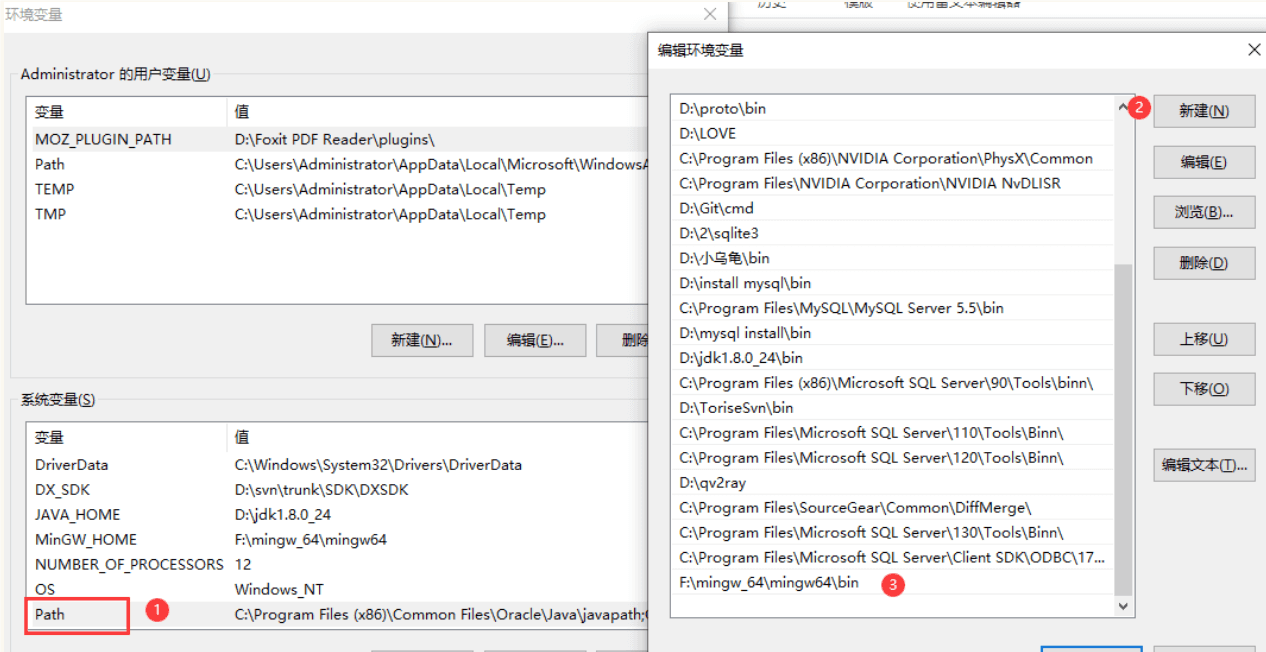
When installation is complete, you can run gcc, g++, ar, ranlib, dlltool, and other GNU tools from the Windows command line.
Compile using Visual Studio (Graphical Interface)
1. Download and installationVisual Studio Download。

2. Open Visual Studio Community
3. Click File -> New -> Project

4. In the left list, select Templates -> Visual C++ -> Win32 Console Application, and set the project name to MyFirstProgram.
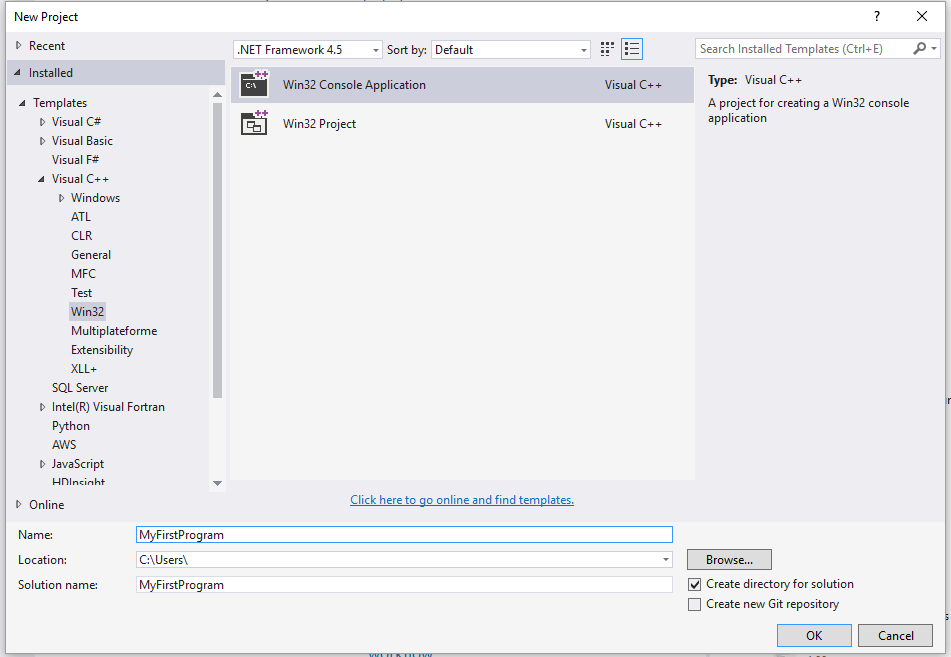
5. Click OK.
6. Click Next in the following window
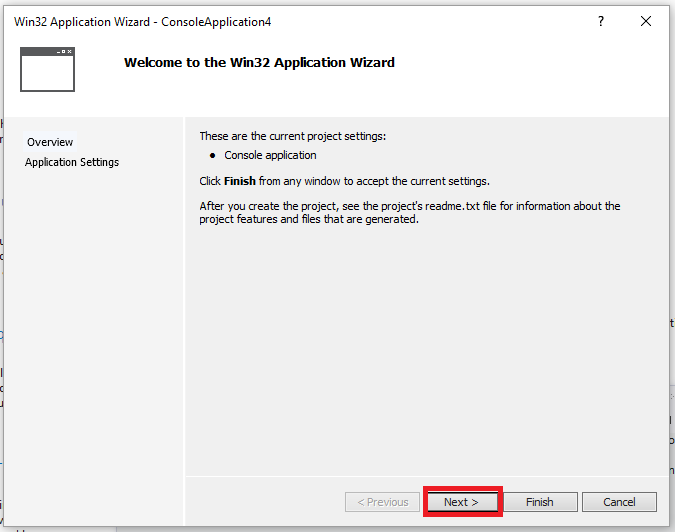
7. In the pop-up window, select the Empty project option, then click the Finish button:
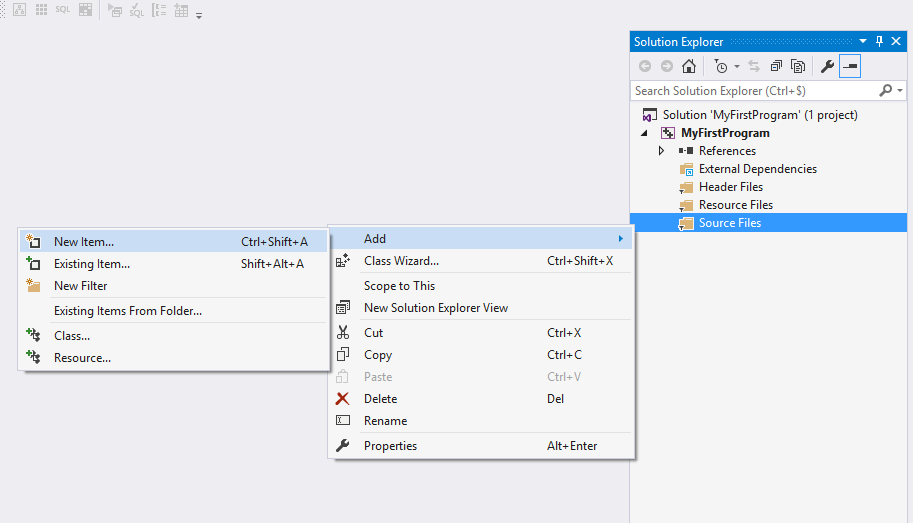
8. Right-click the folder Source File and click Add --> New Item... :
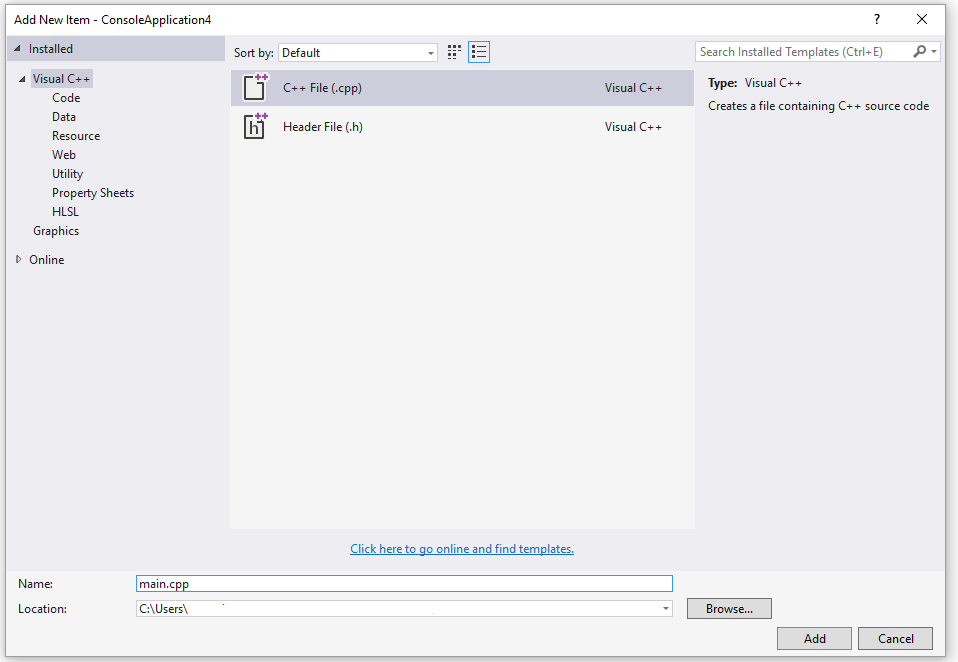
9. Select C++ File, set the file name to main.cpp, then click Add:
10. Copy the following code to main.cpp:
#include <iostream>

int main()
{
    std::cout << "Hello World!\n";
    return 0;
}
The interface is as shown below:

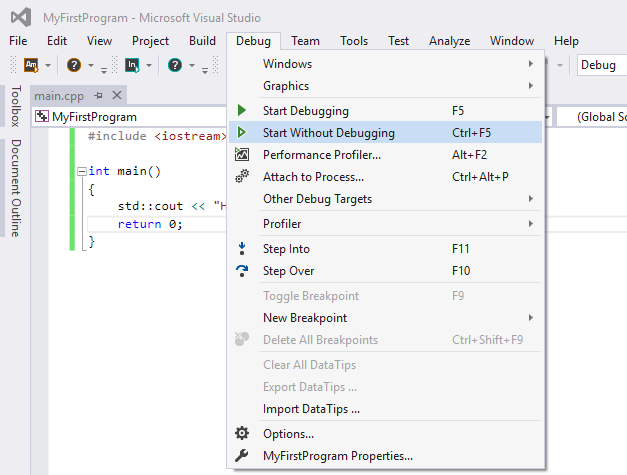
11. Click Debug -> Start Without Debugging on the menu (or press Ctrl+F5) :
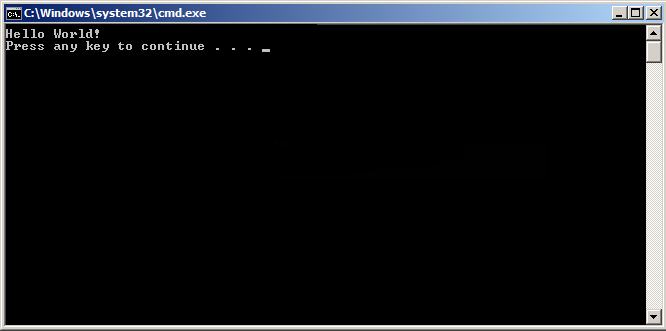
12. After completing the above operations, you can see the following output:
g++ Application Notes
The program g++ is a special version of gcc that sets the default language to C++. When linking, it automatically uses the C++ standard library instead of the C standard library. By following the source code naming conventions and specifying the corresponding library names, it is possible to compile and link C++ programs with gcc, as shown in the following example:
$ gcc main.cpp -lstdc++ -o main
Below is the code of a simple C++ program saved in the file helloworld.cpp:
#include <iostream>
using namespace std;
int main()
{
    cout << "Hello, world!" << endl;
    return 0;
}
The simplest way to compile:
$ g++ helloworld.cpp
Since the executable file name was not specified in the command line, the compiler uses the default a.out. The program can be run like this:
$ ./a.out
Hello, world!
Usually we use-oThe option specifies the executable file name. The following example generates an executable file named helloworld:
$ g++ helloworld.cpp -o helloworld
Run helloworld:
$ ./helloworld
Hello, world!
If there are multiple C++ code files, such as example1.cpp and example2.cpp, the compilation command is as follows:
$ g++ example1.cpp example2.cpp -o example
Generate a example executable file.
Some systems default to C++98 for g++, and we can specify C++11 to compile the main.cpp file:
g++ -g -Wall -std=c++11 main.cpp
g++ Common Command-Line Options
| Options | Explanation |
|---|---|
| -ansi | Only supports C syntax conforming to the ANSI standard. This option will disable certain features of GNU C, such as the asm or typeof keywords. |
| -c | Compile only and generate object files. |
| -DMACRO | Define the MACRO macro as the string "1". |
| -DMACRO=DEFN | Define the MACRO macro with the string "DEFN". |
| -E | Only run the C preprocessor. |
| -g | Generate debugging information. The GNU debugger can use this information. |
| -IDIRECTORY | Specify additional header file search path DIRECTORY. |
| -LDIRECTORY | Specify additional library search path DIRECTORY. |
| -lLIBRARY | Search the specified library LIBRARY when linking. |
| -m486 | Optimize code for 486. |
| -o | FILE generates the specified output file. Used when generating executable files. |
| -O0 | Do not perform optimization. |
| -O | Or -O1 to optimize generated code. |
| -O2 | Further optimization. |
| -O3 | Further optimization beyond -O2, including inline functions. |
| -shared | Generate a shared object file. Usually used when building shared libraries. |
| -static | Disable shared linking. |
| -UMACRO | Undefine the MACRO macro. |
| -w | Do not generate any warning messages. |
| -Wall | Generate all warning messages. |